Unda’s Story

Research & Concept

Each letterform has its own distinct characteristics of dimensionality and texture that allows it to be able to be recognized standing alone. Although letterforms are distinct there are still multiple methods used to customize the letterform’s structure in a way that still keeps its essence but alters the appearance of the letter character. No matter what alteration, typography allows us to recognize a letterform and its shape unconsciously.

First Letter: “Z”

The first glyph I chose was the letter “Z” because I felt that it was a very unique yet simple letter. I like how angular the letter is and that it contains sharp edges. This letter form has two even horizontal line connected to the each end of an angular, vertical strip. When written it is similar to the shape of a zig zag. Depending on the font or style, the letter “Z” will sometimes contain the personalization of a serif or a san serif. Below are some examples of my own alterations of the letter “Z” along with sketches.

Second Letter: “U”

The second glyph I chose was the letter “U” because it is the first letter of my name and because it is completely opposite to the letter “Z”. I thought it would be interesting to go from a completely angular letter to a softer, more curved letter. The letter “U” contains a simple upwardly curved line. When it is in lowercase it additional has a tail attached to it. The “U” also can be alter differently depending on if it is serif styled or san serif styled. Below are some examples of my own alterations of the letter “U” along with sketches.

Iterations

My first iteration for the letter “U” was pretty straight forward because I was able to draw out the shape that I wanted on Illustrator and then transferred that file into Tinkercad. My “Z” letter took more of a process because I originally started with a design of a Z shape that is hollow on the inside but as I was playing around with the outline more I came up with a more 4D type of design that I really liked.

After looking at 4D letters and taking inspiration from letter sculptures, I thought that the “Z” was simplistic enough to be able to play around with its shape and angles as well as morph its form. I also really wanted to take advantage of how clean cut the letter is so I wanted to create a more challenging design for this letter. Because of that, I thought that it would be the perfect opportunity to create the “Z” in a way that could be read at all angles when it is turned in a circle.

This is the first “Z” letter design I came up with.

This is my second “Z” letter design. If you move it around you can see that it takes the shape of a “Z” no matter what angle it is in.

I like both designs but I prefer how the second design turned out because I enjoy its unique 4D quality. The 2nd design to me also has a lot more potential as well to be altered in a creative way.

For the letter “U”, because it is the complete opposite of the letter “Z”, I wanted to take a different approach to it. My main concern when I chose the letter was how it was going to stand up on its own because the base of the letter is curved. After doing the research I came across many designs where the curve of the “U” is slightly more angular but still holds the true essence of the letter. I really love the style of old english and thought it would be clever to create a 3D print of a letter that looks like it came straight from a written pen or off a page of an old book. Below is the design I came up with. You can see that the bottom of the “U” is also sharp enough to stand on its own as well if needed.

Final Print & Reflection

Before printing out my final letter form I had to make some slight changes. For the letter “U” I tidied the corners up so that the letter form as a whole had a smoother edge. Below is the final design of the letter “U”. For the letter “Z” I decided to keep that the same because the test print came out really well.

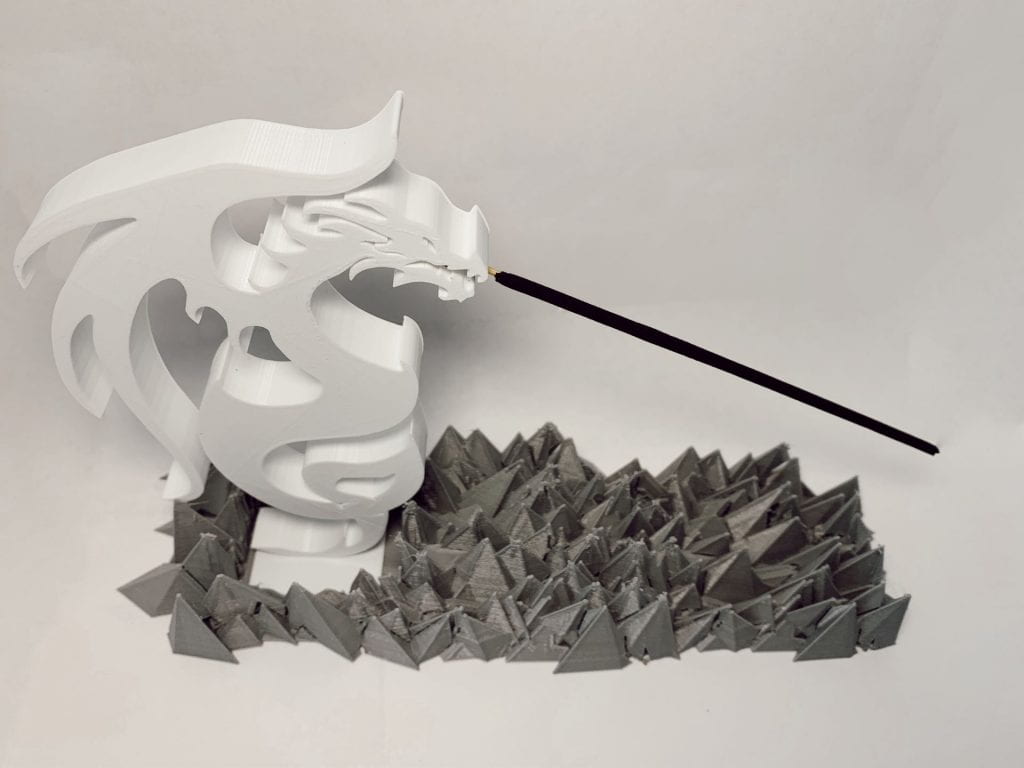
Below you can see the two final forms of my two letters “Z” and “U”. On the top is the final design for the letter “Z” and on the bottom is the final design for the letter “U”.

Overall I’m super happy with the final prints for this last project. As shown above, you can see that both letters both stand upright on their own. I’m most happy with the outcome with my letter “Z” because it can be viewed as a “Z” in all directions. I’m also content with my letter “U” because I love how it is able to stand up on its own due to the old english font it is in. Both letters were fun to make and a nice challenge to play with their letter form.

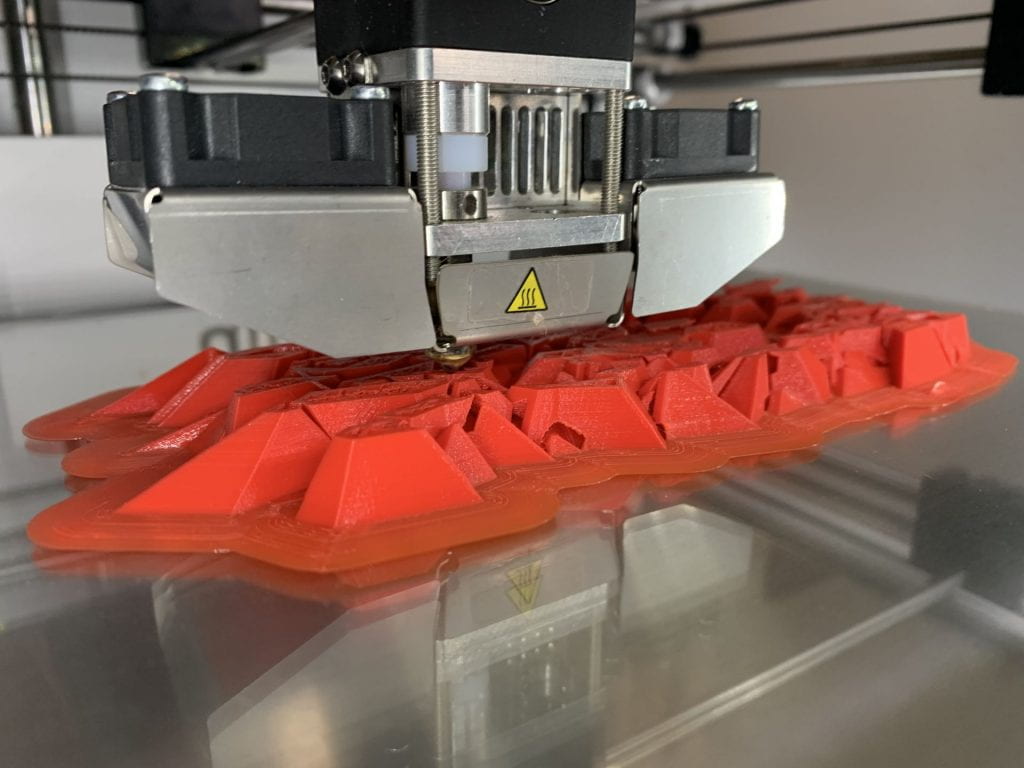
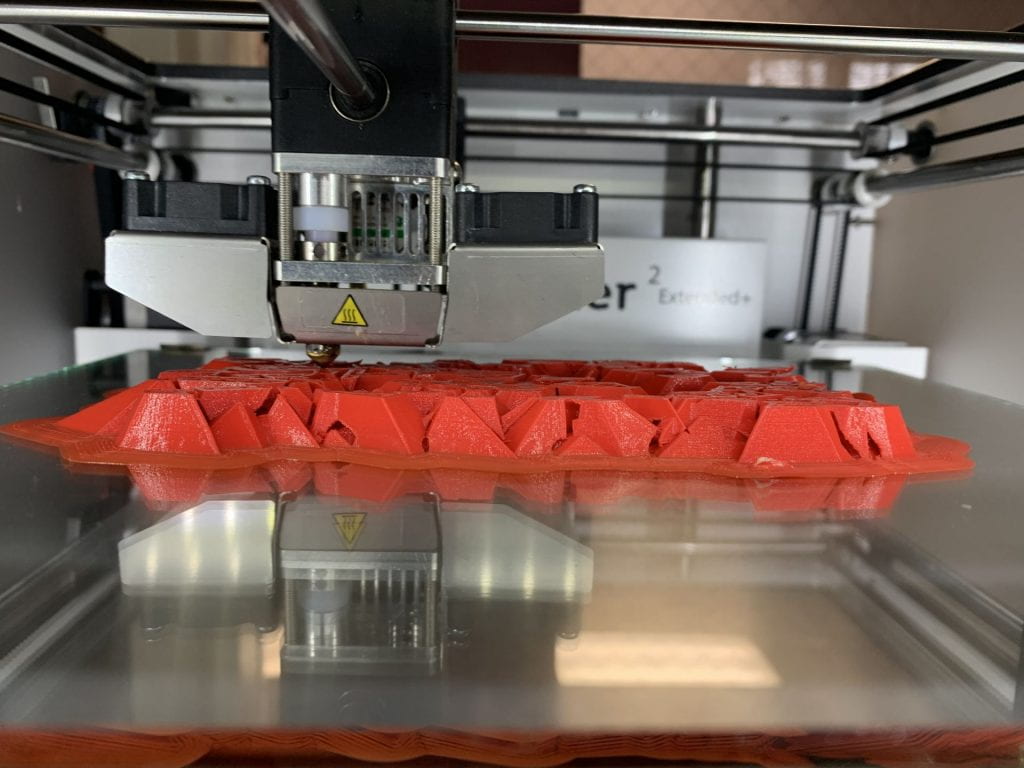
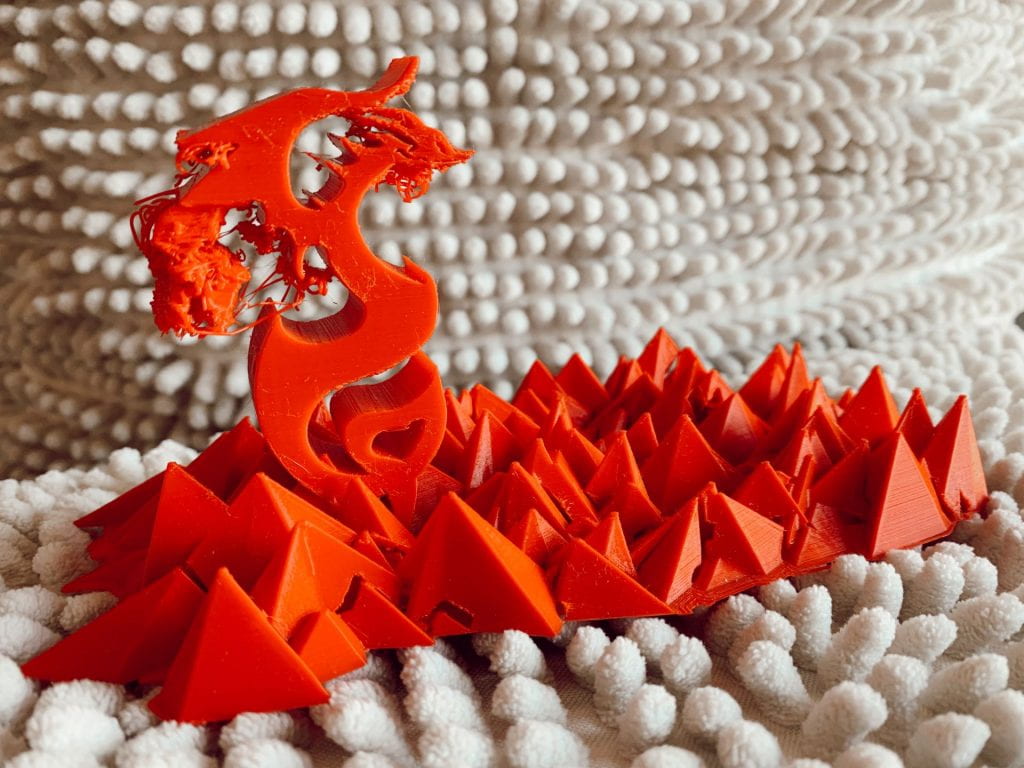
The process to obtain these prints were mostly easy but I did come across some obstacles. The test prints for these objects came out super well even though I accidentally broke the “Z” taking it home. When I went to print out my finalized letters the 3D printer glitched and melted the back of the letter prints. The supports also didn’t print with the “Z” and so it spaghettied everywhere.

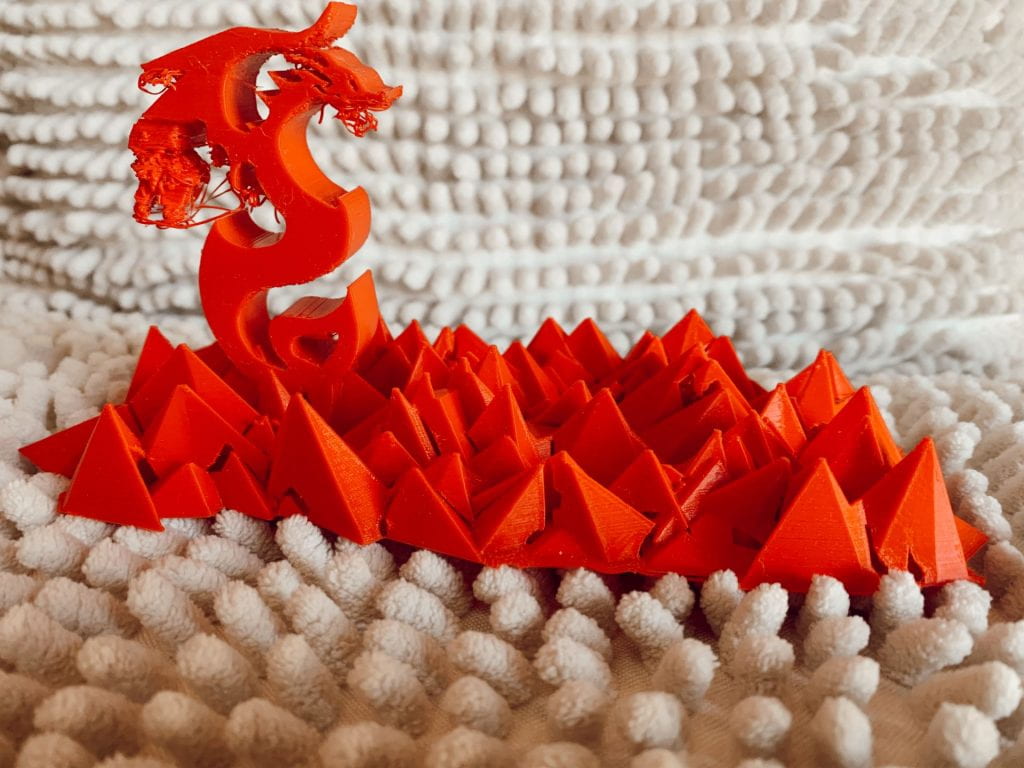
After this I reprinted the letter and they came out very nicely. The supports actually printed and the overall form of both letters looked clean. Below are my final letters together. They two prints came out the cleanest and are the sturdiest!

Shapr3d First Models

Bracket

To create this bracket mount, the first step I took was outline the shape of the object in 2D. From following the tutorial I was able to sketch the outline of the object with the correct dimensions. After the 2D sketch was completed I selected the sketch and pulled it out to make the body 3D. After filling out the object, I then beveled the sides and created a hole inside of the bracket.

The next steps I took was to create a hole on top of the bracket by using the plane tool to place the shaped hole in correctly. I then pushed the plane down through the solid object to create a hole. I then intersected the two objects to get the correct shape of the bracket mount.

I then beveled the outside arms that were sticking out to round them out and places a hole in between the two arms.

The bottom portion of the object then needed to be made and connected. A separate square the four holes in each corner was then created. We rounded it out and then connected it to the entire object.

The final step that was taken was to bevel out the rest of the edges to perfect the bracket mount.

3D Modeling a Tea Kettle

For the 3D modeling of our choice I choose to create a tea kettle. This design was very challenging and very time consuming. To start, the first step I took was to download the tea kettle image to trace over it. I then used the spline tool to sketch half of the outline out. After sketching the outline out I revolved the 2D sketch to make it into a 3D object. I then did the same to the top of kettle pot cover. After those were fully revolved I then created the handle by creating a plane on the 2D sketch of the handle and used the sweep tool to make the handle 3D.

The next step was creating the spout by using the ellipsis tool to create circles where the spout would connect to the kettle. After placing the circles in the correct position, I clicked all the circle sketches in place and used the loft tool to make it into 3D.

I hid the kettle bottle to make sketching the spout easier but after bringing the body back, I then hollowed out the inside of both the kettle and spout by shelling the object.

Lastly, the final step I took was beveling small details and angles of the kettle. I unhid the other parts of the tea kettle and finally changed the color.

Credit to Shapr3D and tutorial by Wayne State Industrial Design Professor and Autodesk Expert Elite educator Claas Kuhnen.

3D Scan

The process of getting a 3D scan of myself took a lot of trial and error. At first my partner and I used ScandyPro on our phones to scan each other but we came to realize that the app wasn’t very accurate. The app only was able to pick up the front of our bodies but was unable to scan the top and back of our heads. We both decided that the iPad was a better option so we switched to using the Monocle Structure Scanner app to get an accurate enough scan to print. When we scanned each other we had to stand very still while the other person went around and got precise shots of our body. We had to angle the camera in the correct positions as well to be able to get detailed enough scans. The iPad allowed us to get scans of the back of our bodies as well as the top of our heads so in the end we stuck with the scans of ourselves from the iPad.

After I got the scan of myself that I thought was the best to 3D print I airdropped the files onto my computer. I downloaded the obj file of my scan and then imported it into Tinkercad. After importing the 3D scan into Tinkercad I then had to clean up my scan because it picked up some random objects but other than that the scan turned out well.

Unda’s Self Expression

Research & Concept

When thinking of objects that I could incorporate playfulness into I wanted to find an object that was something I could use often and that was part of my everyday life. While looking around my room I found an old incense burner that I had broke. After finding the burner I realized how it was very simple and plain it was so I decided that it would be a good object to inject a little playfulness into. I found more examples of incense burners and came to the realization that most incense burners are either very simple or solely acts as a decoration. Very rarely do the form/function of the object match its playfulness. The burner as a whole is designed as a tray that holds a burning incense while also catching the ash the comes off the incense stick as it continuously burns. There is usually a small hole or indent in the object for an incense stick to be placed in so that it can stand on its own and a tray that accompanies it to catch the ash that falls out. When I saw the form and shape of the incense burner I knew that this was the specific type of burner that I wanted to incorporate a whimsical aspect to.

After looking at the object for a while I realized that the incense stick reminded me of a long tongue that a snake or lizard usually has. The smoke at the end then reminded me of how dragons usually have smoke coming from their mouths. Because of that I plan on making this object whimsical by making it either into the shape of a snake or a dragon with the incense stick coming from its mouth to represent the tongue of the animal. I plan on making the tray that catches the ash into the body to imitate the shape of a snake/dragon with the tail twirling up at the end as well. Below you can find a sketch of the object.

Iterations

Unfortunately, my 3D print is still not finished and has a couple more hours to go before it is complete, but this is what has printed out so far. From what is currently printed, I am pretty happy with the outcome of the incense holder. The object looks very sturdy and the progress of the incense holder is shaping out nicely.

The process of figuring out the correct changes I needed to make for my self expression was slightly difficult. I had trouble honing in on a specific way to incorporate a whimsical and playful aspect to my self expression. I was stuck between a snake-like incense iteration and a dragon type of incense variation. I eventually figured that the function and whimsical aspect made more sense with the elements of a dragon. After finally committing to the idea of a dragon incense I had to figure out what was the most effective way of shaping the dragon so that the function of the incense stick was placed in a way that made the most sense. After receiving back some feedback I played with certain ways to shape the dragon. At first I wanted to make it so that the dragon incense holder was on its back but it was not sturdy enough on its back.

I then wanted to make it circular so that the head and tail touched but I had trouble creating a design that was circular but also effective enough to hold an incense stick in its mouth so that the stick wasn’t poking out awkwardly. After looking at more dragon incense designs on google, I then saw a reoccurring theme of placing the dragon on a mountain or on some rocks. That then gave me an idea of placing the dragon upright while resting on a valley of mountains. I thought that the mountains would be a perfect way to incorporate a tray that most incense burners have to catch the ash from the burning stick. This is how I came up with the final design below.

Below are my model iterations.

The dragon incense on its back with a lower head that is close to its body.

The dragon incense upright with a head that is raised higher.

Overall, I had trouble with coming up with the correct dimensions for certain elements of the incense holder so that it was shaped correctly and under anticipated the amount of time it would take to 3D print. After facing these challenges I now have a better understanding of how to correctly format my object and will better anticipate printing out the holder in a more timely manner.

This is how the print came out altogether. The print took over 24 hours in total but still wasn’t where I wanted it to be as it was too small and very splotchy when it came to the dragon print.

After seeing the outcome of the dragon incense I decided that it would be more effective to do two separate prints that combine into one whole object. I decided on doing one dragon print and one incense base print.

Final Print & Reflection

The is the final print of my dragon incense holder. The incorporation of a dragon shaped incense holder with a mountain-like tray adds a sense of whimsicalness to a normal incense holder. The stick coming out of the dragon replicates smoke and fire coming out of a dragons mouth.

For the final print I decided that it would be more effectual for the entire piece to be two separate objects. This would lessen the print time and also allow for each print to have the ability to be much larger. The incense holder as a whole came together really nicely. It’s functional and has a nice aspect of playfulness within the design. The shape of the dragon is thick enough that it makes the object sturdy and the mouth is wide enough for an incense stick to fit through but small enough for the stick to not fall out. I made the tray have a small square hole within it so that the separate dragon print would be able to fit into the tray and stand on its own. The one aspect that didn’t come out the way I would have 100% liked is the tray of mountains. In my first test print, the layers of the small mountains came out nicely and there were no holes but the next couple of times I printed the tray there were weird holes that showed up in the middle of the print. So if i were to do another round of prints of the tray I would make the mountain points slightly thicker and keep the layer height at 0.15 so that less mistakes would occur.

Overall, I really like the results of the incense holder. I really enjoyed the dragon concept and liked creating the shape of the dragon on illustrator. I think the blending of the two objects could be more seamless but as a whole I still really enjoy my incense holder and can’t wait to use it.

3D SVG

For my SVG design, I decided that I wanted to make a simple keychain that was personalized with my name on it. I ultimately decided on a personalized keychain because at my apartment my roommates and I all basically have the same keychain holder and we often get our personal keys mixed up. Because of that I thought it would be a good idea to add on an object that is personalized for me so that my roommates and I can avoid the problem of mixing up our keys.

On Adobe Illustrator I knew the shape of the keychain that I wanted so I traced it out with the curvature tool. After creating the shape, I decided that I wanted to put my full first name rather than just my initials so I picked a font I liked and wrote in my name. I then created an outlined my name and then put in little rectangles to add more dimension to it.

To transform the 2D SVG model to a 3D model I began by importing the Illustrator SVG file into Tinkercad. Once imported the empty spaces where I wanted my name and the rectangles to be were imported perfectly as the spaces were left empty. The only element I changed was the thickness of the object. The keychain was imported with a 10mm height and I wanted it to be thin so I changed it to a 5mm height.

Unda’s Form|Function Concept

F|F Research & Concept

3D Printed COVID Door Opener

This is a model of a COVID resistant door opener. The main purpose of this object is to use this item as an alternative way to open doors without having to physically touch the surface of a door knob or lock. The angled hook is designed to be able to push up or down on a door handles in public spaces while the circular section of the object is to place your fingers through to allow you to pull open any doors or entrances. The square shaped fragment on the opposite end on the hook is used to push against objects you don’t want to make contact with like elevator buttons or doorbells. There is also a small hole at the end of the object to hang off of a keychain or lanyard.

Personalizations/Improvements

One personalization I made was to widen the hole used for a key chain or a key ring so that this object could fit into many different sized key chain holders. Another change was to add in little divided spaces for fingers so that the grip is more comfortable and doesn’t slip from the person’s grasp. I also added in a smaller hook so that it can be used to turn/twist smaller locks on doors. Overall the my main improvements would be to add on elements that make the object more comfortable and versatile to use.

F|F Iterations

Credit to: mr_walker on Thingiverse

Before seeing the physical 3D print of the door opener my iterations at first was to make the handle longer so that more fingers would comfortably fit in the hole, to add in finger dividers in the handle for a more comfortable grip, to make a smaller hook where the button pusher would be for unlocking doors, and to make a larger hole for more keychains to be able to fit in it. After finally printing out the door opener I found that the thickness of the object made it impossible for any keychain to fit through as I tired to fit it on my own key hook and was unable to do so. I also found that the thickness of the object made it too big to really hang on a keychain as well so I definitely wanted to change that. I saw that the button pusher on the opposite side of the hook was very small and was too short to successfully do its job. After trying out the door opener as well I found that the grip wasn’t as comfortable due to how thick it was. From all of these elements I also was able to come to the conclusion that the adding in another hook to unlock doors was unnecessary as well.

My final iterations that I made on the door opener had changed compared to my first draft of iterations. I first made the object thinner (7mm rather than 15mm), I pulled out the button pusher on the opposite side of the hook so that it was a lot longer than the original object, I slimmed down the object so that it was longer and less squished to make a little more room for fingers to fit in the handle, I also added in finger dividers for a better grip. After trying out the object again I found that slimming the door opener down and making it thinner made the object more efficient as it was easier to maintain as well as was effortless to keep on a keychain comfortably. Elongating the button pusher also made the aim more precise and unchallenging to spot. I also found that adding making the handle longer and adding in finger dividers made the grip much more snug and smooth to use.

F|F Final Print and Reflection

This is my F|F final print of the door opener made originally by mr_walker on Thingiverse. The remixes I finalized on this object was making the thickness of the object much thinner, creating finger dividers for a better grip, and making the button pusher longer as well as sharper for a more precise aim.

Before & After:

Reflection:

The overall process to reach this final print took a couple of trial and error prints before reaching the final remix of the object. Each print brought me closer to the final product so the process in total took some time but was exponentially improving after every step. Although the object was a very solid, well made door opener there were still small improvements that could be made to make it most ideal.

After making my first couple of iterations I was able to draw conclusions from those remixes and ultimately find the final changes that needed to be done to this object. I originally made the object thinner than the original (from 15mm to 7mm) but then found that the object was slightly too thin so for my final remix I made the thickness 8mm instead. The 8mm was a comfortable middle ground between the other two sizes. After using the original door opener I then printed the first remix with finger dividers for a more comfortable grip. After comparing the original that didn’t have finger dividers with the new remix I personally found that I preferred the object with the finger grip as it was more convenient for me to use. The last iteration I decided to add was to make the button pusher more angular so that it could hit smaller more precise button easily. I found that with the original object it was harder to get a concise aim at smaller buttons. The final step I took was changing the print settings when printing my final door opener. I changed the infill density from 20% to 40% and changed the infill pattern to tri-hexagon because both of these elements create a stronger product especially due to the fact that the door opener is thin.

Overall I’m very happy with the final product and can’t wait to hang it on my keychain.

Unda’s First Print

I’ve never used a 3D printer before so my first experience figuring out how to use the printers in Carrier was very interesting and enjoyable. Learning the process of 3D printing was a lot easier than I expected and I can definitely see how effective this new form of technology is. The printer is very efficient and I really liked how you could play around with certain details of the object you want to print like changing the infill percentage or layer height. It makes it really easy to customize and tailer the object to our own needs, so I really enjoyed that aspect of 3D printing. Connecting the printer to the object we wanted to print was also a lot easier than expected which is really gratifying to know because almost anyone can do this. It’s really rewarding to know how accessible and convenient this technology is for others as well as for myself. I look forward to playing around with the printer more in the future.

Credit for the JMU cube goes to: @mathgrrl

Hi, I’m Unda

Hi everyone! My name is Unda Dittaboot and I’m a junior. I’m a DVC concentration with a minor in film studies. In my free time I love to watch lots of movies, listen to music, and go hiking with friends! I’m personally taking this class because I love creating and being innovative so 305 seemed like the perfect course to take. I’ve never worked with 3D printers before so I’m very excited to learn more about it this semester as well!

The object that I chose to represent me is a camera because I enjoy documenting and making videos of people and places around me. I appreciate seeing the world through a different lens and it is something I try to do daily. This object also slightly relates to why I want to take this class because both filming and 3d printing allow me to be creative and experiment in many different ways.

As a creative type I am an Innovator!

You can find me on:

dittabux on Tinkercad

dittabux on Thingiverse