Daniel’s Story

Research & Concept

Throughout letterform, typography, and graphology, we see letters the same way. We see these letters every single moment throughout our lives and even though they might be constructed in a different way, we still know the meaning behind it. We can see letterforms from 2D, 3D, and even 4D, and it still has the same meaning to us. Each letterform has its own unique structure and shape. Through those characteristics, each letter has its own letterform that is special in its own way.

First Glyph- “d”

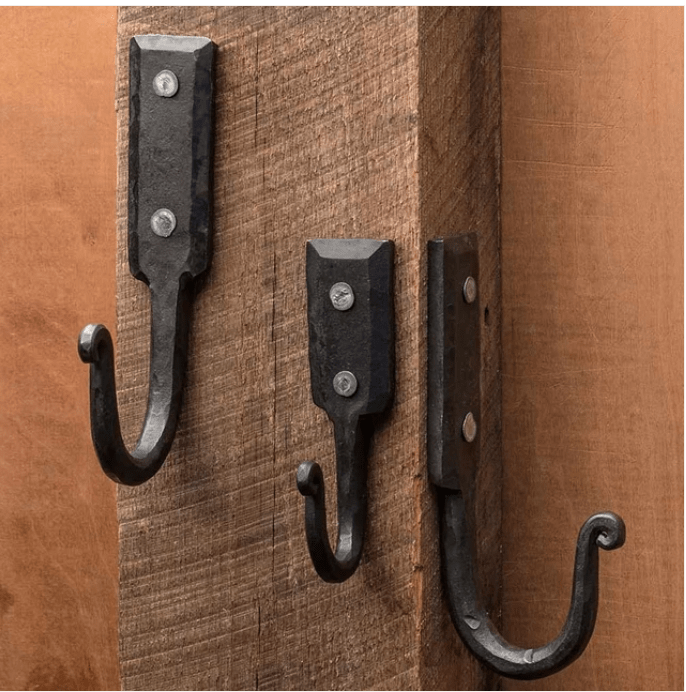
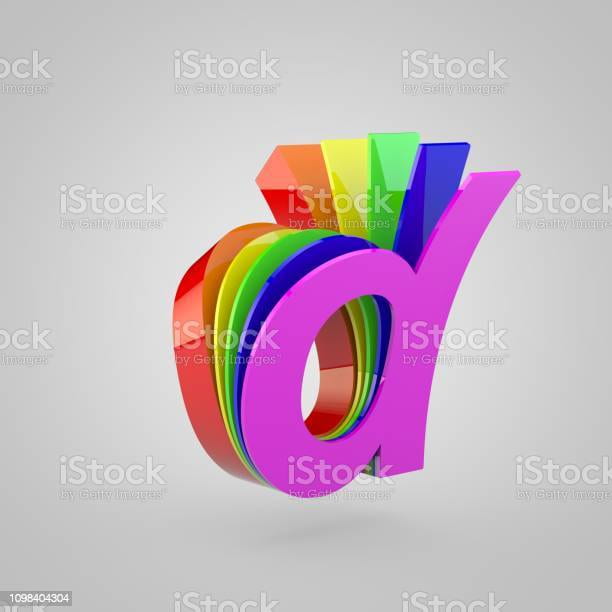
The first letter glyph that I have chosen is the lowercase “d”. Both my first and last name starts with the letter “D”, and I think it would be interesting to find and model a way to change the structure of the letter “D” but keep it as its same letterform. The lowercase “d” can be written in many ways, but the most basic would be the initial tall stroke, while combining it with a semi-oval shape to finish the letter. Some people might add a slight arc to the bottom of the stroke of the letter “d” to give it more definition. Although it is a simple letter that can be written in one stroke, I wanted to see what I can do to this letterform. Below are my inspirations as well as my sketches.

Second Glyph- “P”

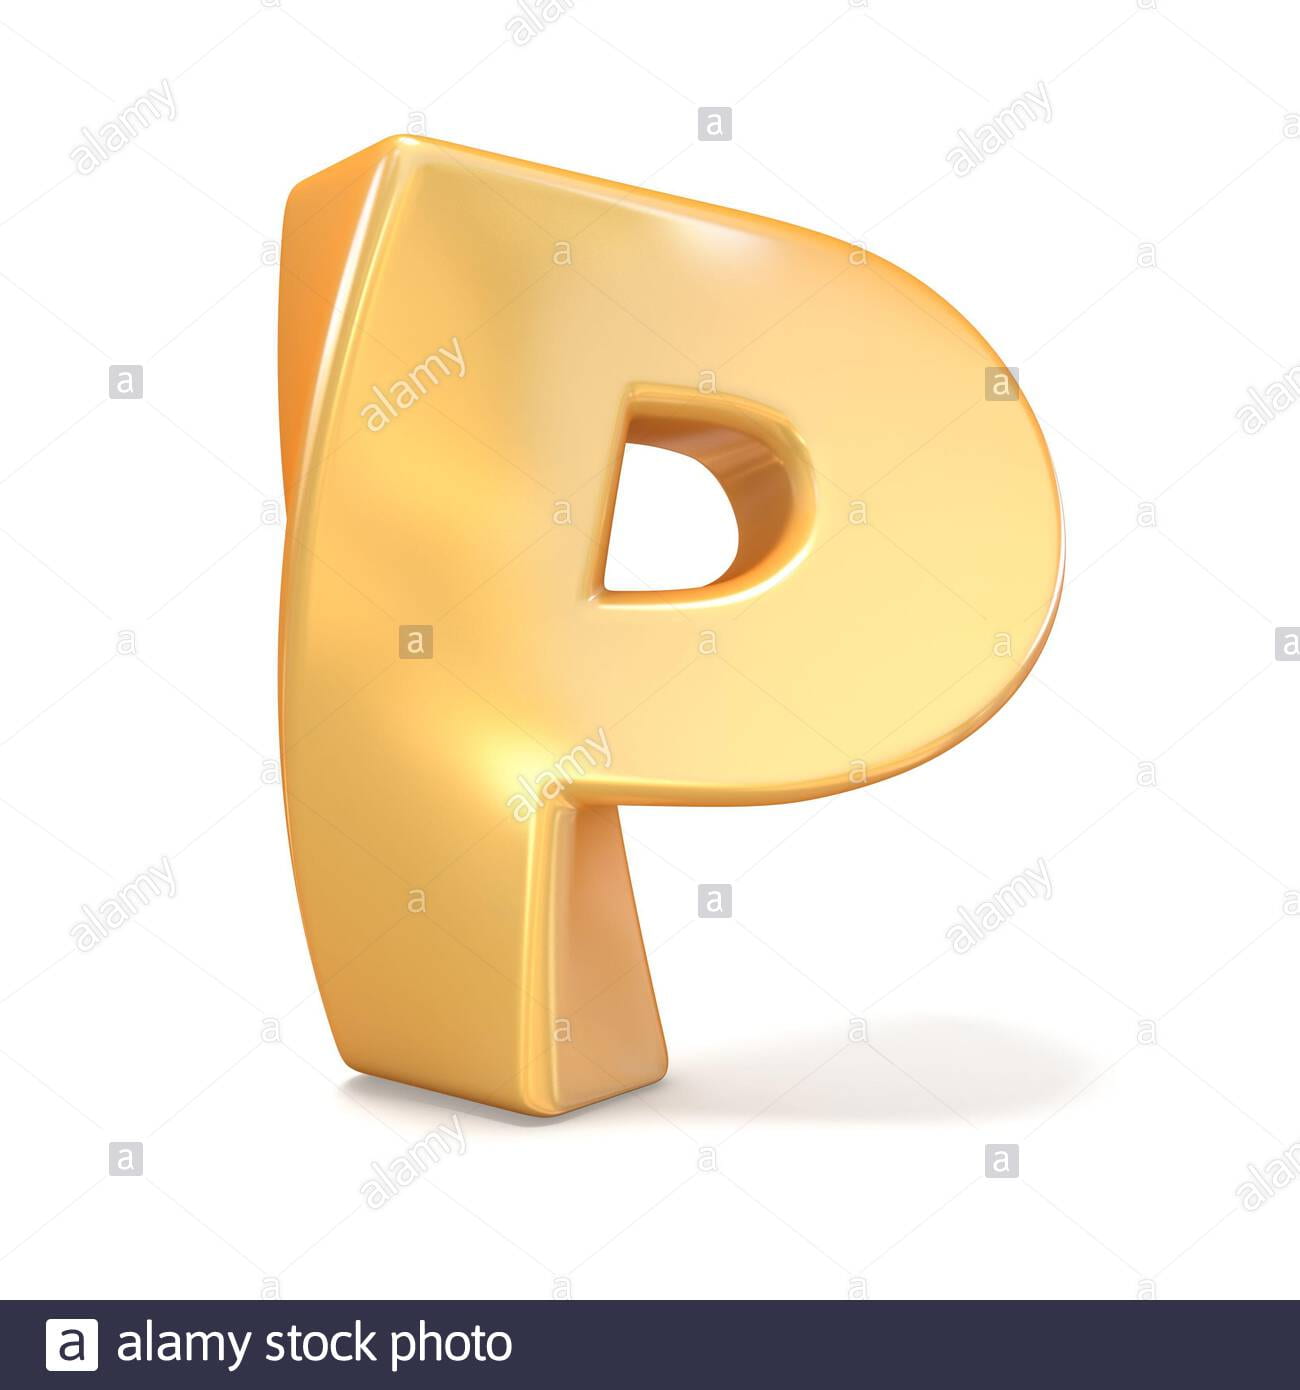
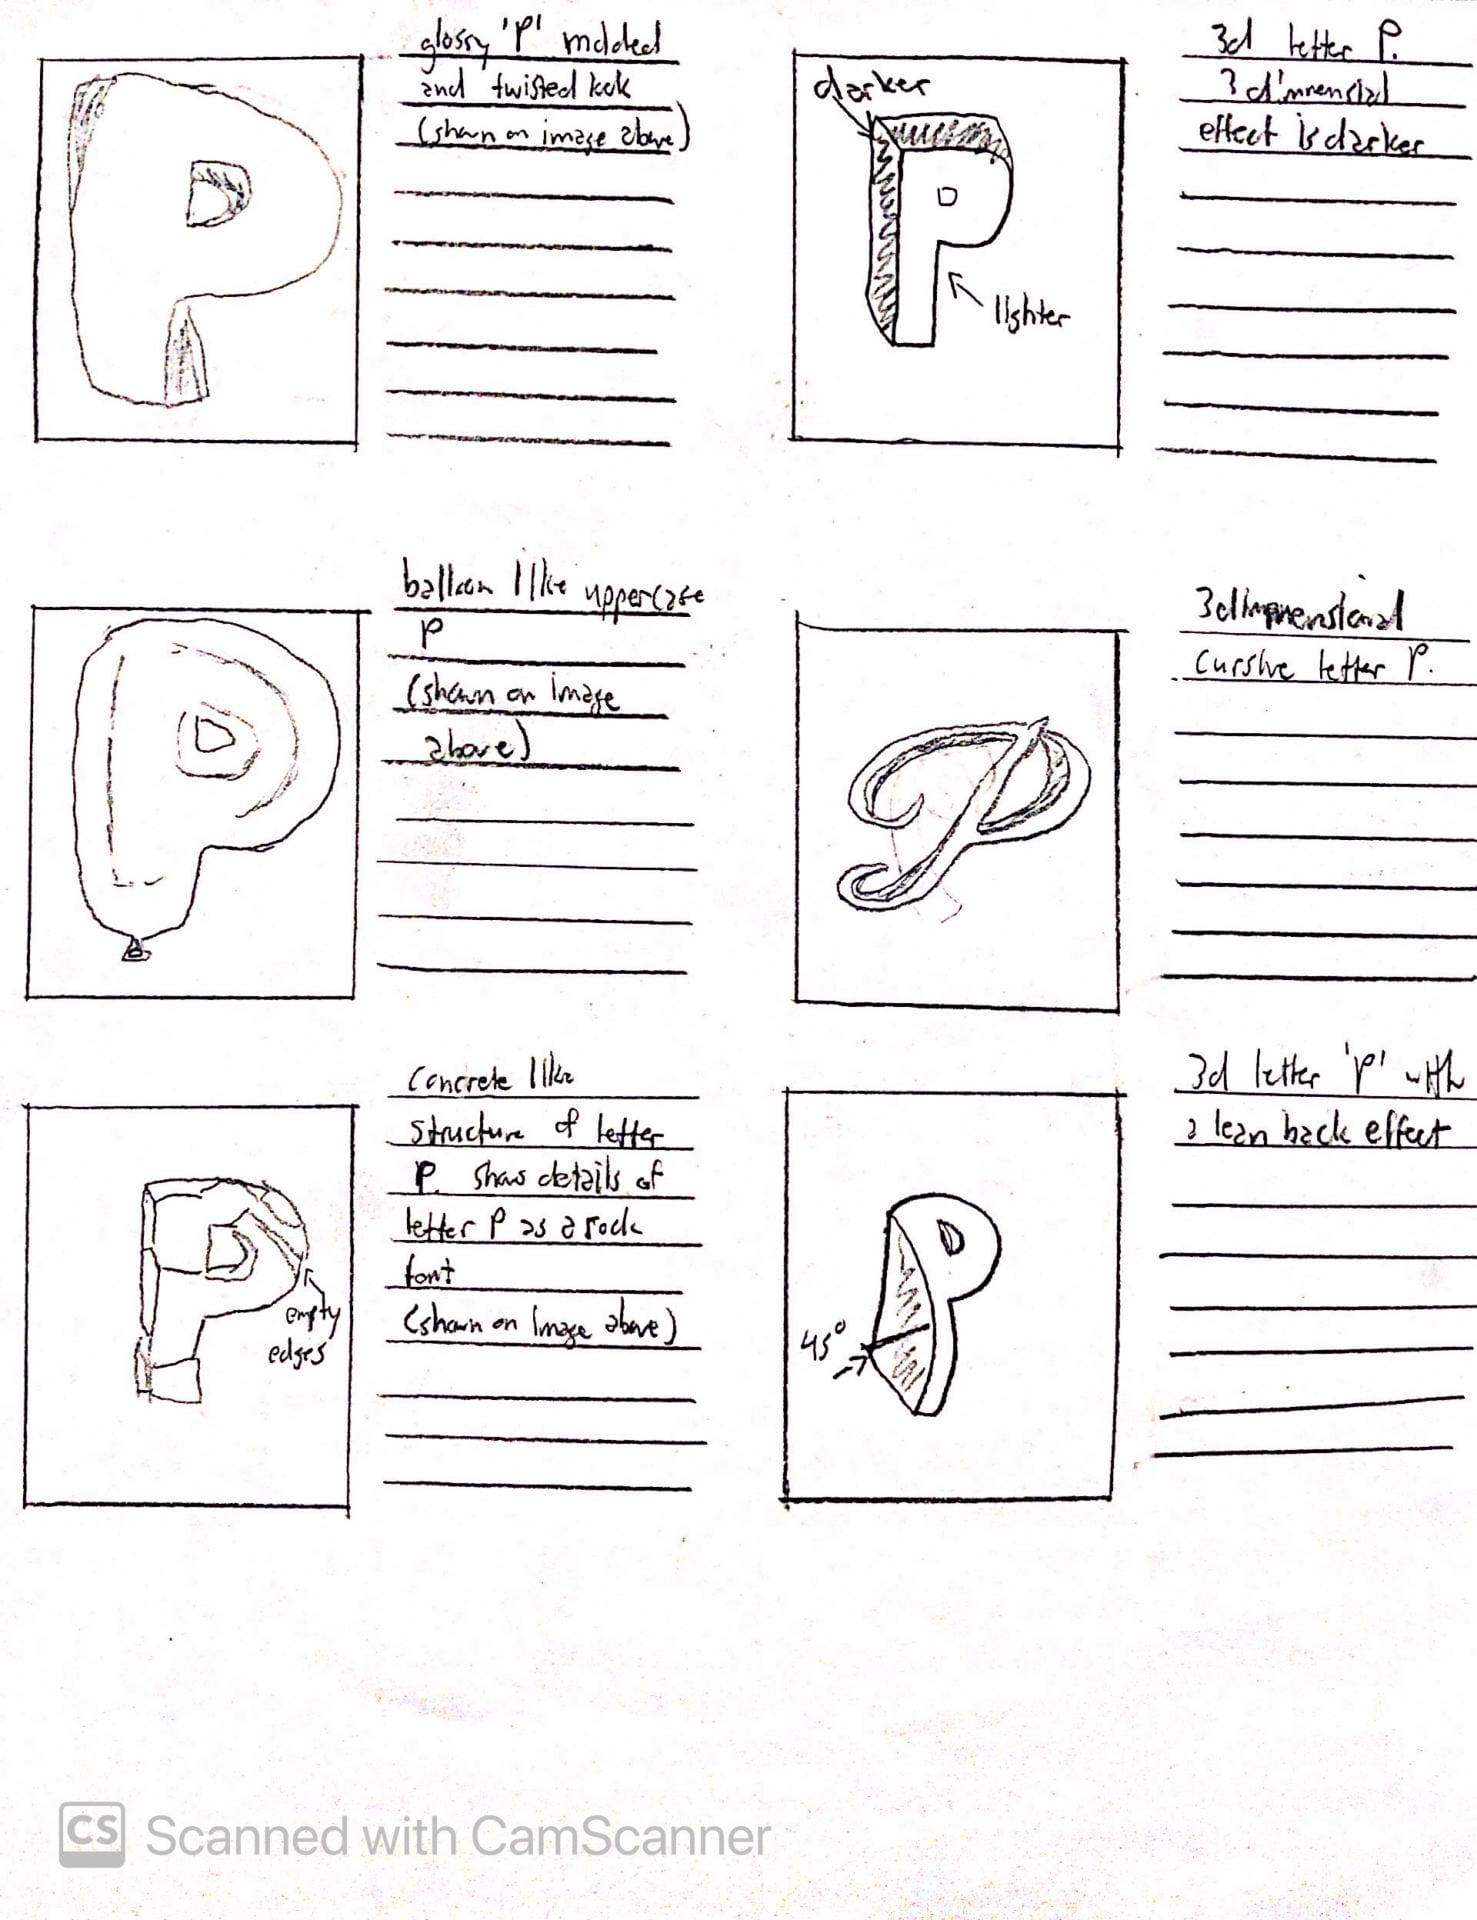
The next letter that I have chosen is the uppercase “P”. I decided to choose this letterform because as you can see from the lower case “d”, they have a similar structure. The upper case “P” seems like a flipped and mirrored letterform of the lower case “d”. They both contain a long straight stroke, while having a semi-oval shape connecting it together. I wanted to see what type of differences I can make to this letterform compared to the letter “d”. Maybe I can create a model that could be similar to both letterforms to create some sort of connection between those two. Although both of these letterforms are simple, I wanted to see if I can create a model that could either connect the forms together or distinguish the differences between those two letterforms. Below are my inspirations as well as my sketches.

Iterations

First glyph: lower case “d”

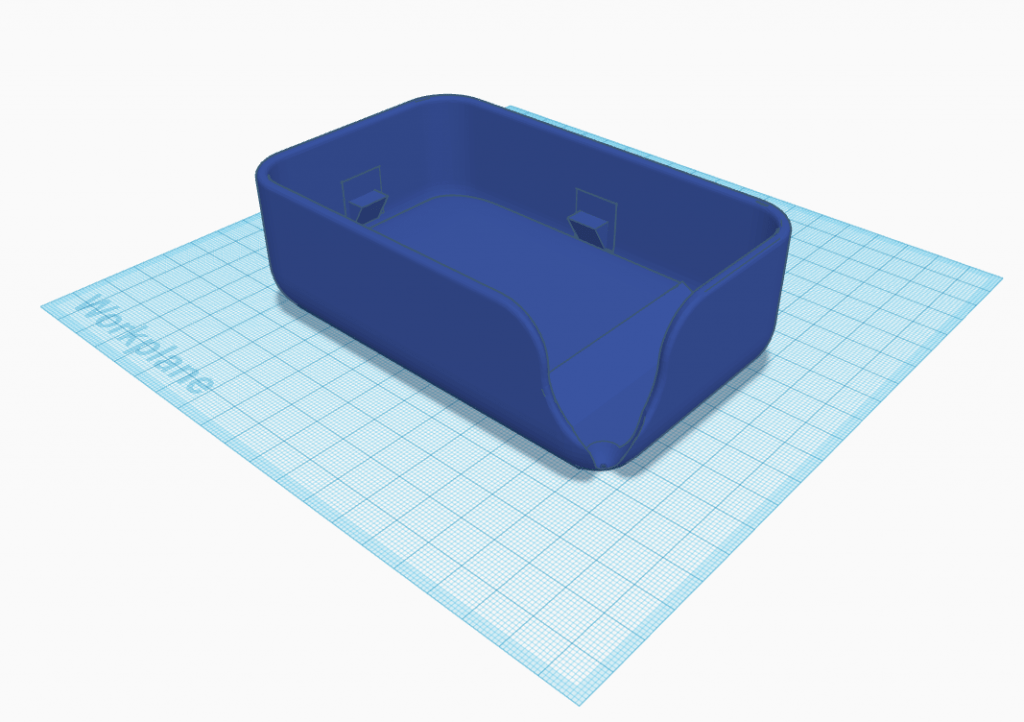
These models and iterations were all made in the Shapr3D app on the iPad. I first approached on working the lower case “d”. I started by first sketching the outline of the letter “d” with a height of 15mm, as you can see in the images below. I then went to the 3D view and changed the sketch into a 3D form. The next step I did was to add another work plane on top of the letter “d”. I then sketched the inside hole of the letter “d”. After creating the inside hole, I then lower the sketch through the first model so it may create a hole through the letter. For this letterform I wanted to add some textures to it, to give it more character. I highlighted each edges around the letter and increased their size to give it a more rugged detail. I wanted to make this letterform to have a abstract look with solid edges and make it look more “alive”.

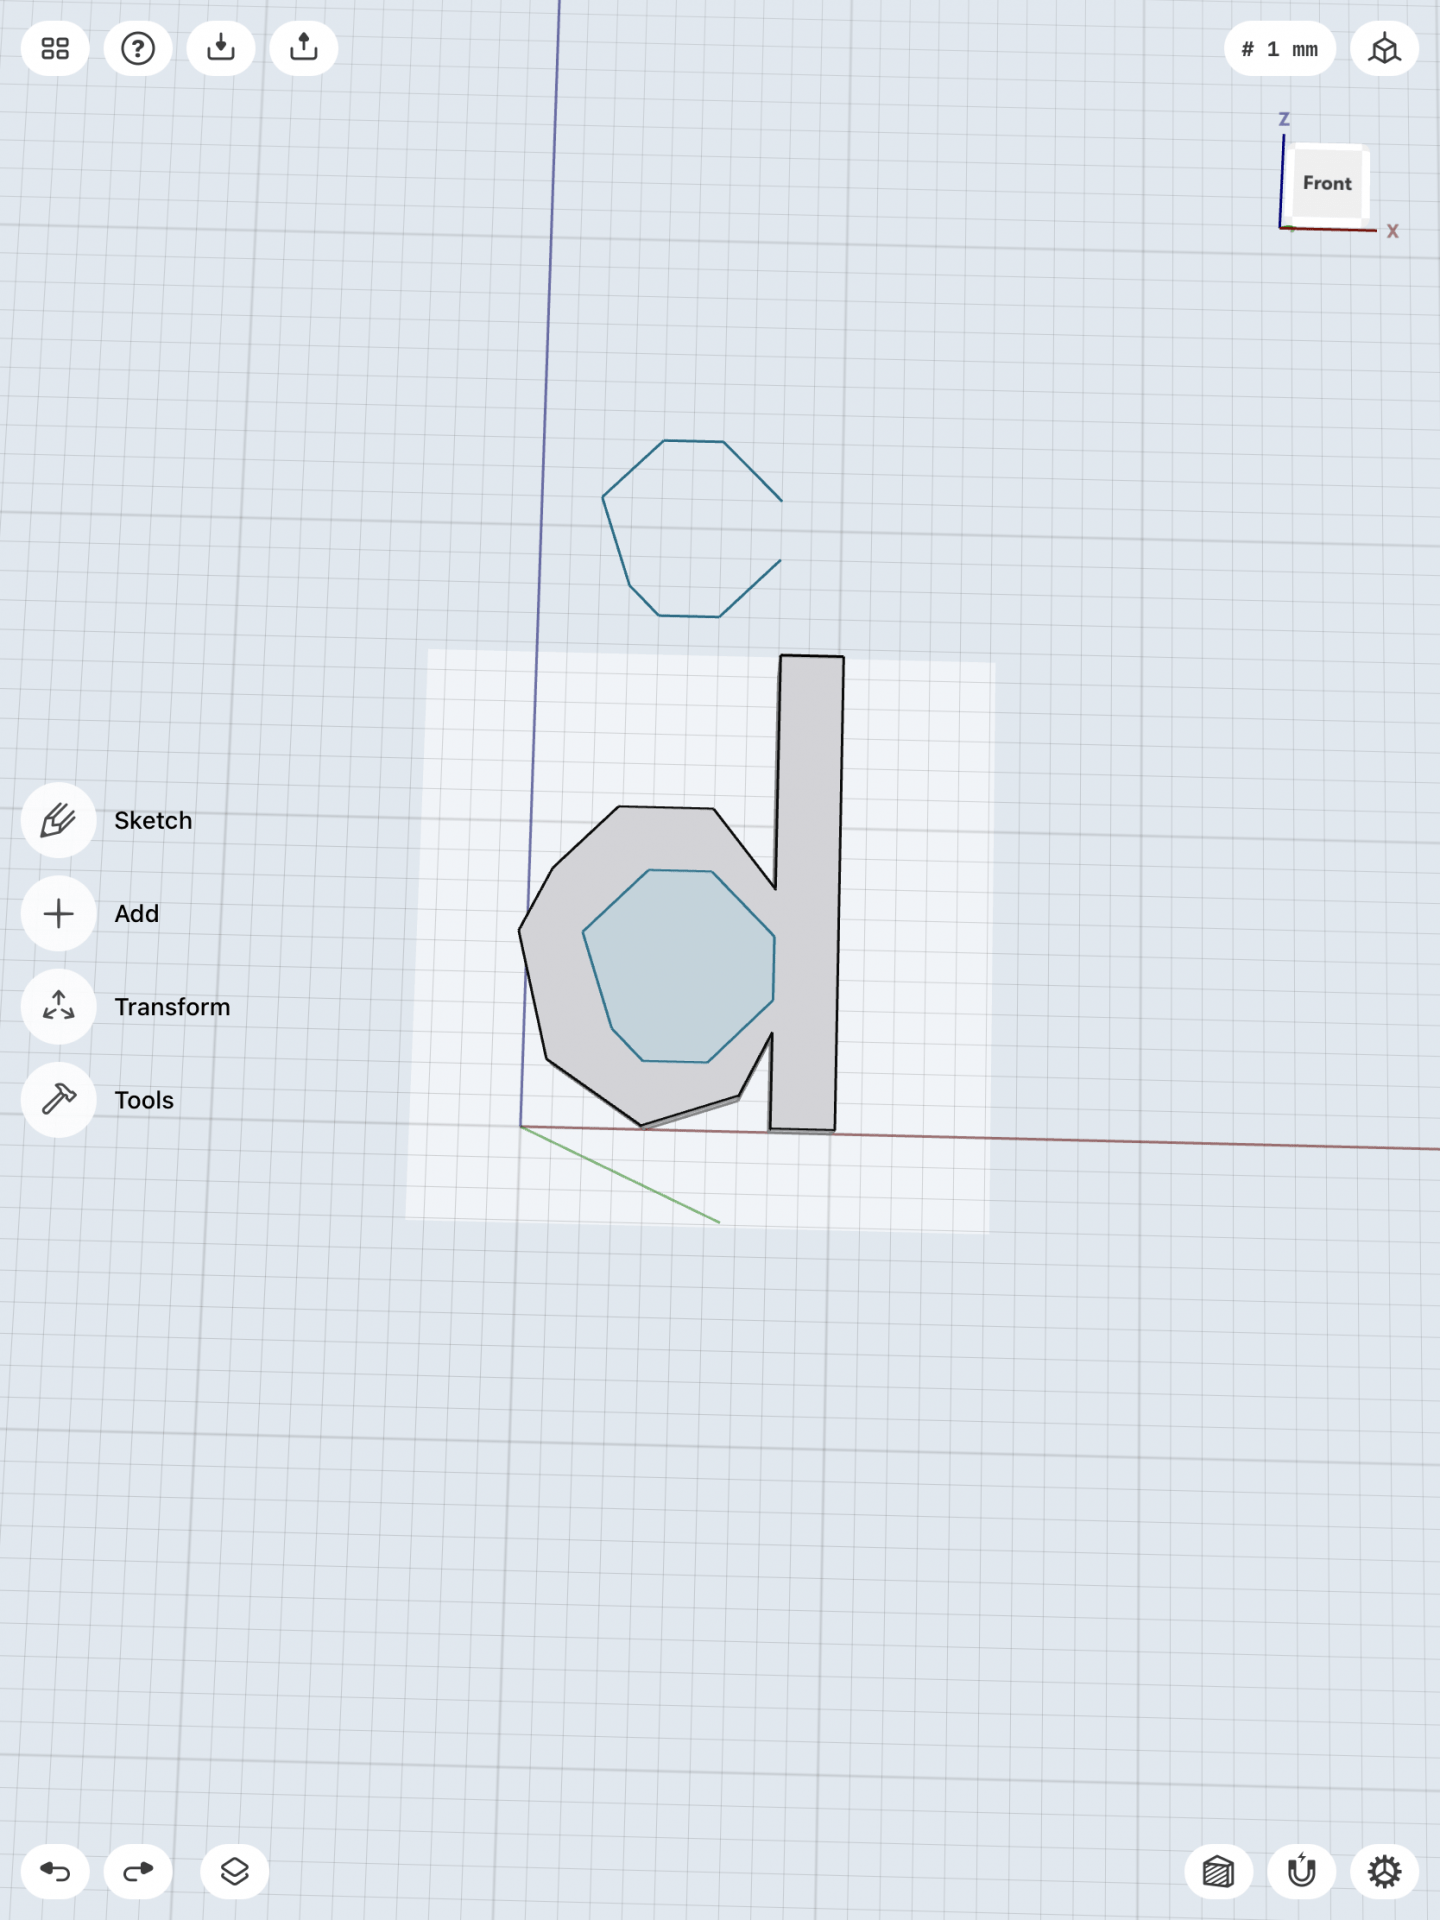
Designing the letterform was both simple and difficult. I had a hard time finding the right dimensions to create this sort of shape. Since I had many sides to the semi-oval in the letter “d”, I wanted to make the sides in the hole of the letter similar but in smaller length. I realized that I only added details to the front face of the letter. I am planning to also add more details to the back side of the letterform. The plan I was aiming for was to make a messy but abstract letterform of the lower case “d”. I plan to make the model larger as well and add more details in the letterform. Since this is my first attempt of the model, I am still researching and possibly might change my plan in creating this letterform.

Second glyph: Upper case “P”

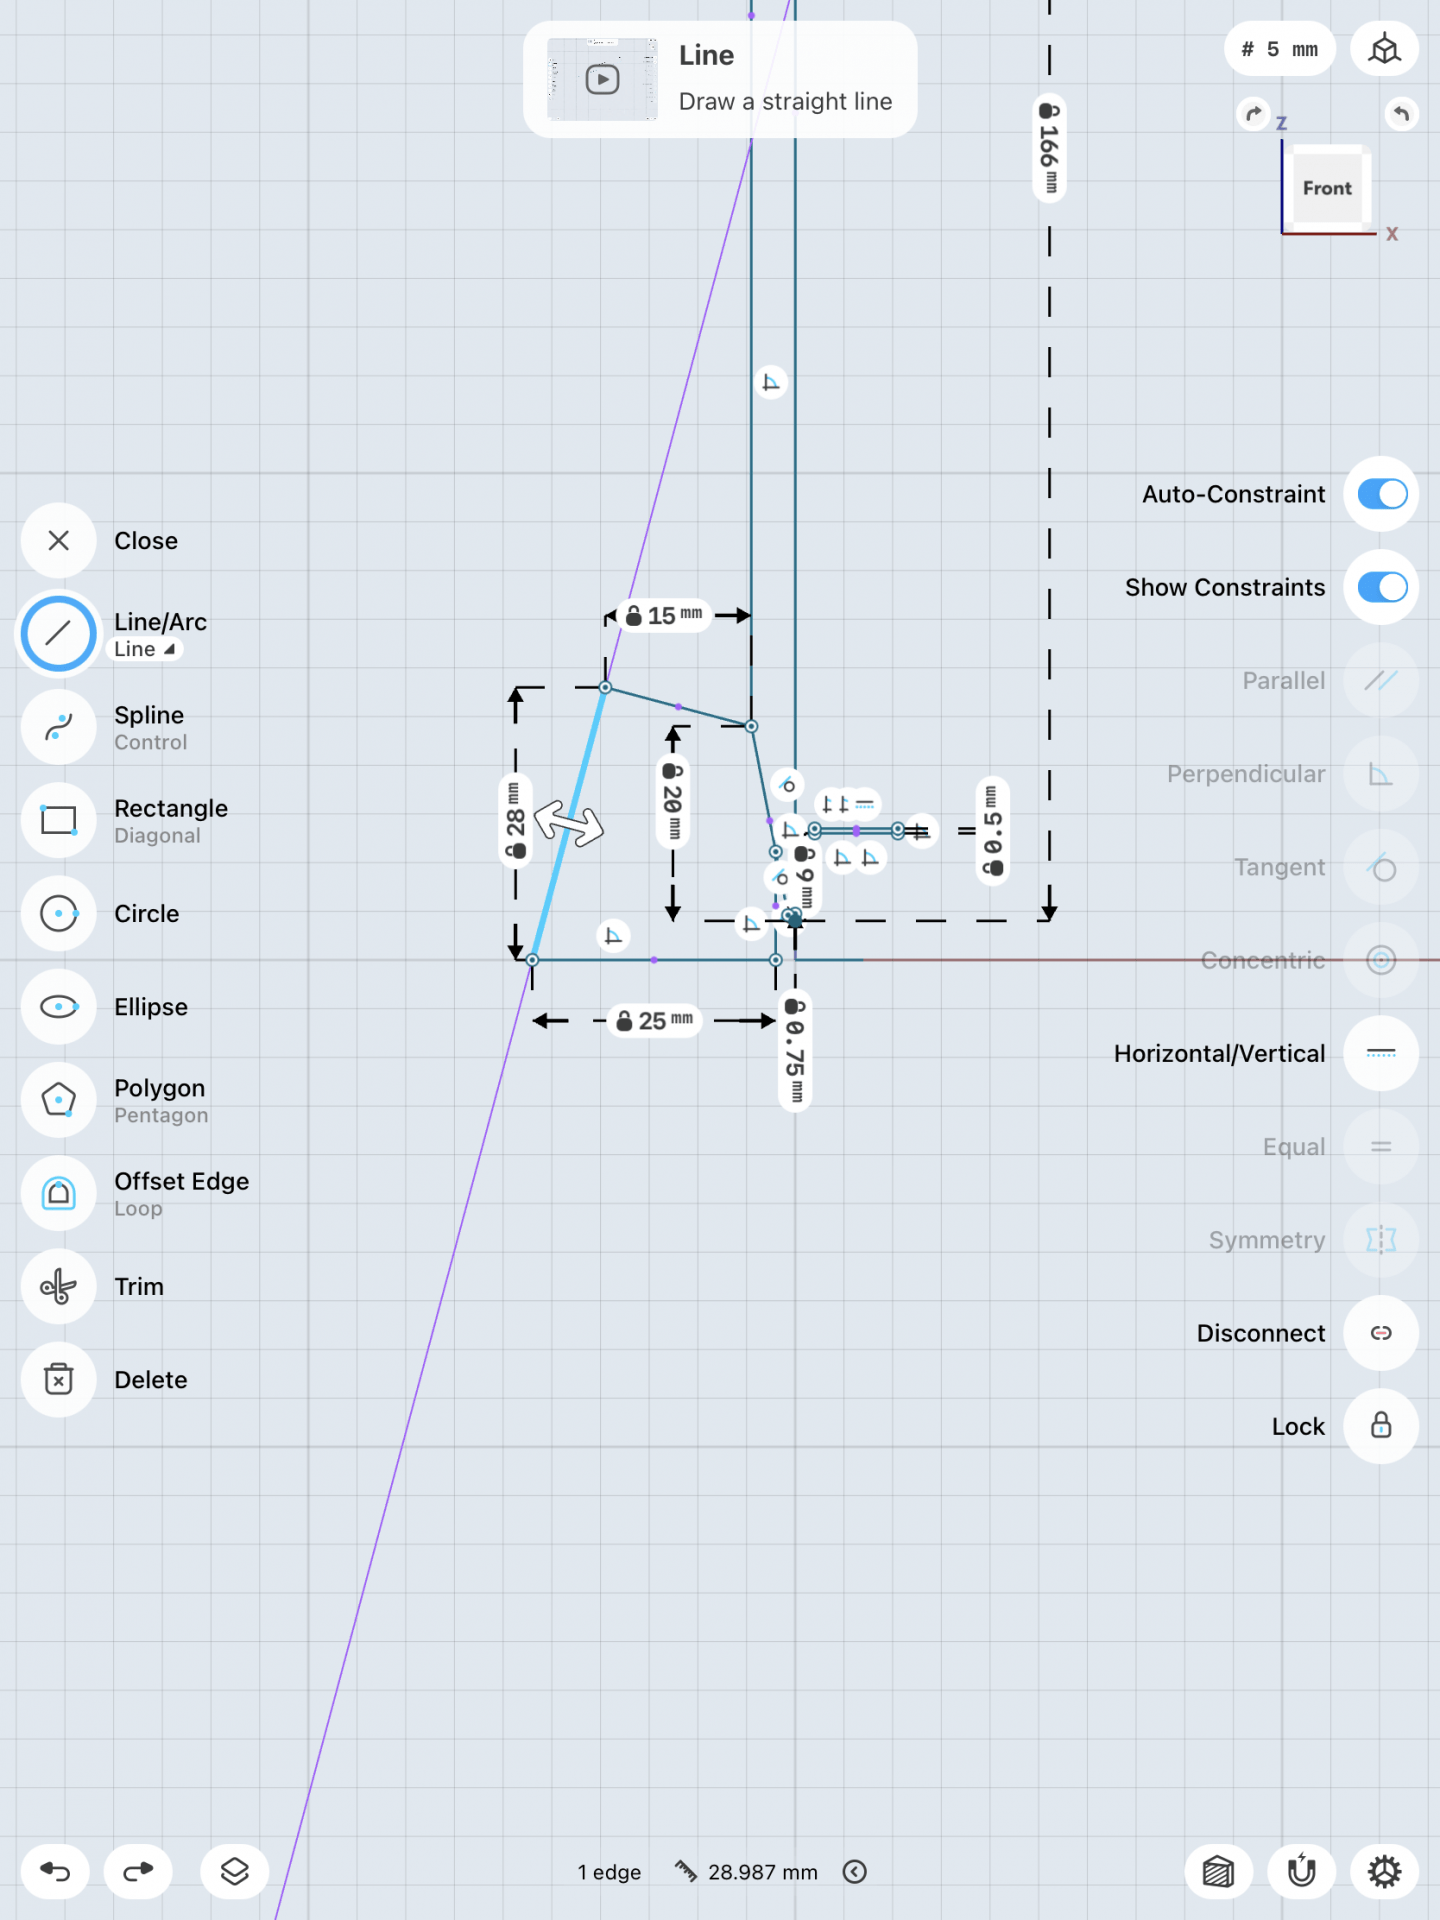
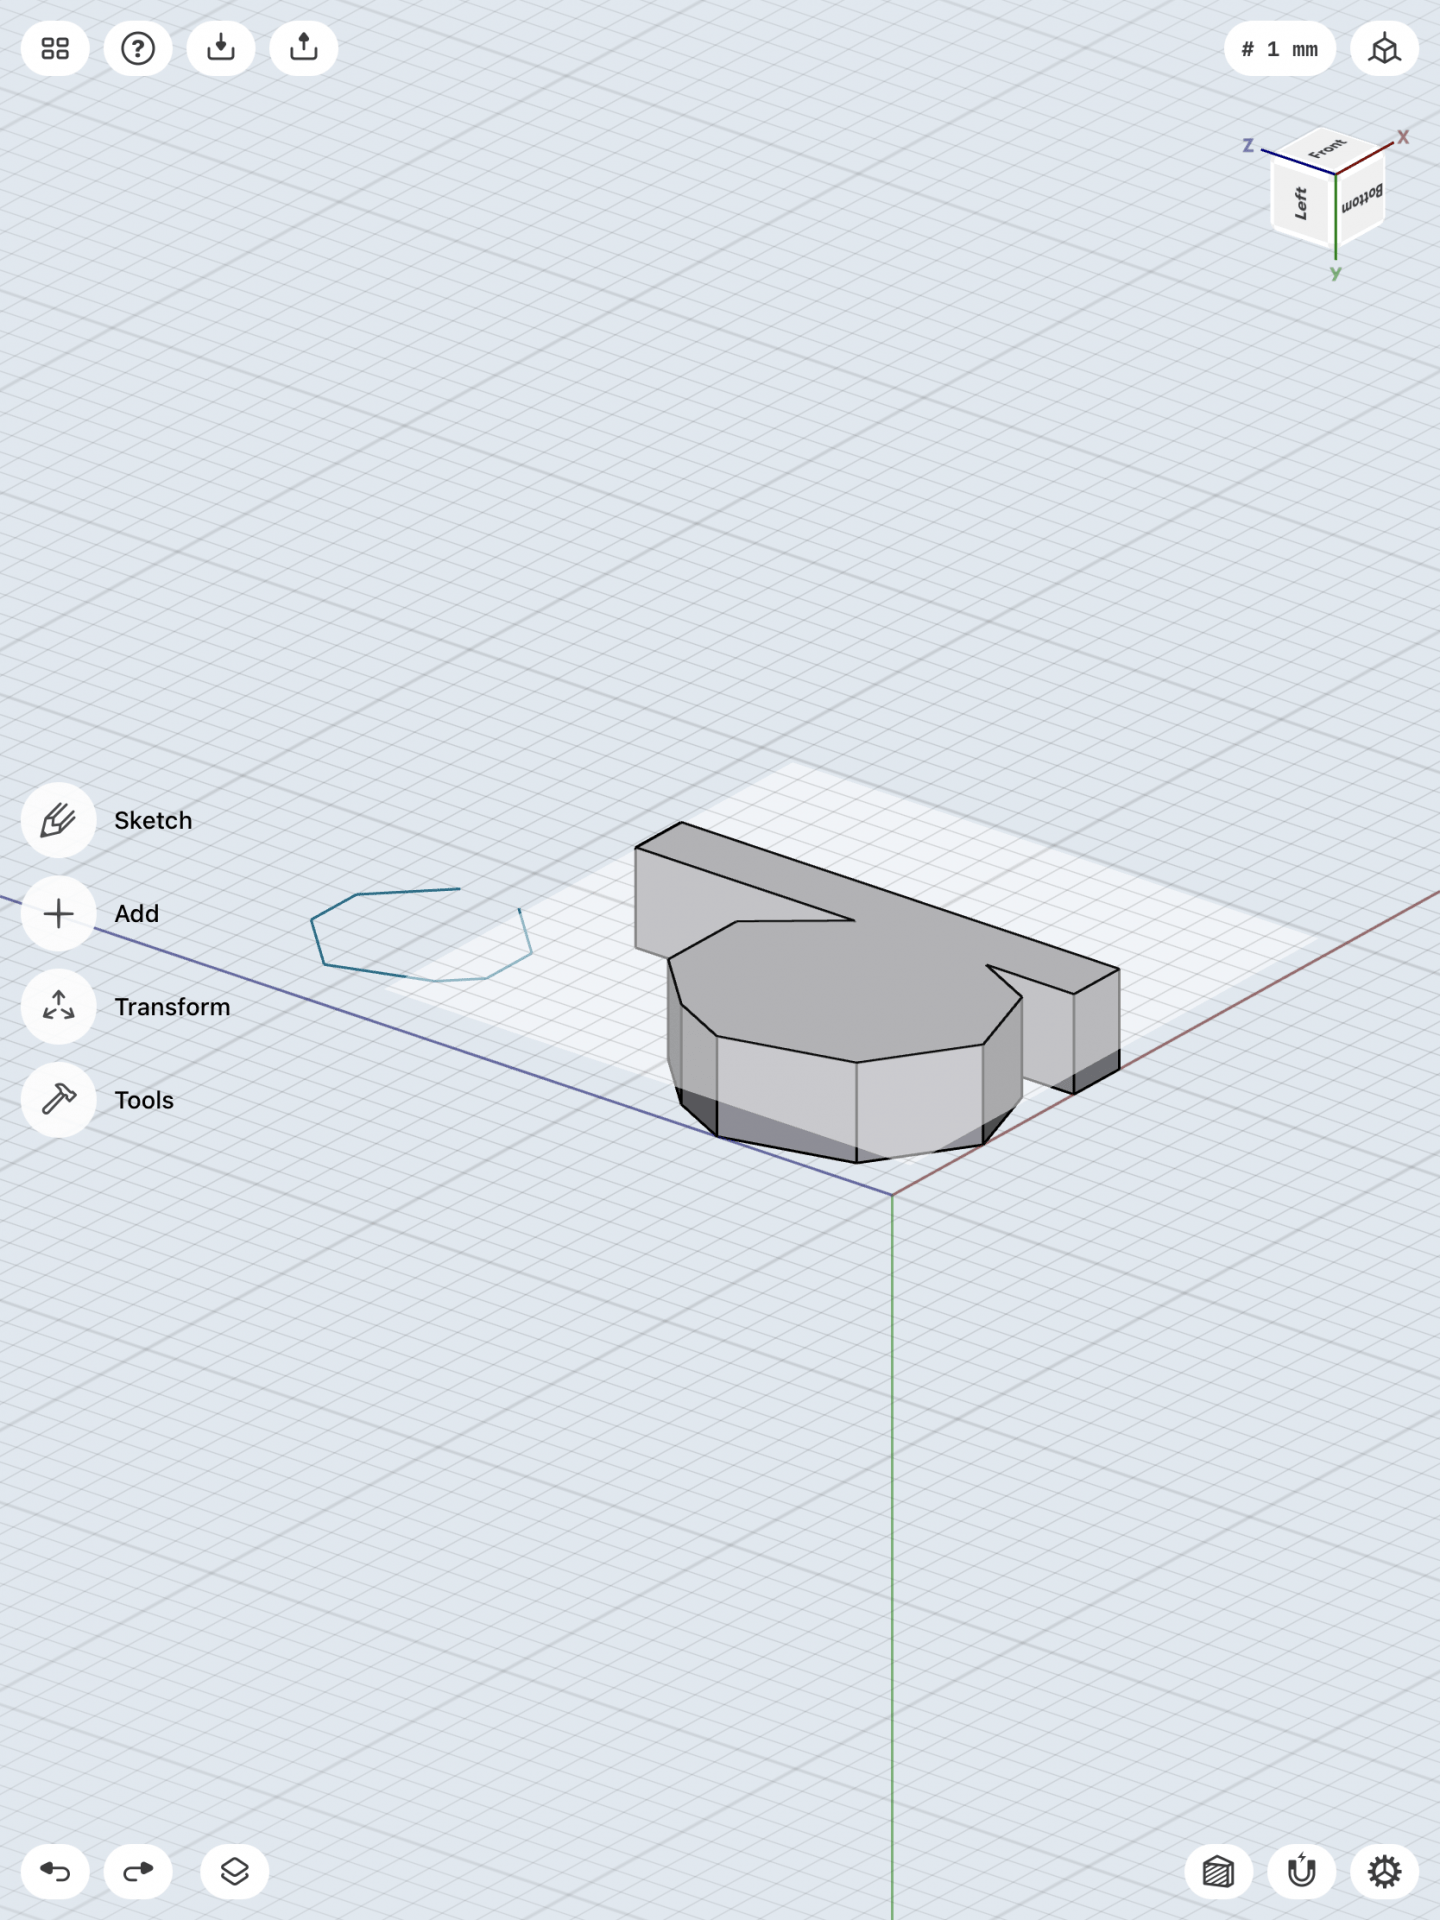
The next model I am creating is the upper case “P”. I first started on the model by sketching a simple model of the letter, with a height of 15mm. I then switched to the 3D view and increased the size of the model to a width of 3mm. I then added another work plane on top of the model so I could create the hole to go through the model to create the upper case “P”. On the second work plane I created the inner hole in the model and then lower the sketch through the first model to create the hole in the middle. Now was the time to add some details and characters to the upper case “P”.

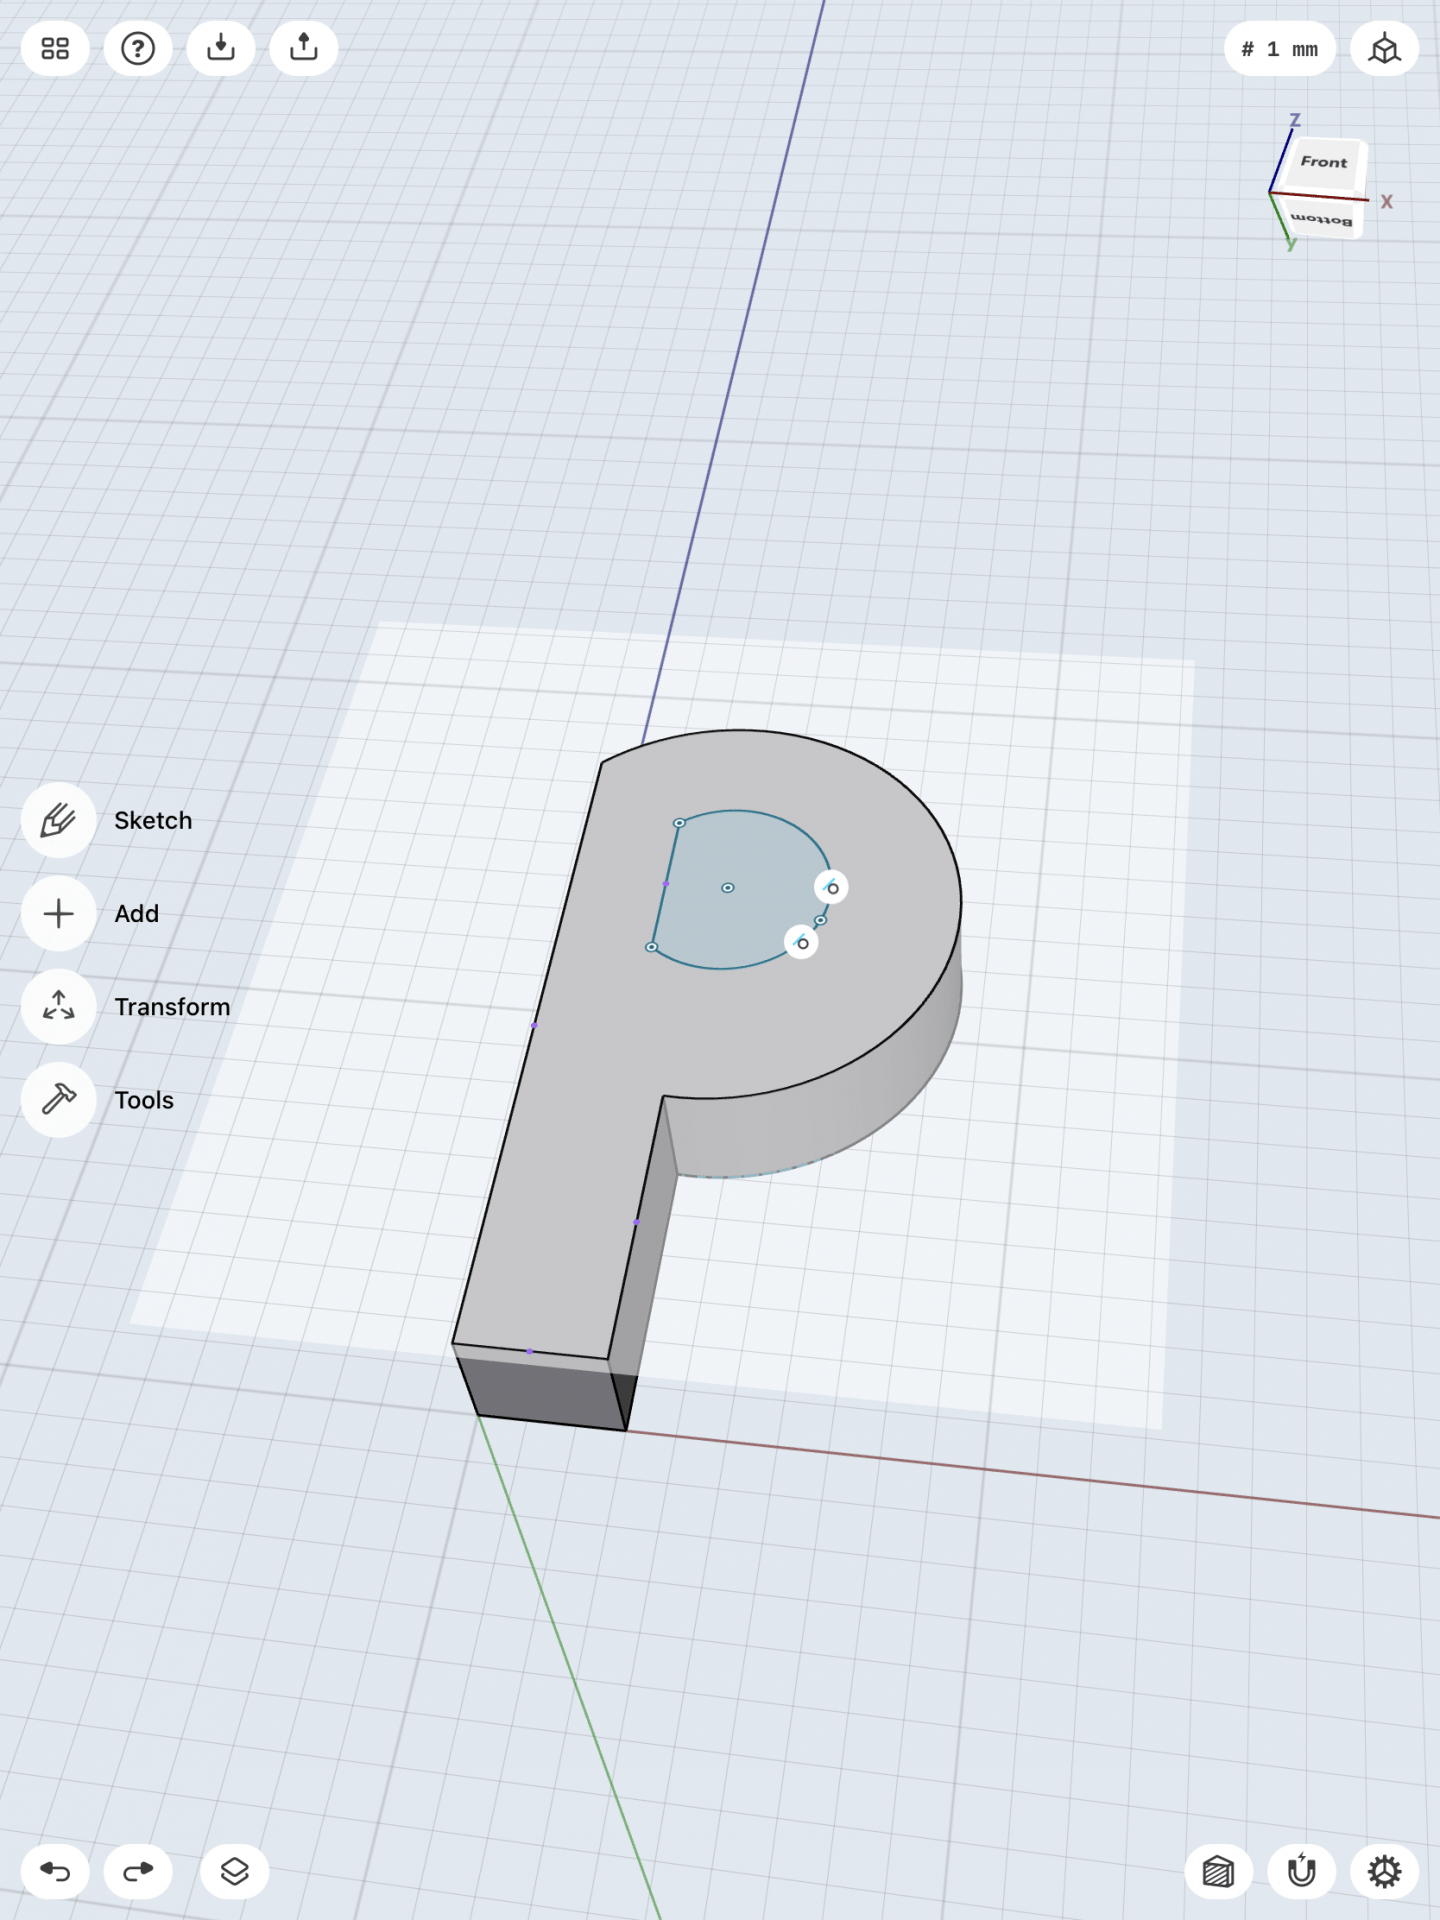
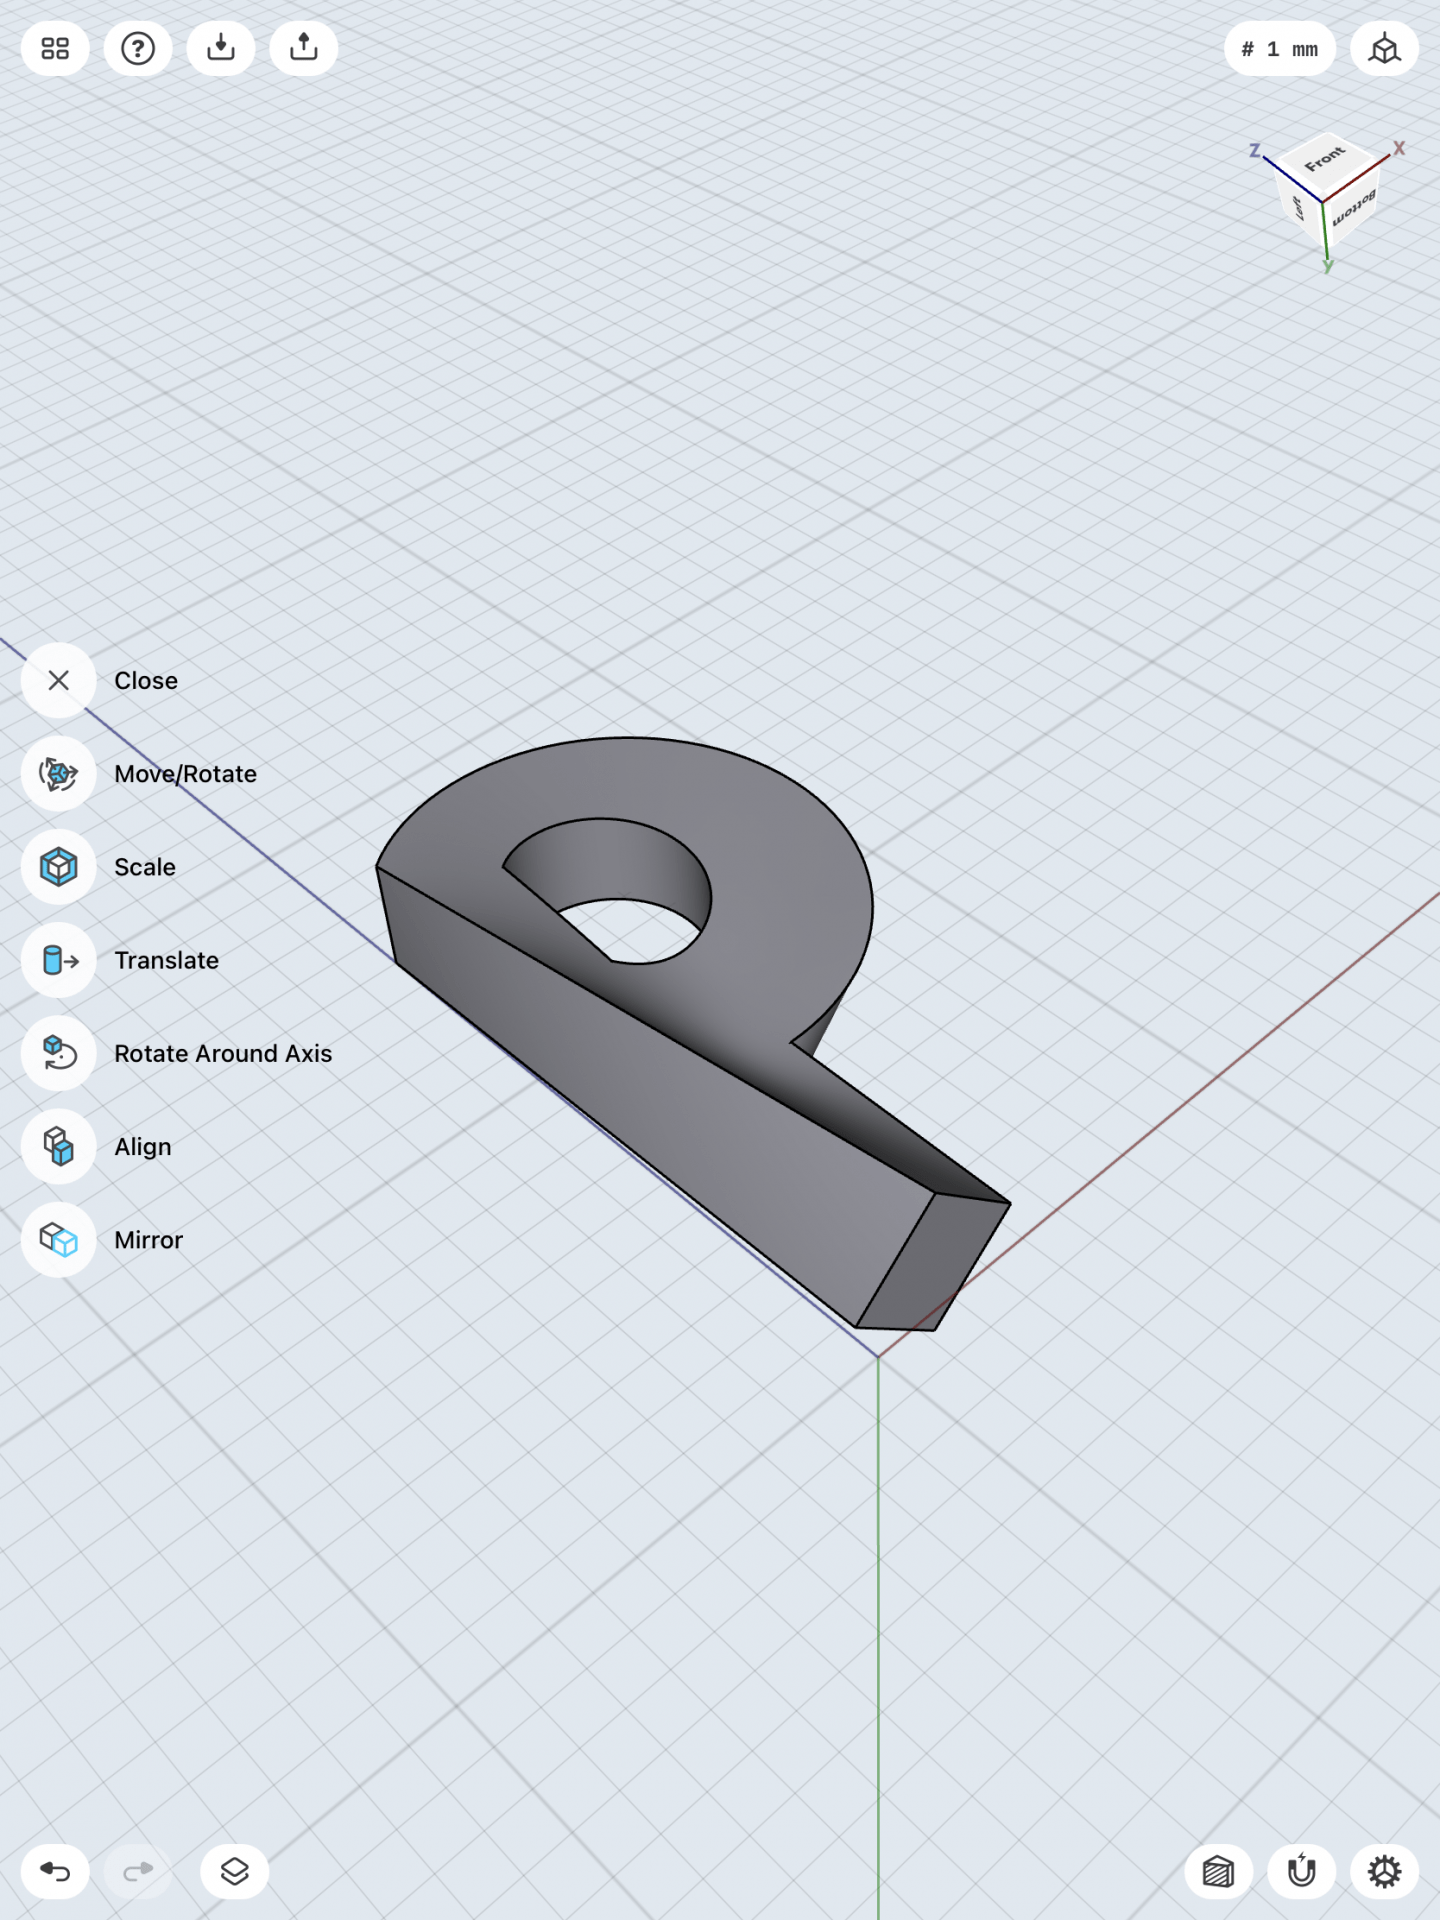
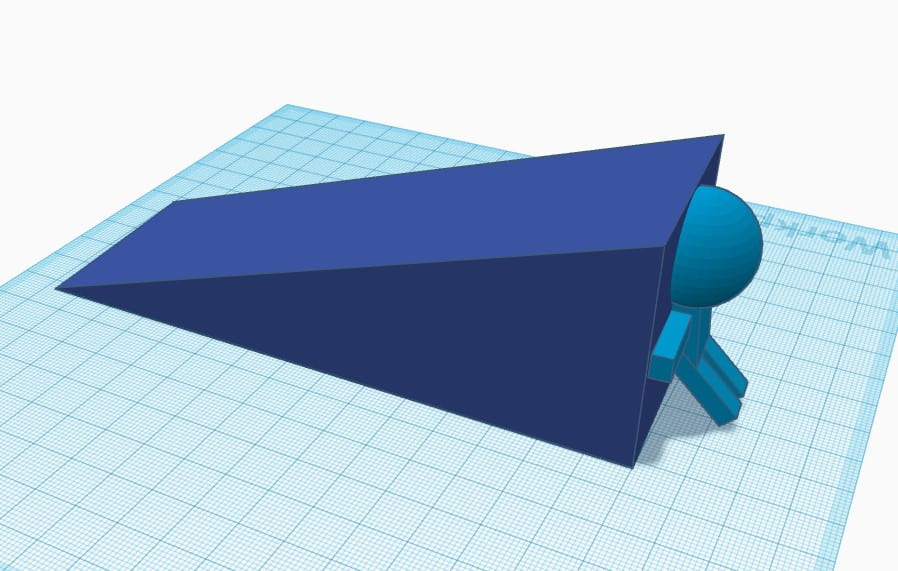
For this letterform I wanted to make it look more smooth than the lower case “d”. I decided that I wanted to curve and bend the upper case “P” to give it more character. I highlighted the edges of the bottom half of the leg of the upper case “P” and changed its direction and angle. That cause the shape of the letter to curve and mold into a bent looking letter “P”. With this detail I feel like it gives it much more of a character as a 3D model and more interesting to the eye. I still haven’t thought about how the final model would look, but I still want to add some sort of more detail to it. Although it looks simple, just molding the shape of it gave it that much more character. I also realized that the shape of the letterform should have more details. Most people who write a lower or upper case “P” has the long stroke poking at the top of the letter. I plan to iterate my shape to resemble more of a upper case “P” letterform.

Overall the first models looked great, but I still want to add more details and shape to the letterform in the future.

Final

Lower case “d”:

https://www.thingiverse.com/thing:4843870

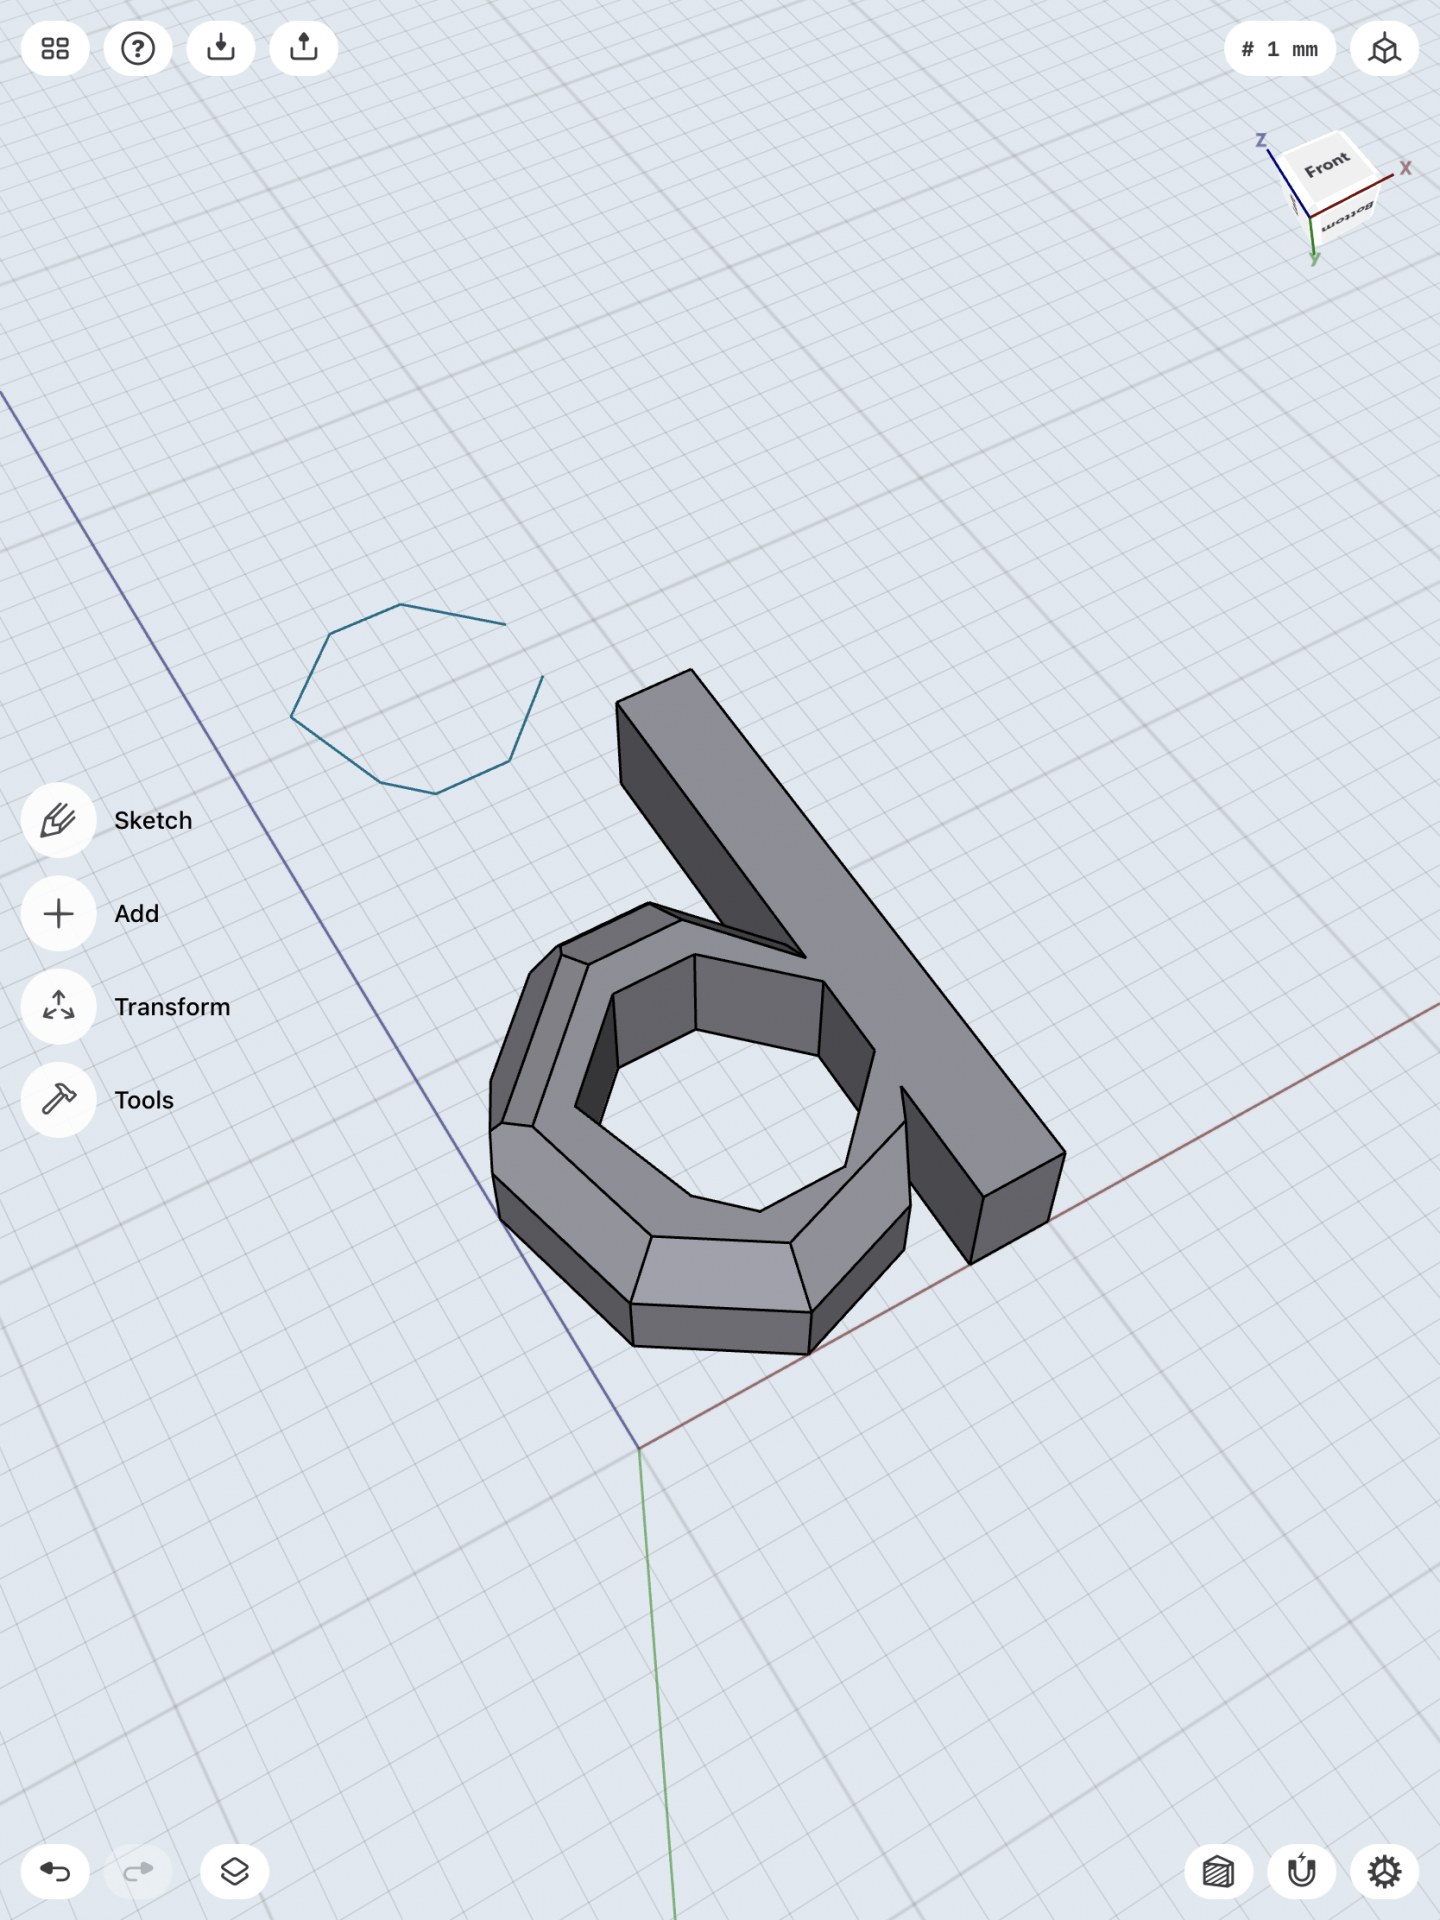
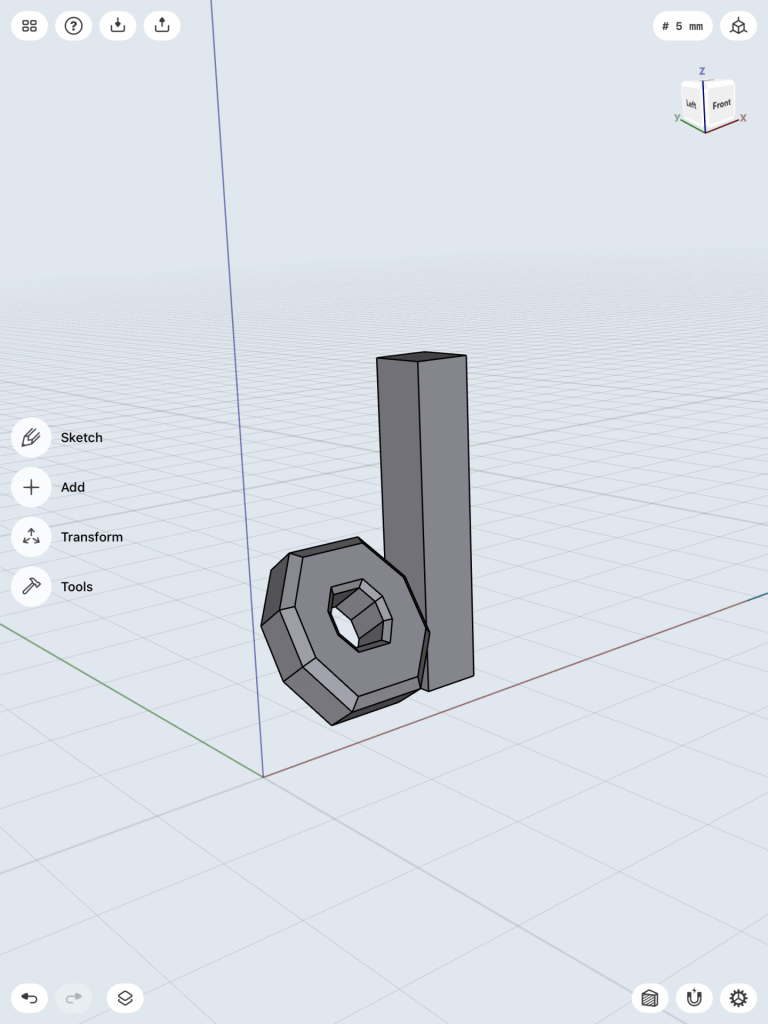
This is my final end result of creating a model of the letterform of the lower case “d”. In the end I wanted to make a simplistic but very detailed 3D model of the letterform. I have created this model on Shapr3D, as you can see at the images below. The octagon shape of the letter is slightly angled at 35 degrees to give it a more distinct look when looking from above. I have attached that part with the long stroke of the letter “d” to make it stand upright and hold its form. Overall this concept was challenging, since I had to go through many different iterations to see which ones I will be satisfied with. At the end this model turned out great and it represents well as the letterform of a lower case “d”. I am looking forward to many more projects that I can create and make with 3D printing and modeling. You can download and print my model here on Thingiverse. https://www.thingiverse.com/thing:4843870
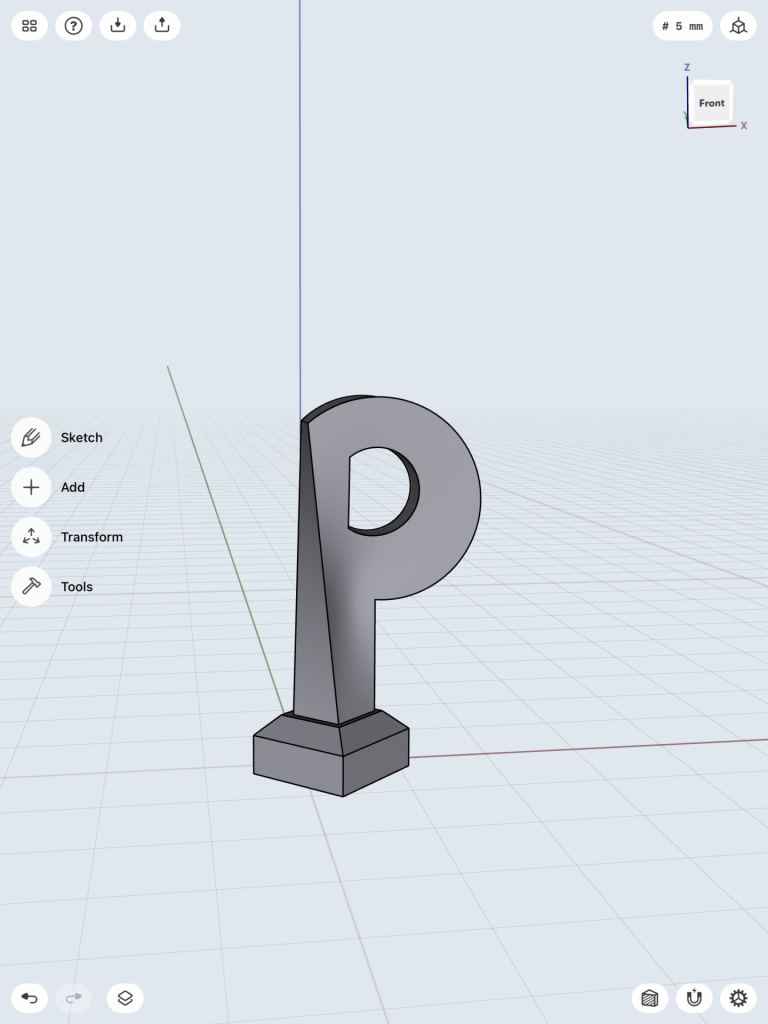
Upper case “P”:

https://www.thingiverse.com/thing:4843863

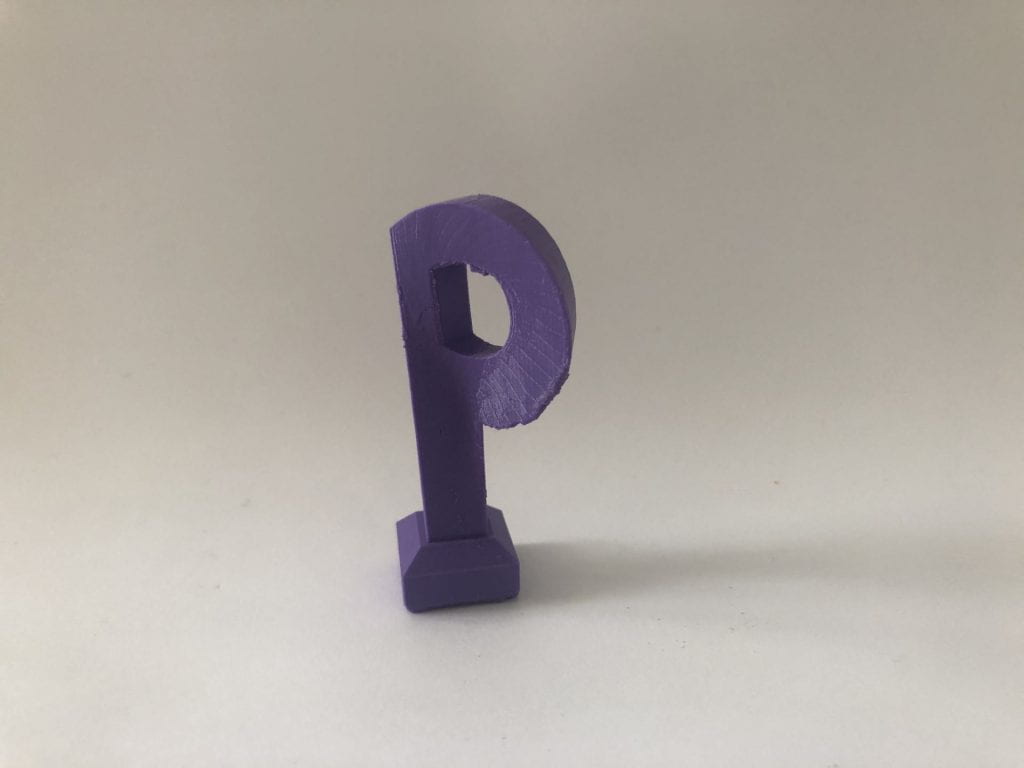
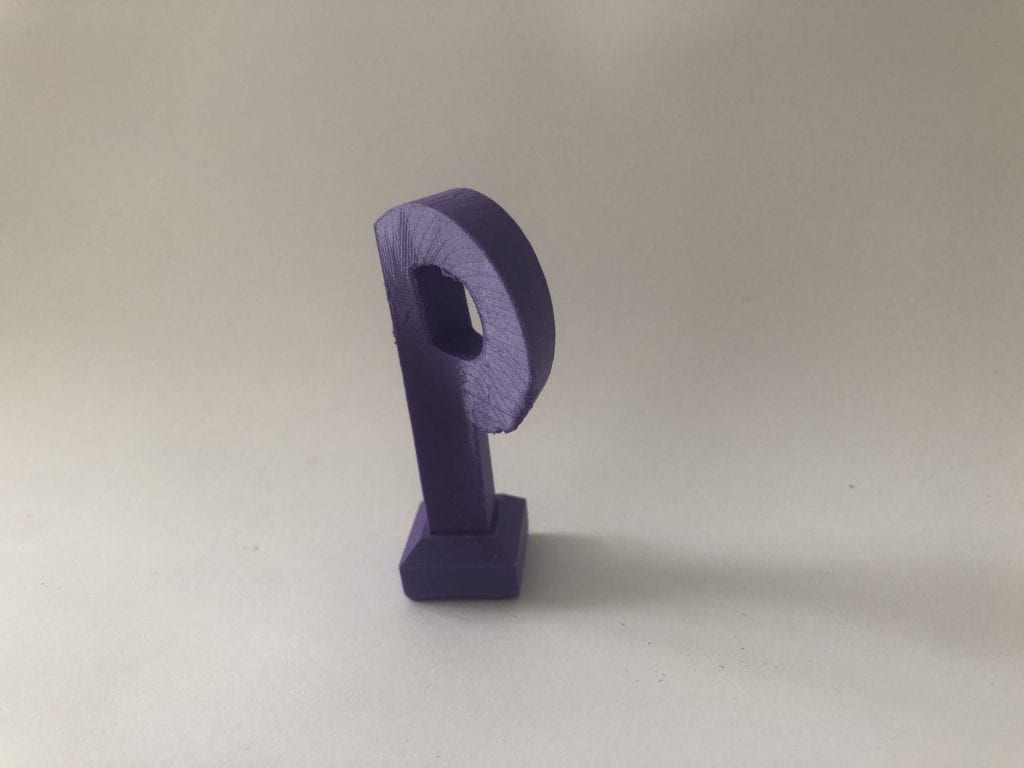
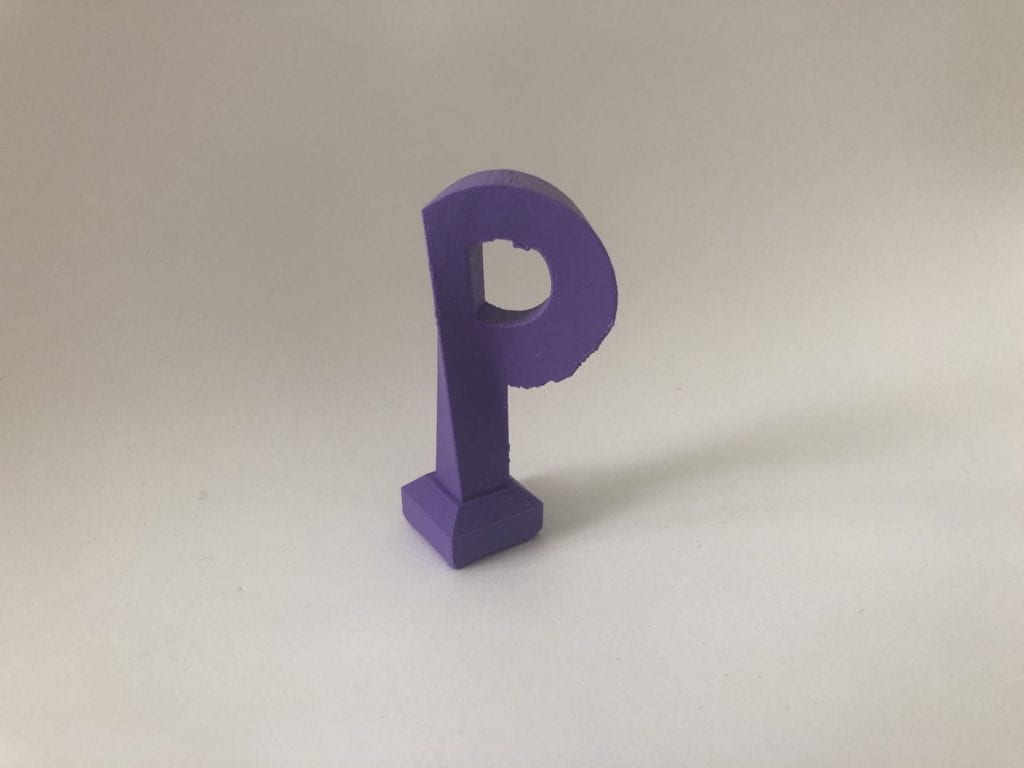
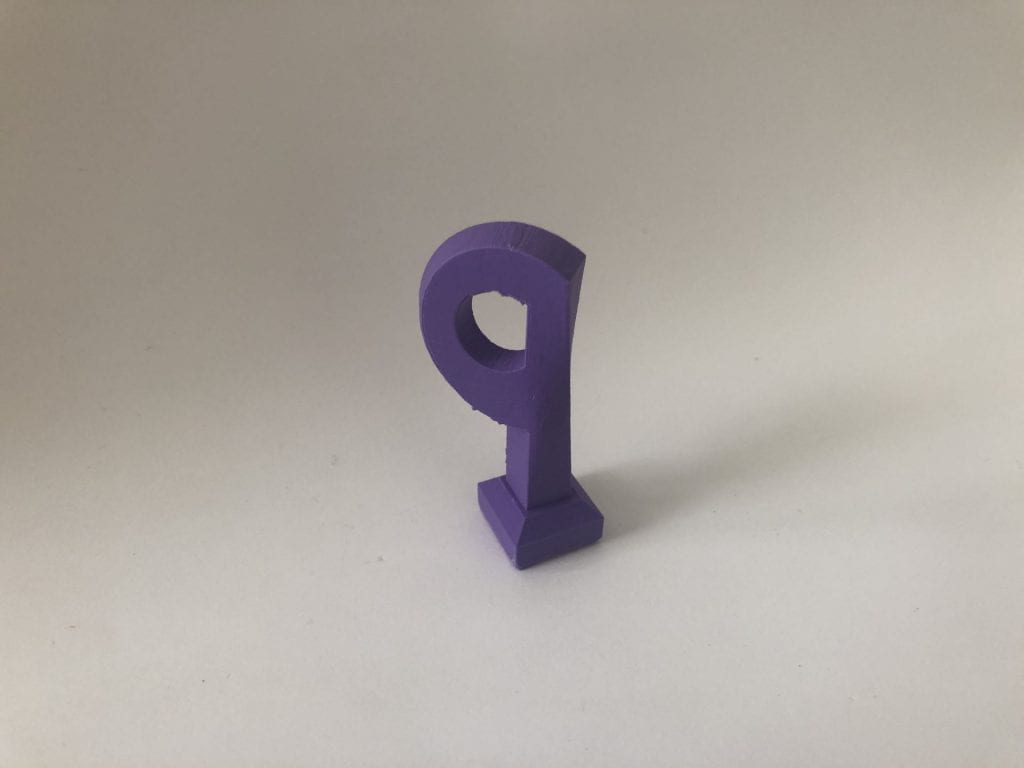
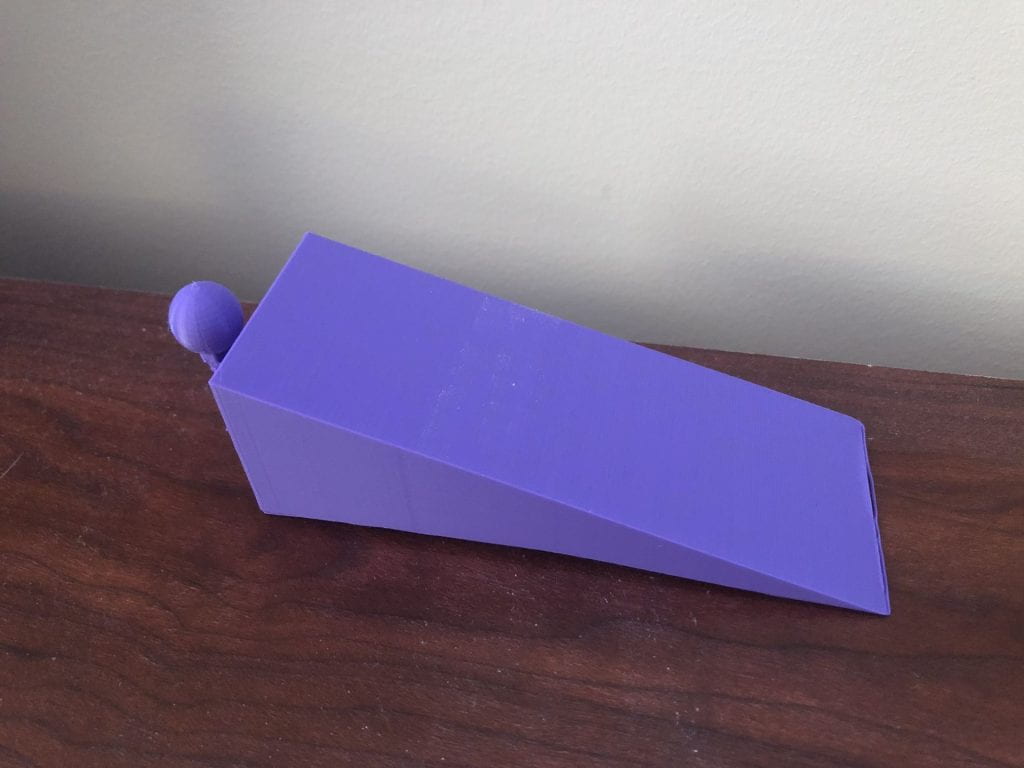
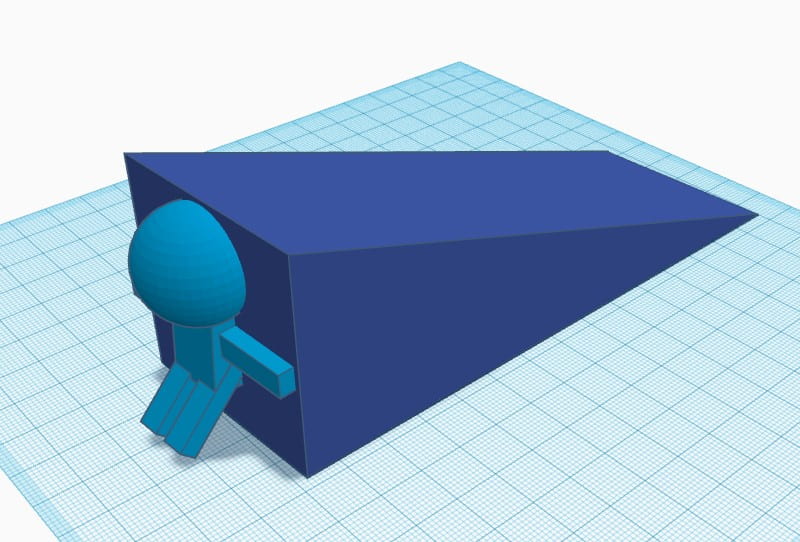
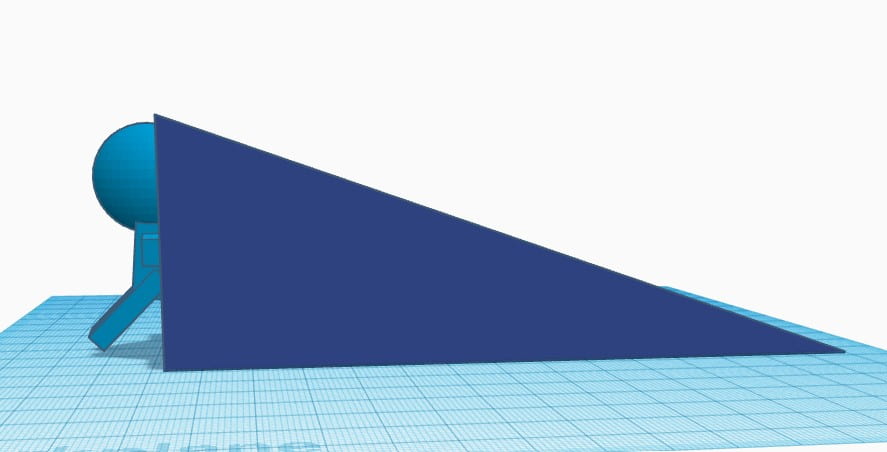
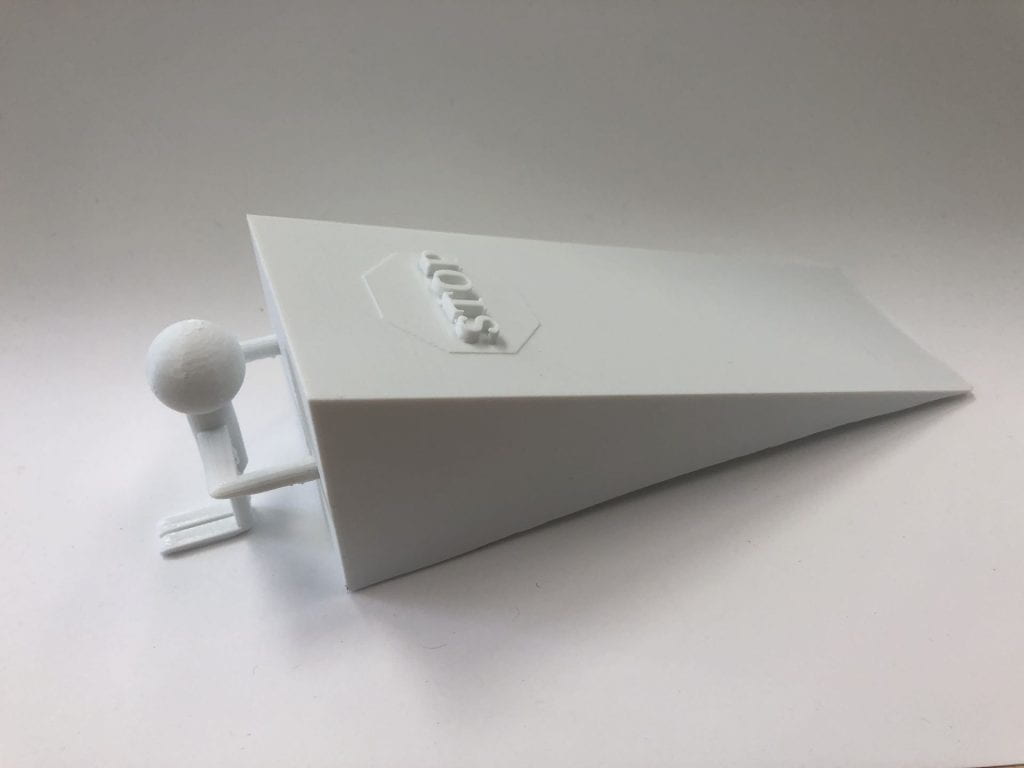
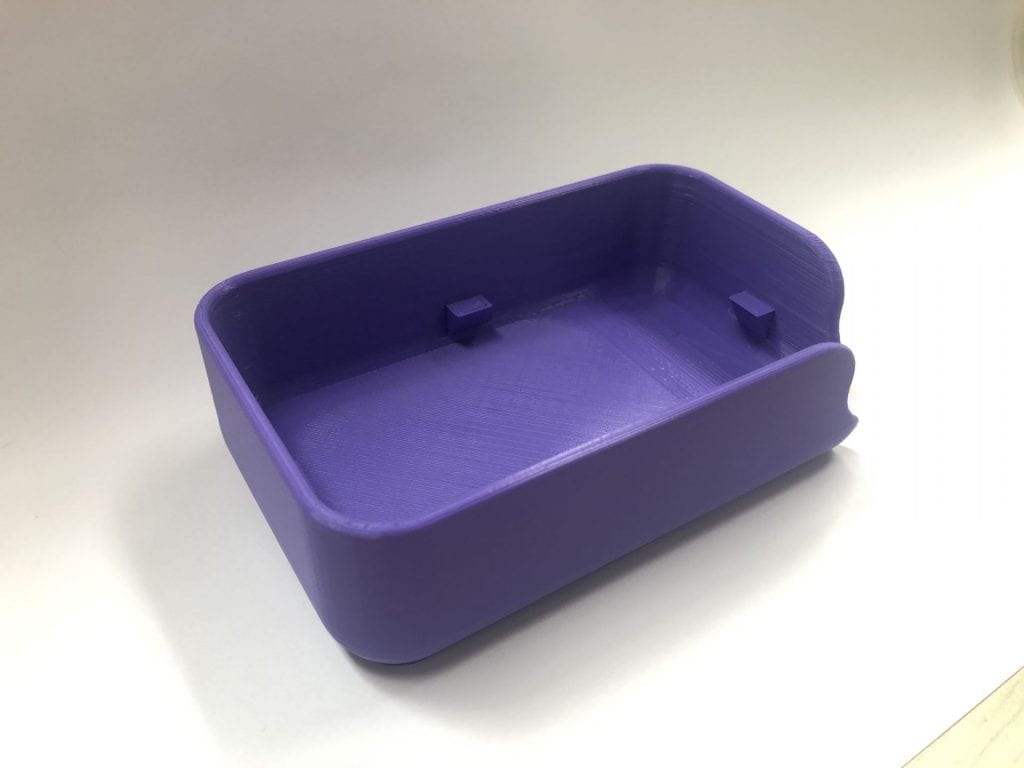
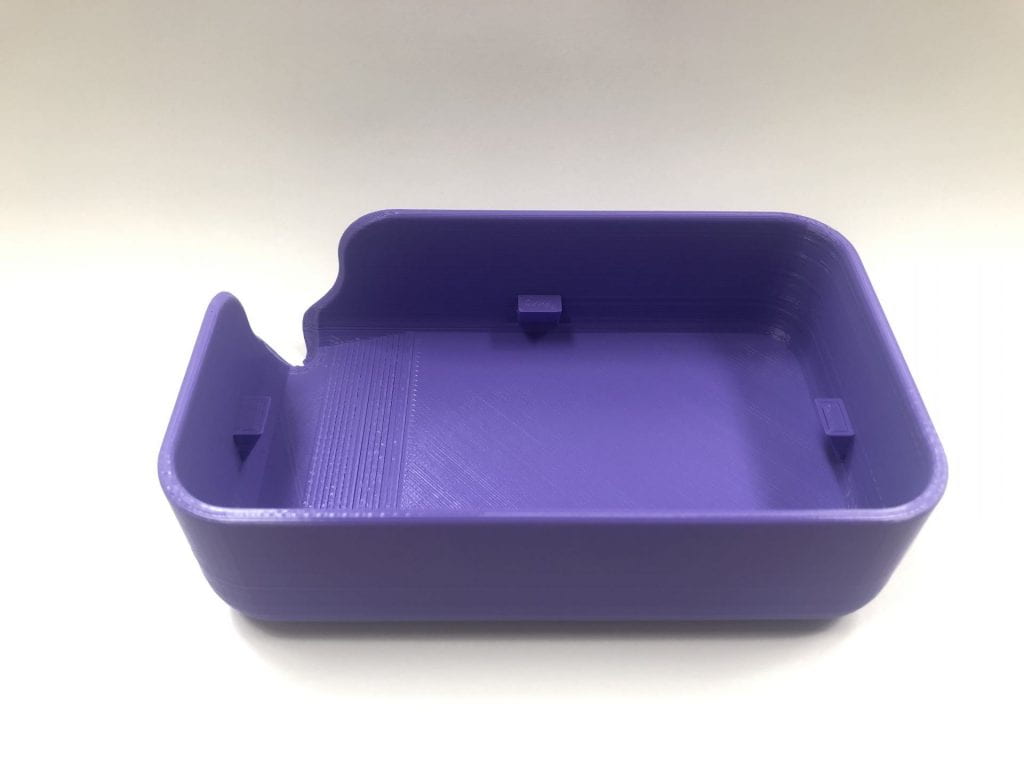
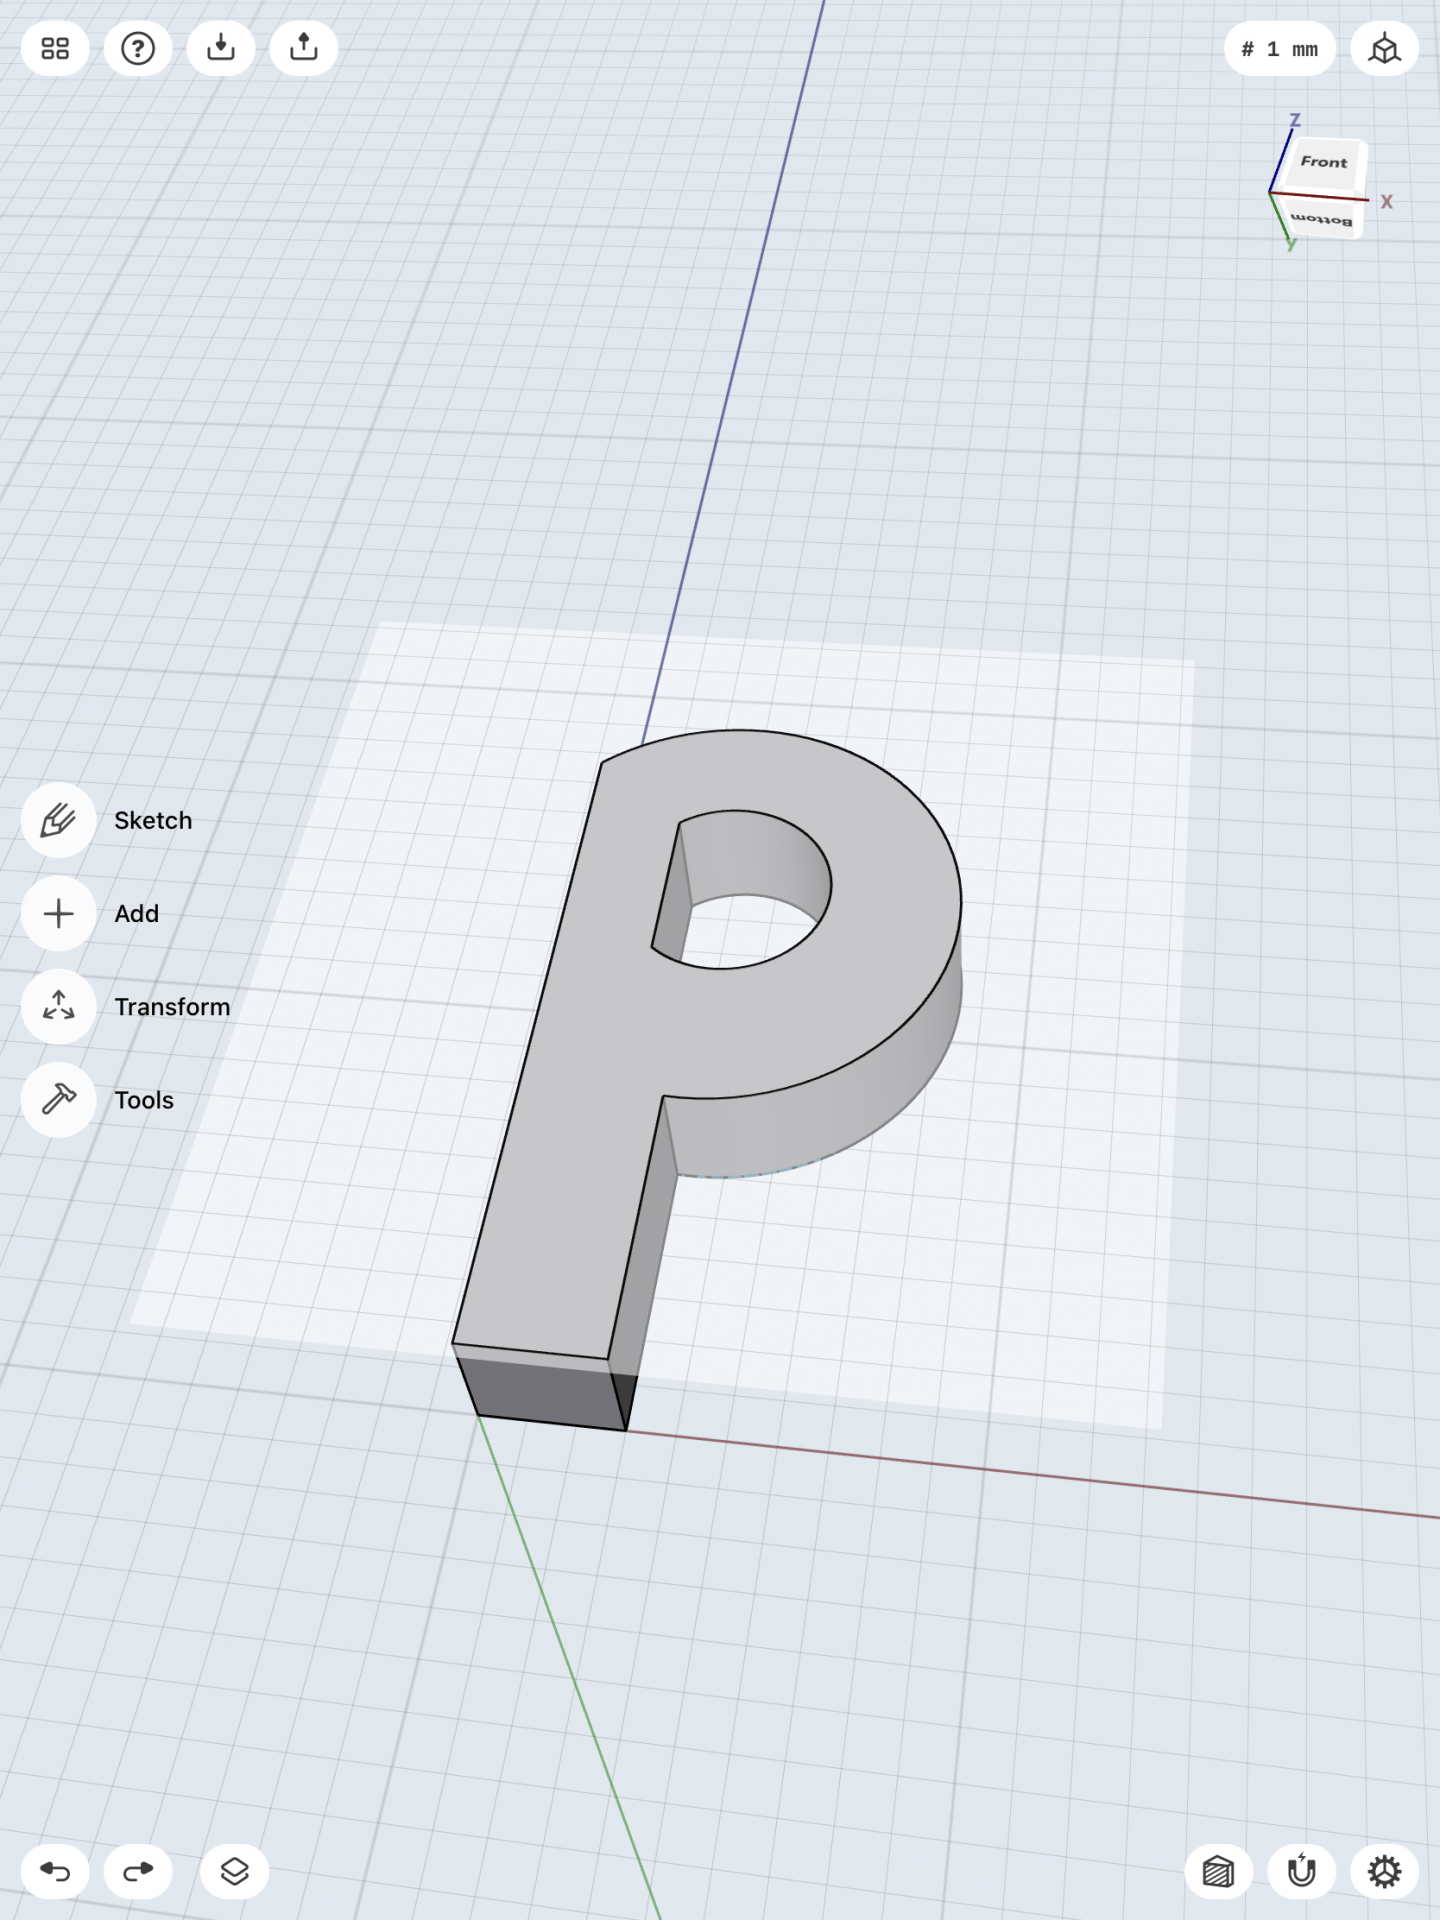
This is the final result of my concept of making a 3D model of the letterform of the upper case “P”. I have kept my iteration from before by twisting the letterform by adding some details to it. However when I first printed it, the letterform wouldn’t stay upright and would tip over. At the end I added a stand/mount below the letterform so it would stand upright, and it did. As you can see there are some rough edges around the letterform, this is because of the support that was printed with the letterform and I had a hard time removing them and smoothing out the letterform. I would most likely print the letterform in a different was towards the future. Overall, this print worked out great and it came out just as I expected. This concept was very fun to do, and I can’t wait to print other types of projects in the future. You can download this model here on Thingiverse

https://www.thingiverse.com/thing:4843863

Shapr3D First Models

Tutorial Bracket Mount

The first model below was process of creating the bracket mount from the learning section in the Shapr3D app. It was fun learning from the tutorial of how the process of making a certain 3D model was made.

Step 1
Step 2
Step 3

The first step was to make a sketch of the main component of the bracket mount. I first sketched of the dimensions of the sizing of the model, then on the next step, I stretched out the body by 30mm and made it into a 3D figure. I then used the offset tool to measure the inside of the model and incorporated a hole inside of the model. The next step was to add the hook and the rest of the top components. I added a work plane, hovering the model to begin the next step. The images below were the next steps I have approached.

Step 4
Step 5
Step 6

The next step was working with the work plane. I combined a circle and a long rectangle into one figure and then lowered that work plane figure onto the model, so it would cut through the model, making its shape. I then intersected the two separated models together into the image shown on step 5. I then used the concentric tool to group a circle within the model as well as two more circles at the lip of the model to make its opening. The final step was to make the base of the model.

Step 7
Step 8
Final Product

I sketched out the base of the model then made it into a 3D item by making its base 50mm by 40mm in size. I then made 4 holes on the base plane and used the concentric trait to align them to each corner. I then smoothed out the edges around the 4 holes to make the function of the base more better. Now it was time to connect the two models together. I attached both of the models together and then smoothed out the edges around the model to give it a authentic look as well as changing the models color to give it a better look. In the end it turned out great, and looked exactly as the tutorial model.

3D Modeling an iPad Stylus & Mount

This model was a big challenge for me. The process of creating this model was a lot more difficult than the bracket mount. It required more steps and details to achieve its dimensions as well as the whole model itself. The process took a lot longer than I thought it would be, but all in all I was able to achieve to create an iPad stylus with a mount in it. Below are the steps that I have taken to achieve the end product.

3D Modeling a Stylus & Base on iPad | Shapr3D Step-by-Step
Step 1
Step 2
Step 3

I first sketched out the overall sizing of the iPad stylus. The height was 166mm and I sharpened the arc at the tip of the pencil to give it a better look. I then highlighted the sketch, used the extrude tool, then selected the long side of the stylus, used the rotate around axis tool, then finally used the revolve tool to make it into a stylus shape. In step 3, I added some details by combining a skinny rectangle at the side of the stylus to give it more of an iPad stylus look. The next step was to make the stylus mount.

Step 4
Step 5
Step 6
Step 7
Final Product

I went back to the 2D view of the model to create the mount for the stylus. I created the dimensions from the mount as seen above, and I then highlighted that shape, as well as highlighting the side of the long side of the pencil, and used the revolve tool to make the shape of the sketch go around the stylus. I had to make some adjustments since the pencil wasn’t completely inside of the mount, so I had to move the stylus around to fit into the mount. It fit perfectly and at the end, I curved the edges around the mount to give it a cleaner look, as well as changing the color of the stylus and the mount. This process was very challenging for me, I had to learn new types of tools that I haven’t learned before to create this model. However, I have learned a lot from these videos, and I look forward to what I will make with these skills that I have learned in Shapr3D.

3D Scan

This was my first 3D print and scan of a model of myself. The process was very interesting. Normally for us students, we would need to download the app, Scandy Pro, on our phone. However, it requires an iPhone that is iPhone X or later, and I did not have that type of model. So during class, I decided to use the school iPad Monocle Structure Scanner to scan. I first wanted to scan my Airpods case with the iPad, but due to the camera on the iPad not being able to correctly scan my Airpods case, I decided to scan a model of myself. After attempting to scan my Airpods case, our professor reconfigured the program and then approached to scan a model of myself. The process was very interesting, in the app, there is a 3D cube that captures the model within the box. So, to capture an accurate model of myself, I had to sit on a chair and not move to the best of my abilities. My professor then started to capture me sitting in the chair, circling around me, trying to capture every part of myself. It is an interesting process, that usually takes two people to complete. After capturing myself, the model looked very accurate of what it has captured. The files were OBJ format so I downloaded the files, then imported the files to my google drive, saved the folder onto my desktop, and then imported it onto Tinkercad. On Tinkercad, I increased the size of my model since it was very small when it was first imported. I then downloaded the model as an STL file, then transferred it to the Ultimaker program at the lab. I decided to add a raft at the bottom of my model so the print would go smoothly, and my model will stay upright thanks to the bottom raft. After the print, the model came out great, the print looked just like as in Tinkercad. I’m amazed of how it captured the details of my hoodie and beanie that I was wearing. I can’t wait to see what other types of 3D scanned objects I will be printing towards the future.

Daniel’s Self Expression

Research & Concept

It was a bit difficult for me to think of simple items that could be incorporated with a sense of playfulness with its function. As I was thinking of what object to use, the two objects that I thought about was a door stop and a wall hook. I still haven’t made a final decision yet for which item to add playfulness to, but I am debating between these two. These two objects are very simple to use by looking at it and understanding its function. Wall hooks are made to use by hanging items against the wall, whether it be clothes, appliances, and so on. A door stop has a simple function of preventing a door closing by itself by inserting a door stop at the bottom of the door. These objects are used everyday at all locations. Although they might look simple and easy to use, I thought it would be a good chance to add a sense of playfulness to these two items.

As you can see at the images below, for the door stop, I thought about three different ways to add playfulness to a door stop. The normal dimensions of a door stop is usually a height of 1.5 inches, length of 5 inches, and a width of 2 inches. I plan to keep those dimensions the same to keep the functionality of the door stop as it is, but add a sort of playfulness to it. The three ideas I have thought of was a person pushing against the doorstop, a person pushing backwards against the doorstop, and a person on top of the door stop holding a stop sign. These indicate that the person attached to the door stop is preventing the door from closing in some sort of way. I think adding these elements will add a sort of playfulness for a simple door stop. The image below the door stop is the wall hook. I thought about three different ways to add an element of playfulness to a wall hook. The first concept is a simple wall mount, but with a finger acting as the hook to hold the item. The next concept is a wall hook but shaped as a cat. The tail of the cat will act as the hook, holding onto the objects. The last concept I thought about was an elephant. The shape of the wall hook would be a figure of an elephant, and the trunk of the elephant would act as a hook to fulfill the function of the wall hook. I still have not decided what my dimensions for the wall hook will be, since the three concepts that I have thought about for the wall hook would be different than the others.

Iterations

This past week I decided to choose to add playfulness to a doorstop instead of a wall hook. I believe that many people have added playfulness to a wall hook already, and I think that adding playfulness to a door stop would be creative. For my first print, I decided to go exactly as I planned on my sketches. As you can see the model below, this was my first draft of the model. I decided to make the length of the doorstop 127mm, width of 50mm, and a height of 38mm. I also incorporated a stick figure acting as it is pushing and stopping the doorstop, preventing the door from closing. The stick figure pushing and preventing the door to close is my playfulness to an everyday object. However after my first print, it didn’t print as I hoped. The door stop itself printed as it is, but the stick figure itself had a bit of an issue. It was able to print the head and the two arms. However, the bottom half of the stick figure did not print correctly. I believe this is because I may have made a mistake on my measurements and the structure of the stick figure itself. Due to an inconvenience, I was not able to make another print. I also learned that the wedge on Tinkercad is not evenly sized. As I printed the door stop, I could tell that the lip of the door stop wasn’t a straight line. It looked as if it was around 175 degrees instead of a straight 180.

For my next prints, I plan to make the door stop itself a big larger. It does fulfill its purpose of preventing the door from closing, but the size is a bit too small. I also plan to make sure the doorstop dimensions are evenly measured and does not look slightly angled. I also plan to make some edits of the entire model on Shapr3D. I want to make my stick figure look more realistic, as well as more smooth than it was before. I want to emphasize the stick figures details, and make it easy to know that the stick figure is acting as like a door stop and preventing the door from closing. Below are some edits I have done to my model. I plan to make the height of my model to be 50mm, a length of 150mm, and a width of 50mm, so it would be more stable of stopping a door from closing. I also changed the model of my stick figure, putting its back against the door stop, another way to interact of how it is preventing the door from stopping.

Final Print

This was my final print for my everyday object with added playfulness. This process was very interesting. The very first doorstop I had printed was a bit smaller from before, so I decided to expand the dimensions of my doorstop. Before it was about 127mm in length, the new final model is now 181mm including the stick figure attached to it. The width from the first model was about 50mm and a height of 38mm. The new final model now has a width of 53mm and a height of 50mm. These changes have made the function of the doorstop much better than before. I had many trail and errors throughout printing this model. Most of my prints from before never really printed perfectly. There was always some sort of issue with the print. The images below are the results of my final print.

From before the prints weren’t printing correctly. Sometimes the bottom of the doorstop wouldn’t print to the bottom of the adhesion, making it look lopsided. The main problem was the stick figure attached to the doorstop. I had printed four different models from before, and the stick figure would always be an issue when printing. The stick figure wouldn’t be printed. Sometimes the bottom half of the body wouldn’t print and there would be filament around it, as you can see above from my first prints before a while ago. Throughout these four different prints, it is always the stick figure that wouldn’t print correctly. I have used Tinkercad with making these stick figures and I figured that was the problem. Whether it be the shapes not forming correctly, or grouping correctly. In the end I decided to use the Shapr3D app on the iPad. I figure that if I were to hand sketch my own 3D stick figure it would print much cleaner and easier. The image below is what I have made in Shapr3D.

The figure of this stick figure looked much better and well constructed as it was before in Tinkercad. I then uploaded this model onto Tinkercad and grouped it with my doorstop. I also added a small stop sign on top of the doorstop to give it the detail and definition of the purpose of the doorstop, preventing the door from closing. I then finally printed this model and it came out just the way it looks. I’m glad that in the end I have fixed my mistakes and issues and that the print worked out great. This was a fun project to do and throughout my experiences I am starting to get used to the methods of 3D printing when using both Tinkercad and Shapr3D. You can find and download my model here on Thingiverse.

3D SVG

For this assignment, I decided to recreate and make a 3D model of the Mozaic Dance Team logo that I am involved in here at JMU. First, I uploaded the PNG of the logo I had into Illustrator and began tracing the outline of the logo and copied it to a new page as a vector image. I also changed the colors from white to black of the logo since it was a white canvas on Illustrator. During the process of importing it to Tinkercad, I had some issues with the model. For instance, some parts of the model, where there should be an open space, was filled instead. With the empty space being filled, it did not look like the original logo. Through trail and error, I had to edit the shape of the outside large triangle and the letter ‘M’. From the Linkedin learning, I highlighted each shape, went to the object tab, and changed the path of the layer to outline stroke, so it can highlight the shape itself instead of a square box surrounding it. After I changed the layers with an outline stroke, I then went to the pathfinder tab and united those layers together. From there I was able to convert it into a SVG and imported it into Tinkercad.

When I imported my SVG to Tinkercad, I had to change the dimensions of the logo from a length of 1728mm, and width of 1296mm, to a length of 266.27mm and a width of 200mm to fit onto the work plane. After importing it, it looked exactly as my SVG. With the logo, there is a small triangle inside of it that didn’t connect to any part of the model. So, I decided to add a cylinder to the logo, surrounding it and grouping it all together to create a keychain so the logo can stay attached and keep its shape. I then added another cylinder at the top of the model, grouping it and making a hole, so the keychain can have something to hold it up. At the end I resized the whole model with a length and width of 80mm to fit onto the plane. I also raised the height of the logo from 10mm to 15mm, to give it a better three-dimensional look.

Work on Illustrator

Daniel Doh’s Form|Function

F|F Research & Concept

3D Soap Holder https://www.thingiverse.com/thing:404028

This is a model of a 3D soap holder. The main purpose of this model is to have a personalized box for a bar of soap to put in your bathroom. People usually have a bar of soap sitting on their sink counter or at the side of their bathtub. After using the bar of soap, when people set it down, it would typically start sliding off the surface and falling on the floor. This model is a solution for that issue. This model will hold your soap box and collect the excess water from the soap and let it filter to the bottom of the box. There is also a small crevice at the corner of the box to remove the honeycomb filter, making it easy to clean the box and putting it back together. This is great for all basic types of soap bars, but there are bars of soap that have different sizes and weight today that could have an issue when using this model, and I think the current model should be slightly modified for all types of bars of soap.

Personalizations/Improvements

The image above shows some of my personal improvements for the soap holder model. The original height of the model is 30mm tall, but I feel like with the different sizes of bars of soap nowadays, it might not be tall enough to hold the bar of soap in place. That is why I wanted to make the height of the box taller to 35mm. Another improvement I would make is to close the corner of the box, but keep the shape of the honeycomb, with the corner bit off, so it would still filter the excess water from the soap. The reason why is because, with the original model, the corner seems a bit too open, and I feel like the excess water will leak out, and the water leaking out could end up under the box, making it become slippery, and thus, the box could slide around, or even fall off. As a result, my two main improvements would be to change the height of the soap holder, and the corner of the box.

Form | Function Iterations

Original Thingiverse Model:

The slideshow above is the original model created by, piuLAB. There has been no remixes done to this model.

The video above is a demonstration of how the original model works. It does its job of keeping the bar of soap in place, and filtering out the excess water from the soap after using it, however there is some issues that I see. Since this bar of soap has been used for a while, the size of the bar of soap has decreased. However, if I happen to use a new bar of soap, it might be able to keep it in place and stay inside of the box, but due to the density and the height of the new bar of soap, it could lead it to falling of the model due to its size and height. Also the lip on the corner of the model that filters out the excess water has some issues as well. I have used this model for a couple of days, and as you can see from the video, after using the bar of soap, there is still a large amount of water in the box that didn’t filter out. I had to manually pick up the box and pour out the excess water myself, when the model should be doing that itself. So I decided to change and make some iterations to the original model.

Iteration Process

First remix of Soap Holder:

The 2 slideshows above shows my first iteration of the soap holder and printing it out. The original soap holder had a height of 30mm, and I decided to raise it to 40mm to make sure any types of bars of soap can stay in place and prevent it from falling off the box itself. As you can see from slide 2-4 of the printed model images above, I had also made the lip of the corner of the box deeper with grouping a cone shape with the model, to make sure the excess water can filter out from the box. After using the remixed box a couples of times with a bar of soap, it did improve the functionality of the model. The bar of soap stayed in place, and the excess water was filtering much more than the original model. However there was still some errors with the box.

Second remix of Soap Holder:

The slideshow above are images of my second remix of the model. Due to the weather, I did not have the chance to print the model out. In this remix, I have kept the iterations from the second remix (keeping the height of 40mm and making the corner lip of the box deeper). The main change I have made in this remix is including an incline inside of the box. Since there is still excess water at the bottom of the box that won’t exit out of the corner, I decided it would be best to add an incline so the excess water can flow down the incline and exit out of the corner of the box.

F|F Final Print & Reflection

This is the final remix of my model without the filter.

This is the final remix of my model with the filter.

Reflection:

This is my final remixed print of the original soap holder created by piuLAB. My main changes in my remix was increasing the height, making the corner lip deeper for the excess water, and adding an incline inside the box for the water to exit out of the corner. For more details, visit my remix at Thingiverse.

This project was very interesting and creatively challenging for me. When I first downloaded the original files, it was very confusing to me of how I can remix this original model. My first edit of this model was to raise the height of the box from 30mm to 40mm so any types of soap boxes can stay in place, and wouldn’t slip off the box after being used. After that, I wanted to make more edits. I then saw that the lip corner of the box, where the excess water exits out of the box, felt a bit too closed for the water to exit. I wanted to change that, so in Tinkercad I grouped a cylinder with the corner lip of the box, so the lip is much deeper than before, and the excess water can exit out much easier than before. After printing that remix, it worked exactly as I planned. However, I wanted to make another edit to the box. I decided to add an incline inside of the box so when the water drips from the soap to the bottom, the excess water can glide down the incline and exit out of the corner. That edit was very challenging, I had a hard time figuring out which shape could fit inside the box in the best way possible. I then ended up grouping a box and a wedge together and changed the radius, so the perimeter of the incline would be the same size as the box. In the end, the print went really well and I’m glad that it functioned the way I wanted it to function.

This process really made me be more creative than I usually am, and it felt very satisfying to make a print that would function the way I wanted it to do. Although there were many trial and errors when changing the shape of the original model and adding new parts to it, it was worth it. I can’t wait to use my remixed model at home. This was my very first finalized remix of an original model that I have done, and thanks to this experience, I am now looking forward to remixing other original models, and even creating my own original model that I can be proud of.

Daniel’s First 3D Print.

This past Thursday, I was able to make my first print! I printed the JMU cube from the Ultimaker 3D printer. I was very excited to be able to print my very first 3D model. When I entered the 3D printing classroom, I felt overwhelmed. This area wasn’t my type of forte, so I did not entirely know where to start. However, throughout the class with the assistance of Professor Hooker, I was able to complete my first print. Although it felt overwhelming at first, it was a simple process of making a 3D print. All I had to do was just turn on the computer and printer, make some adjustments throughout the 3D modeling program, and then print the model. This was the first time I was able to look up close at a 3D printer, to see all the filaments align with each other. Although it does take quite a while, I found it very satisfying to see the steps and process o f how every line stacks on top of each other to create a 3D print. I was very satisfied of how it turned out. I love how it looks and I am now looking forward to my next print towards the future!

Hi, I’m Daniel Doh

I’m a junior at James Madison University. As an individual I may seem as a quiet person, but in reality I would think that I am a pretty outgoing person once you get to know me. My favorite hobbies/interests would be music, dance, cooking, and fashion. I play about five different instruments. In my free time, I enjoy learning/producing music, dancing, and cooking with all types of ingredients. I wanted to take this class because I find 3D printing to be very intriguing, and a great way to be creative. I want to learn the basics and fundamentals of it through this class!

Kawai RX-6 Grand Piano

The object that I chose to represent me is a Grand Piano. With a piano, you can play a wide range of melodies from aggressive to calm and soothing, and I feel like that represents me well. I tend to have a wide range of emotions and moods, and I feel like you can really tell ones emotions/personality by listening to the piece you play on the piano. I love to tell stories and I feel like that playing the piano is one way to express my storytelling!

As a creative type I am a Thinker!

All my links:

https://www.thingiverse.com/danielkdoh/designs

https://www.tinkercad.com/users/2B8d2OEjwvB-danielkdoh