Bracket
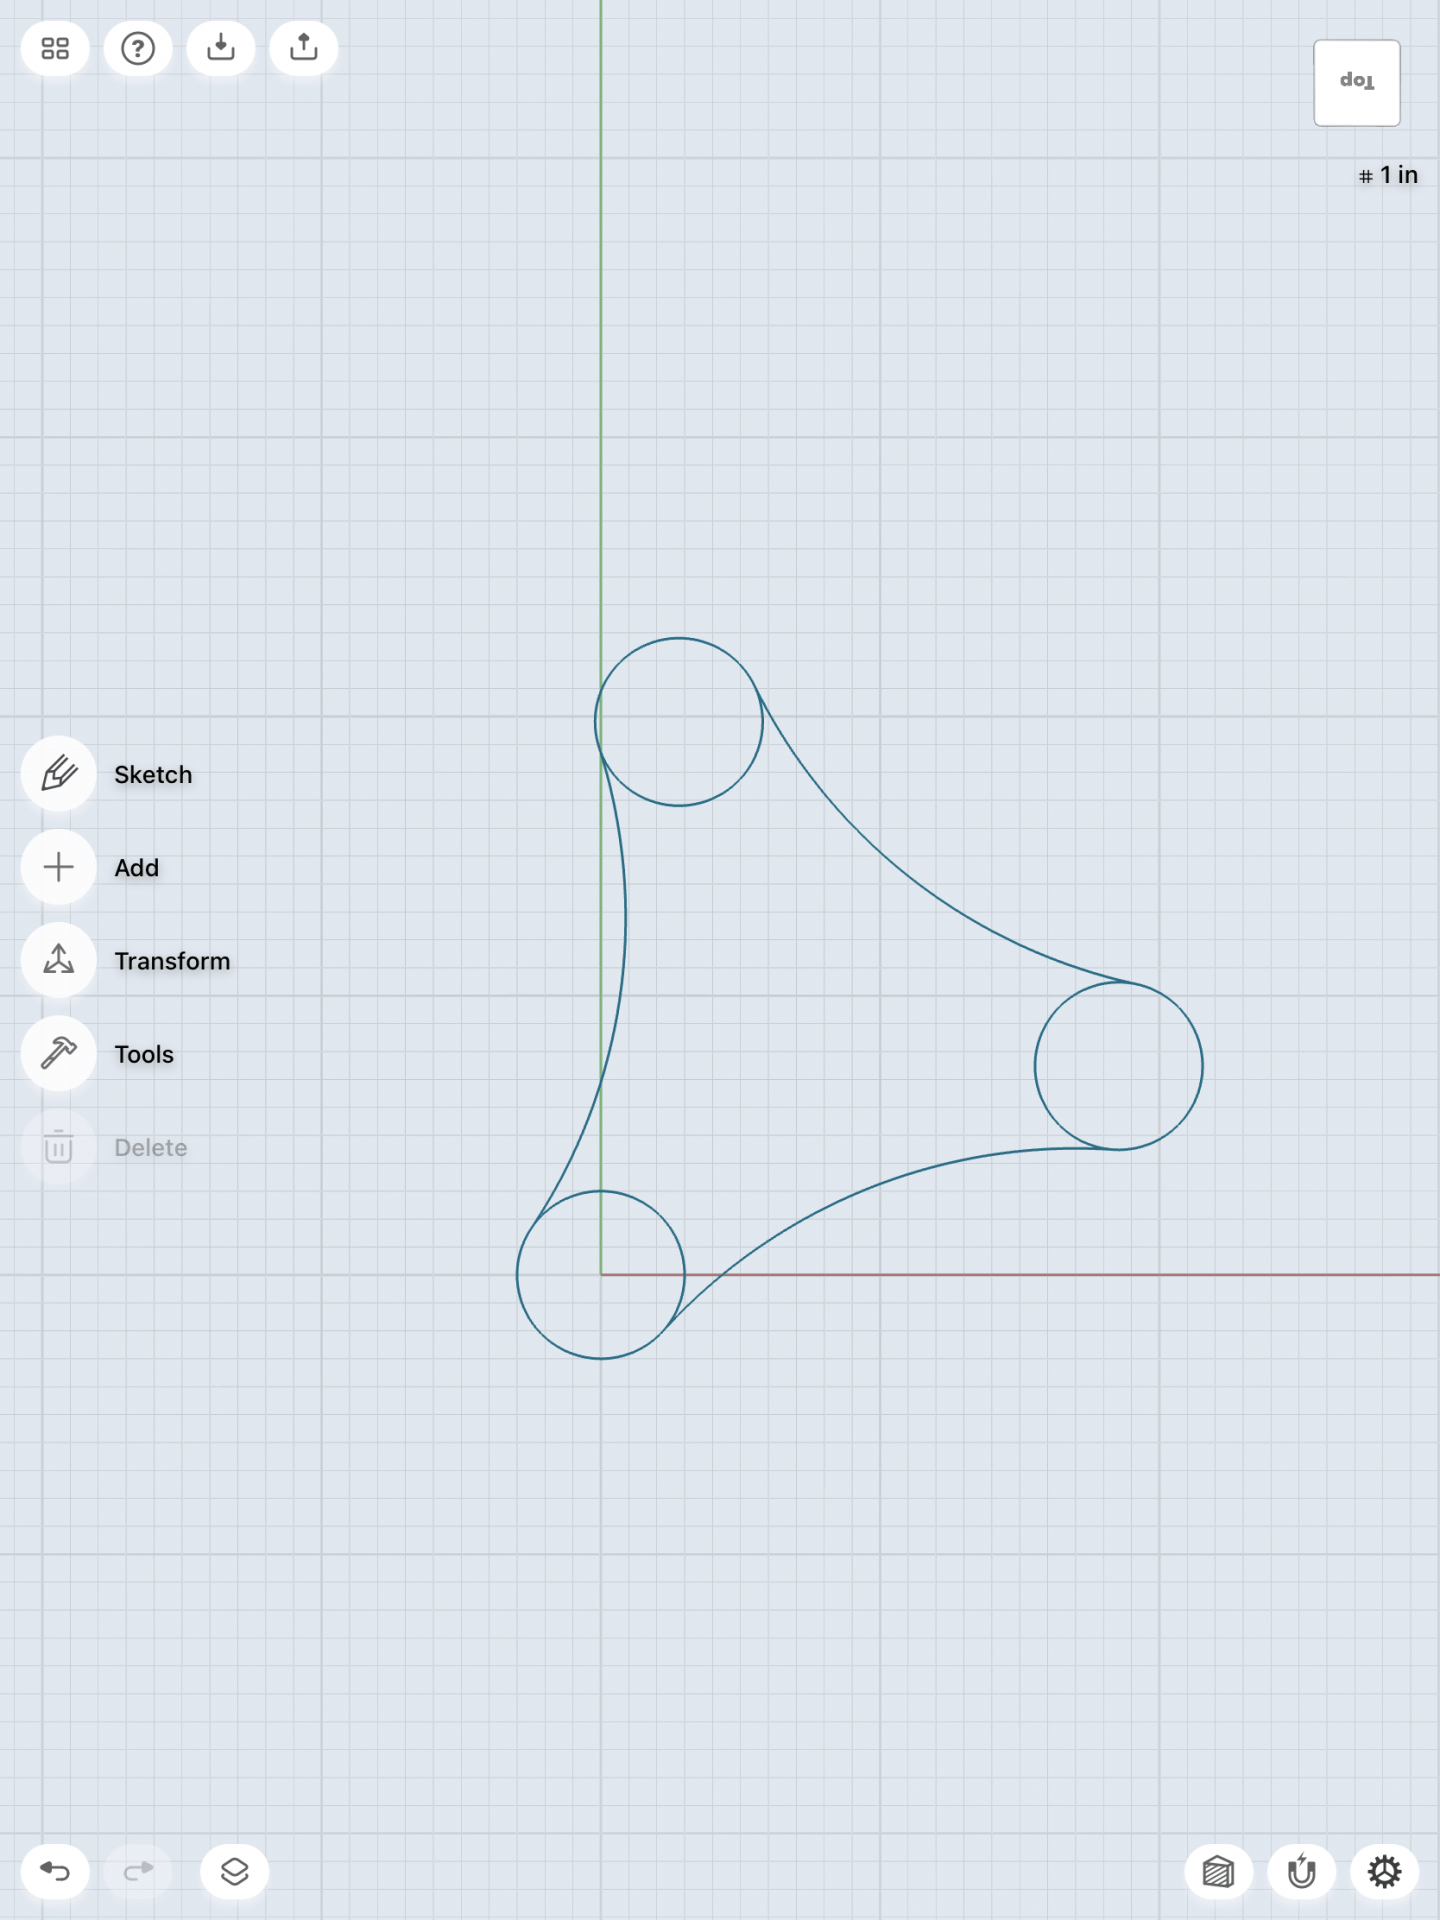
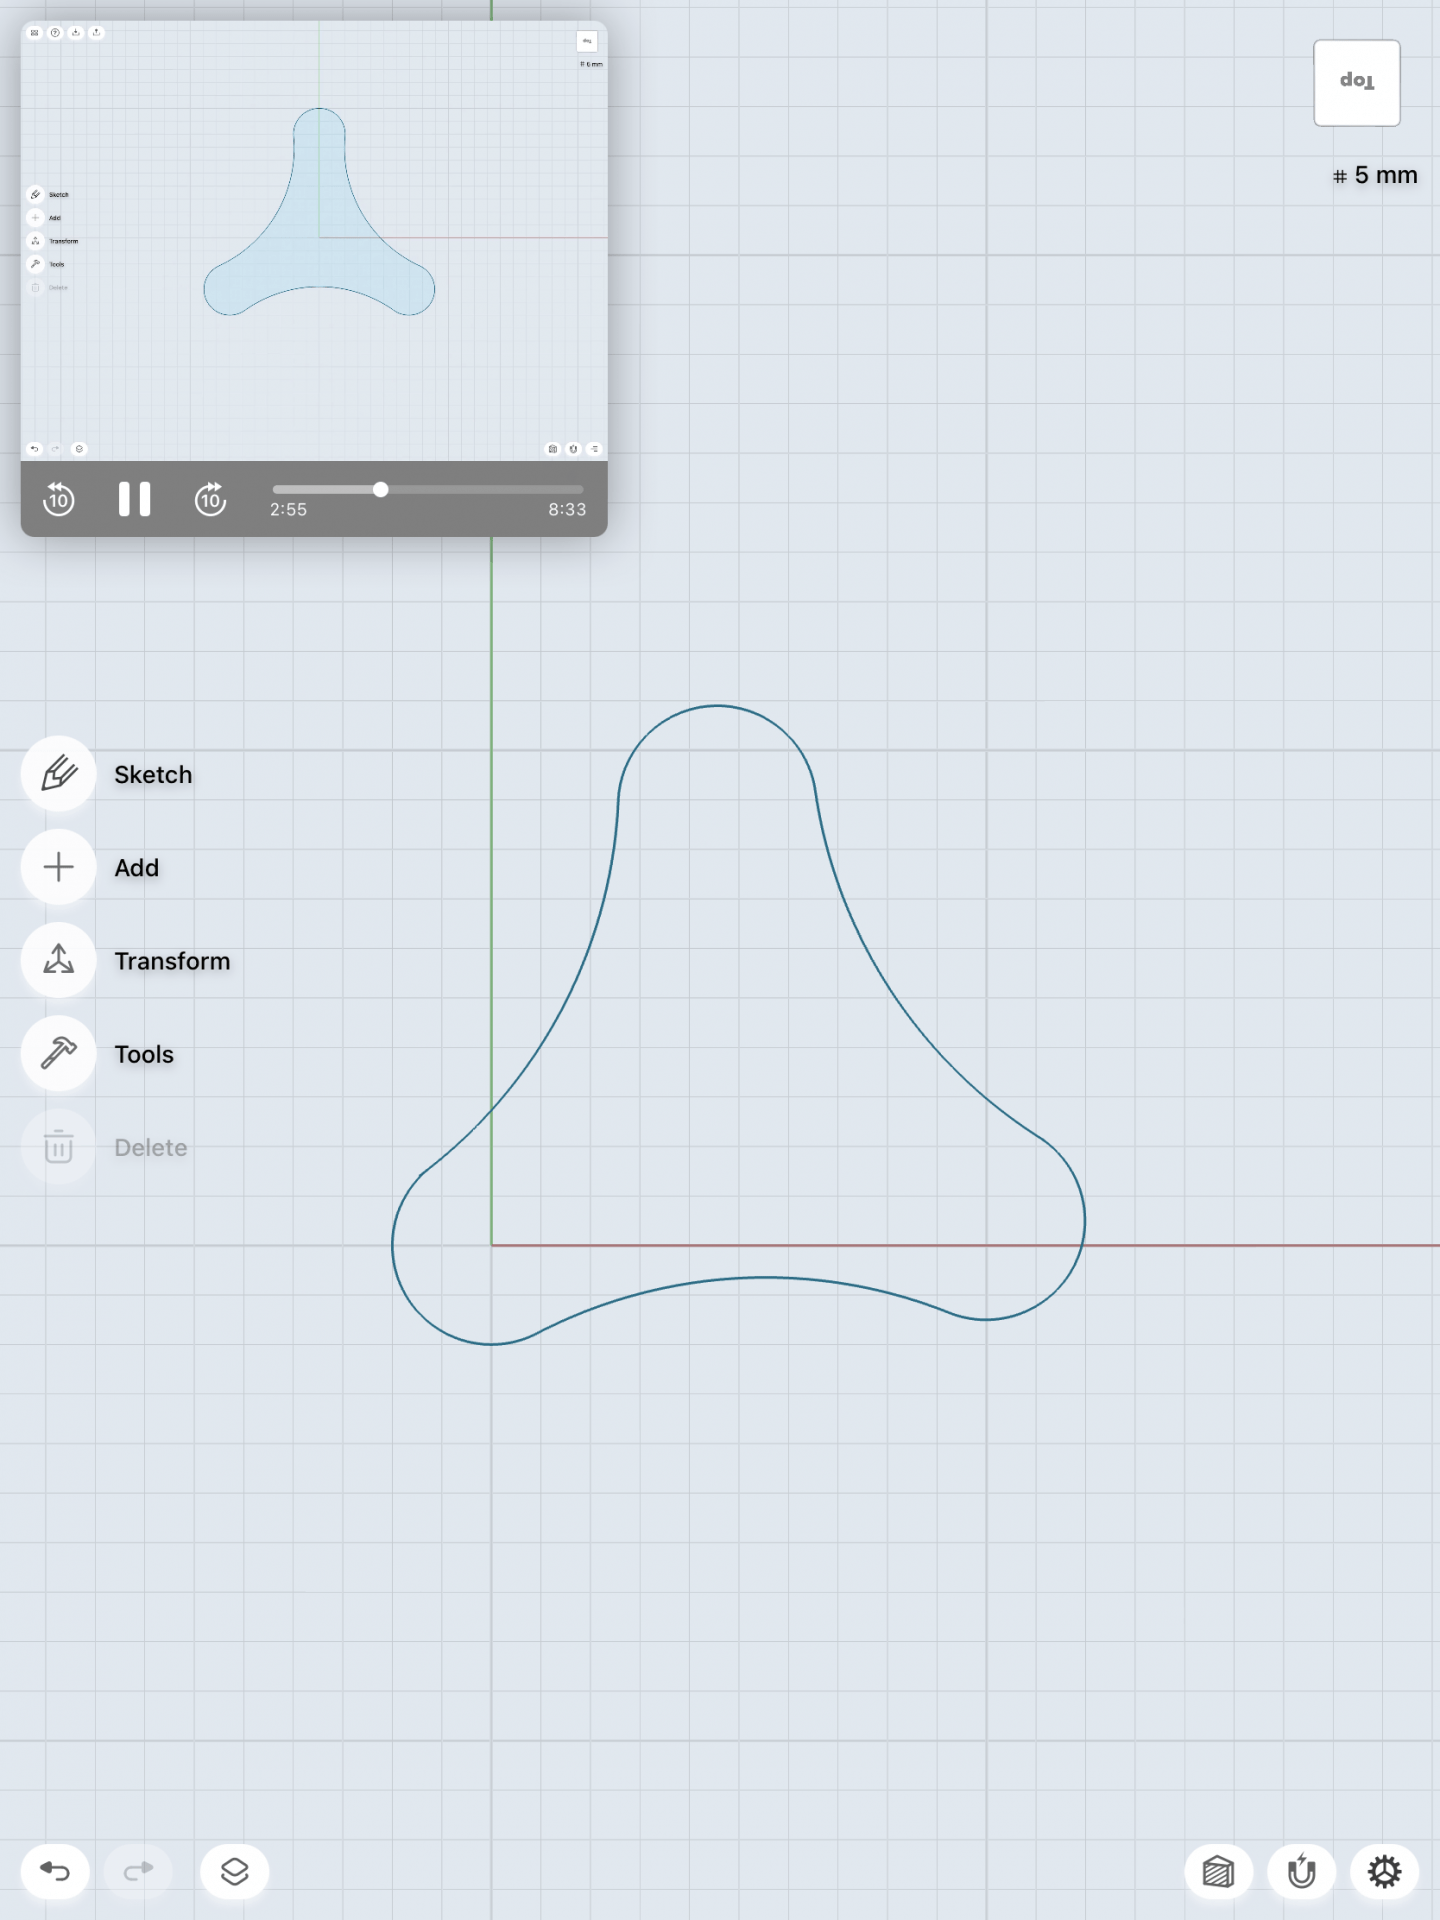
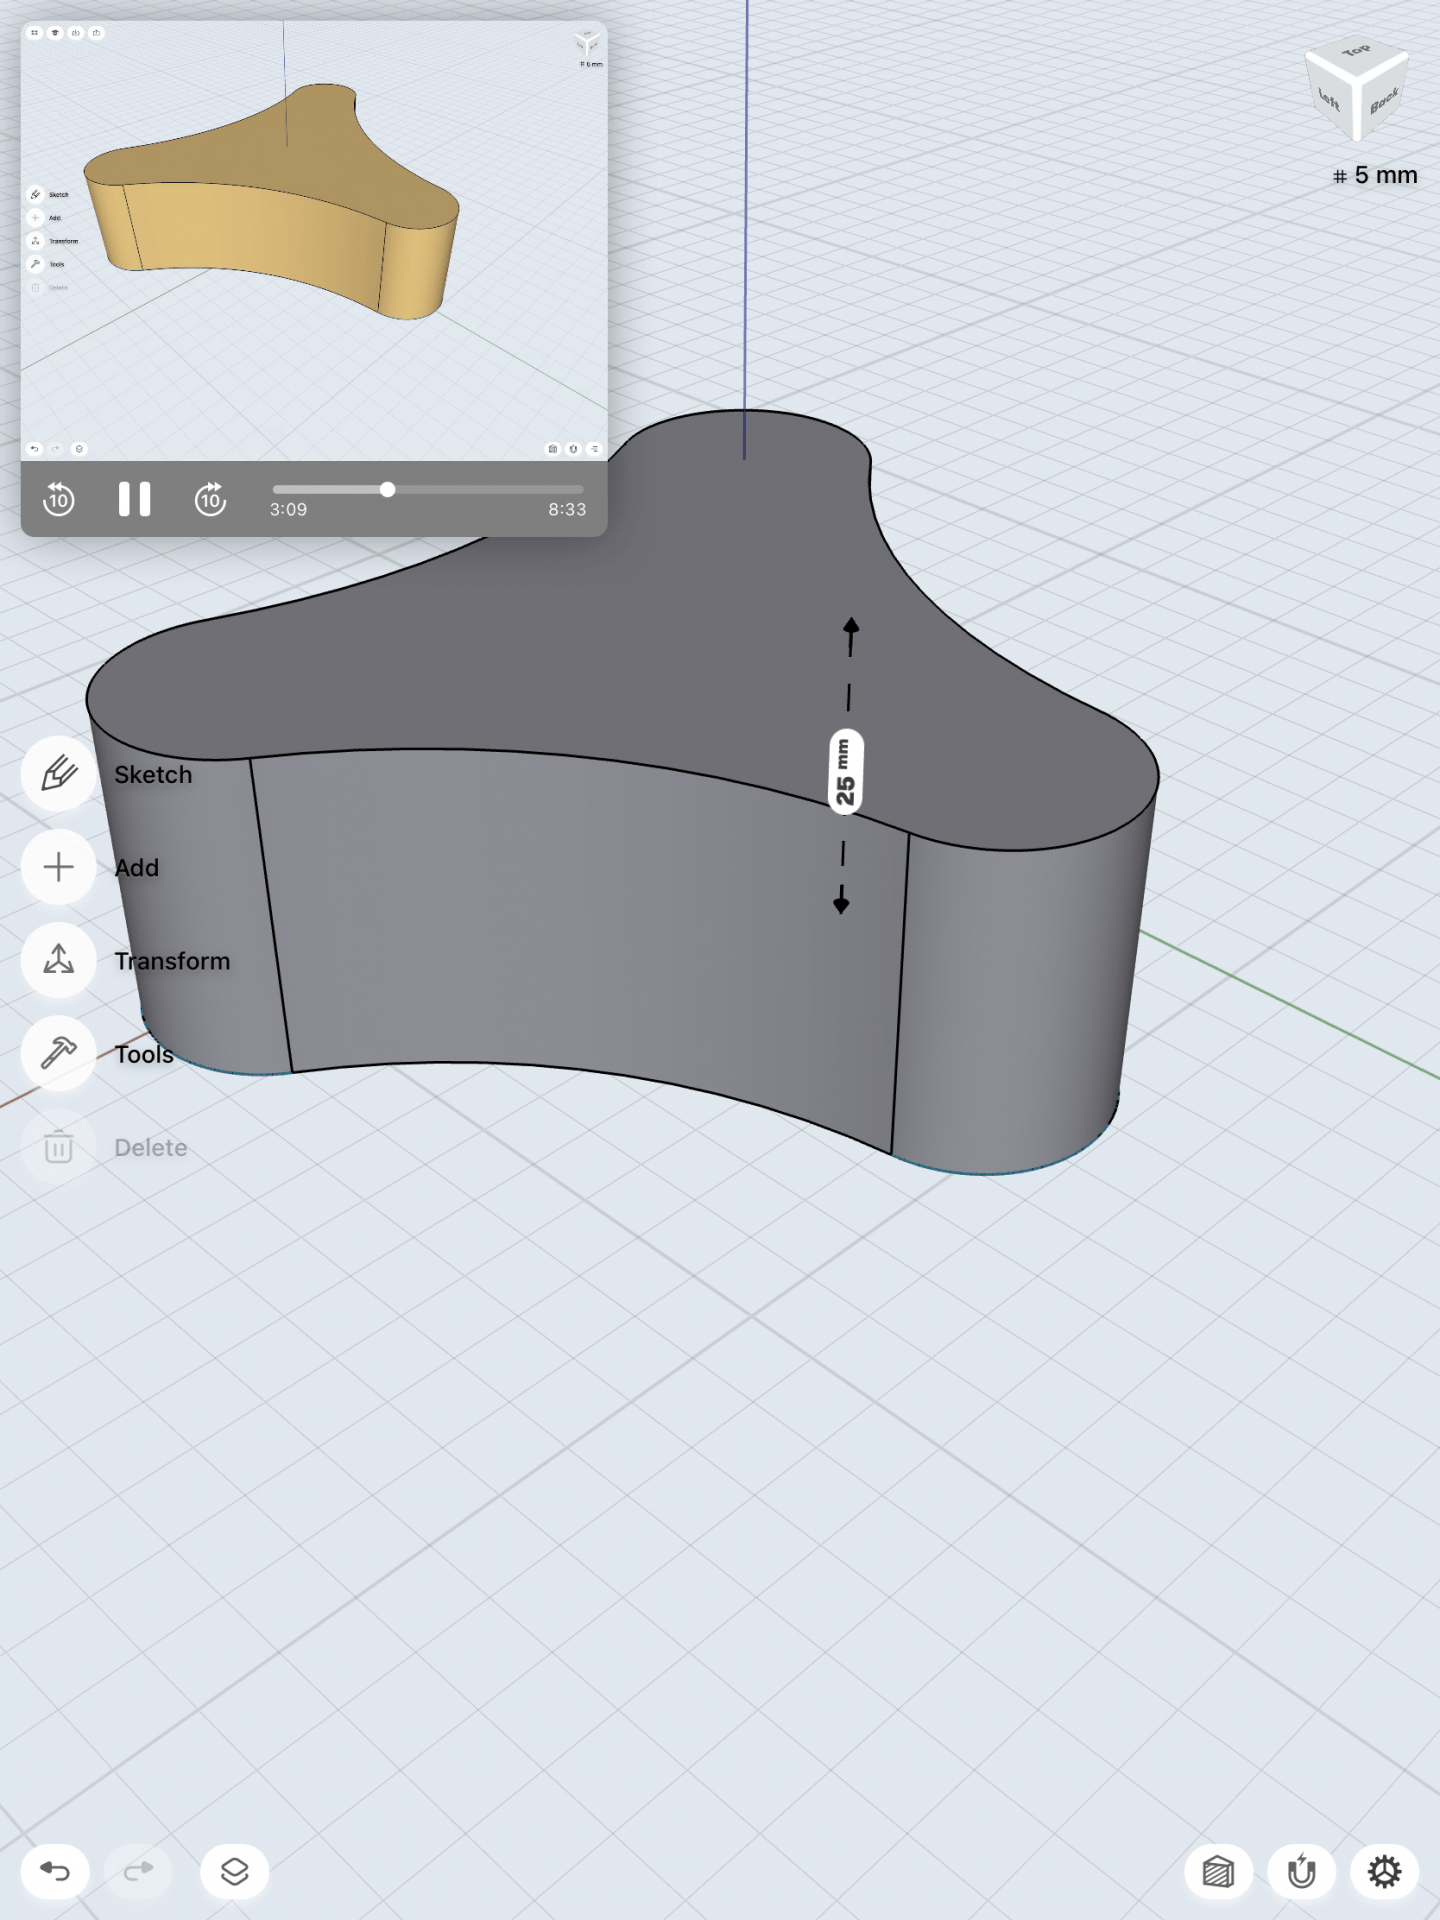
I had a lot of fun learning how to create this three hole bracket. First, I created three circles and made them all equal to each other so that the holes in in the bracket would be even. Next I had to create 3 arcs and create tangent relationships between the arcs and the circles so that they would come together as one whole unit. After removing the unnecessary lines I had the base sketch for my 3 hole bracket. I then took that base and extruded it upwards so that the 3d model would then be created. After doing that I created 3 more circles in each corner of the bracket and negatively extruded ( downwards) each one so that that I could create the holes that go within each corner of the bracket. After that I was done and all that remained was to round the edges of the 3d model to make it look nice and neat and my completed bracket was done! The images below are in chronological order. Model a Triangle-Cap


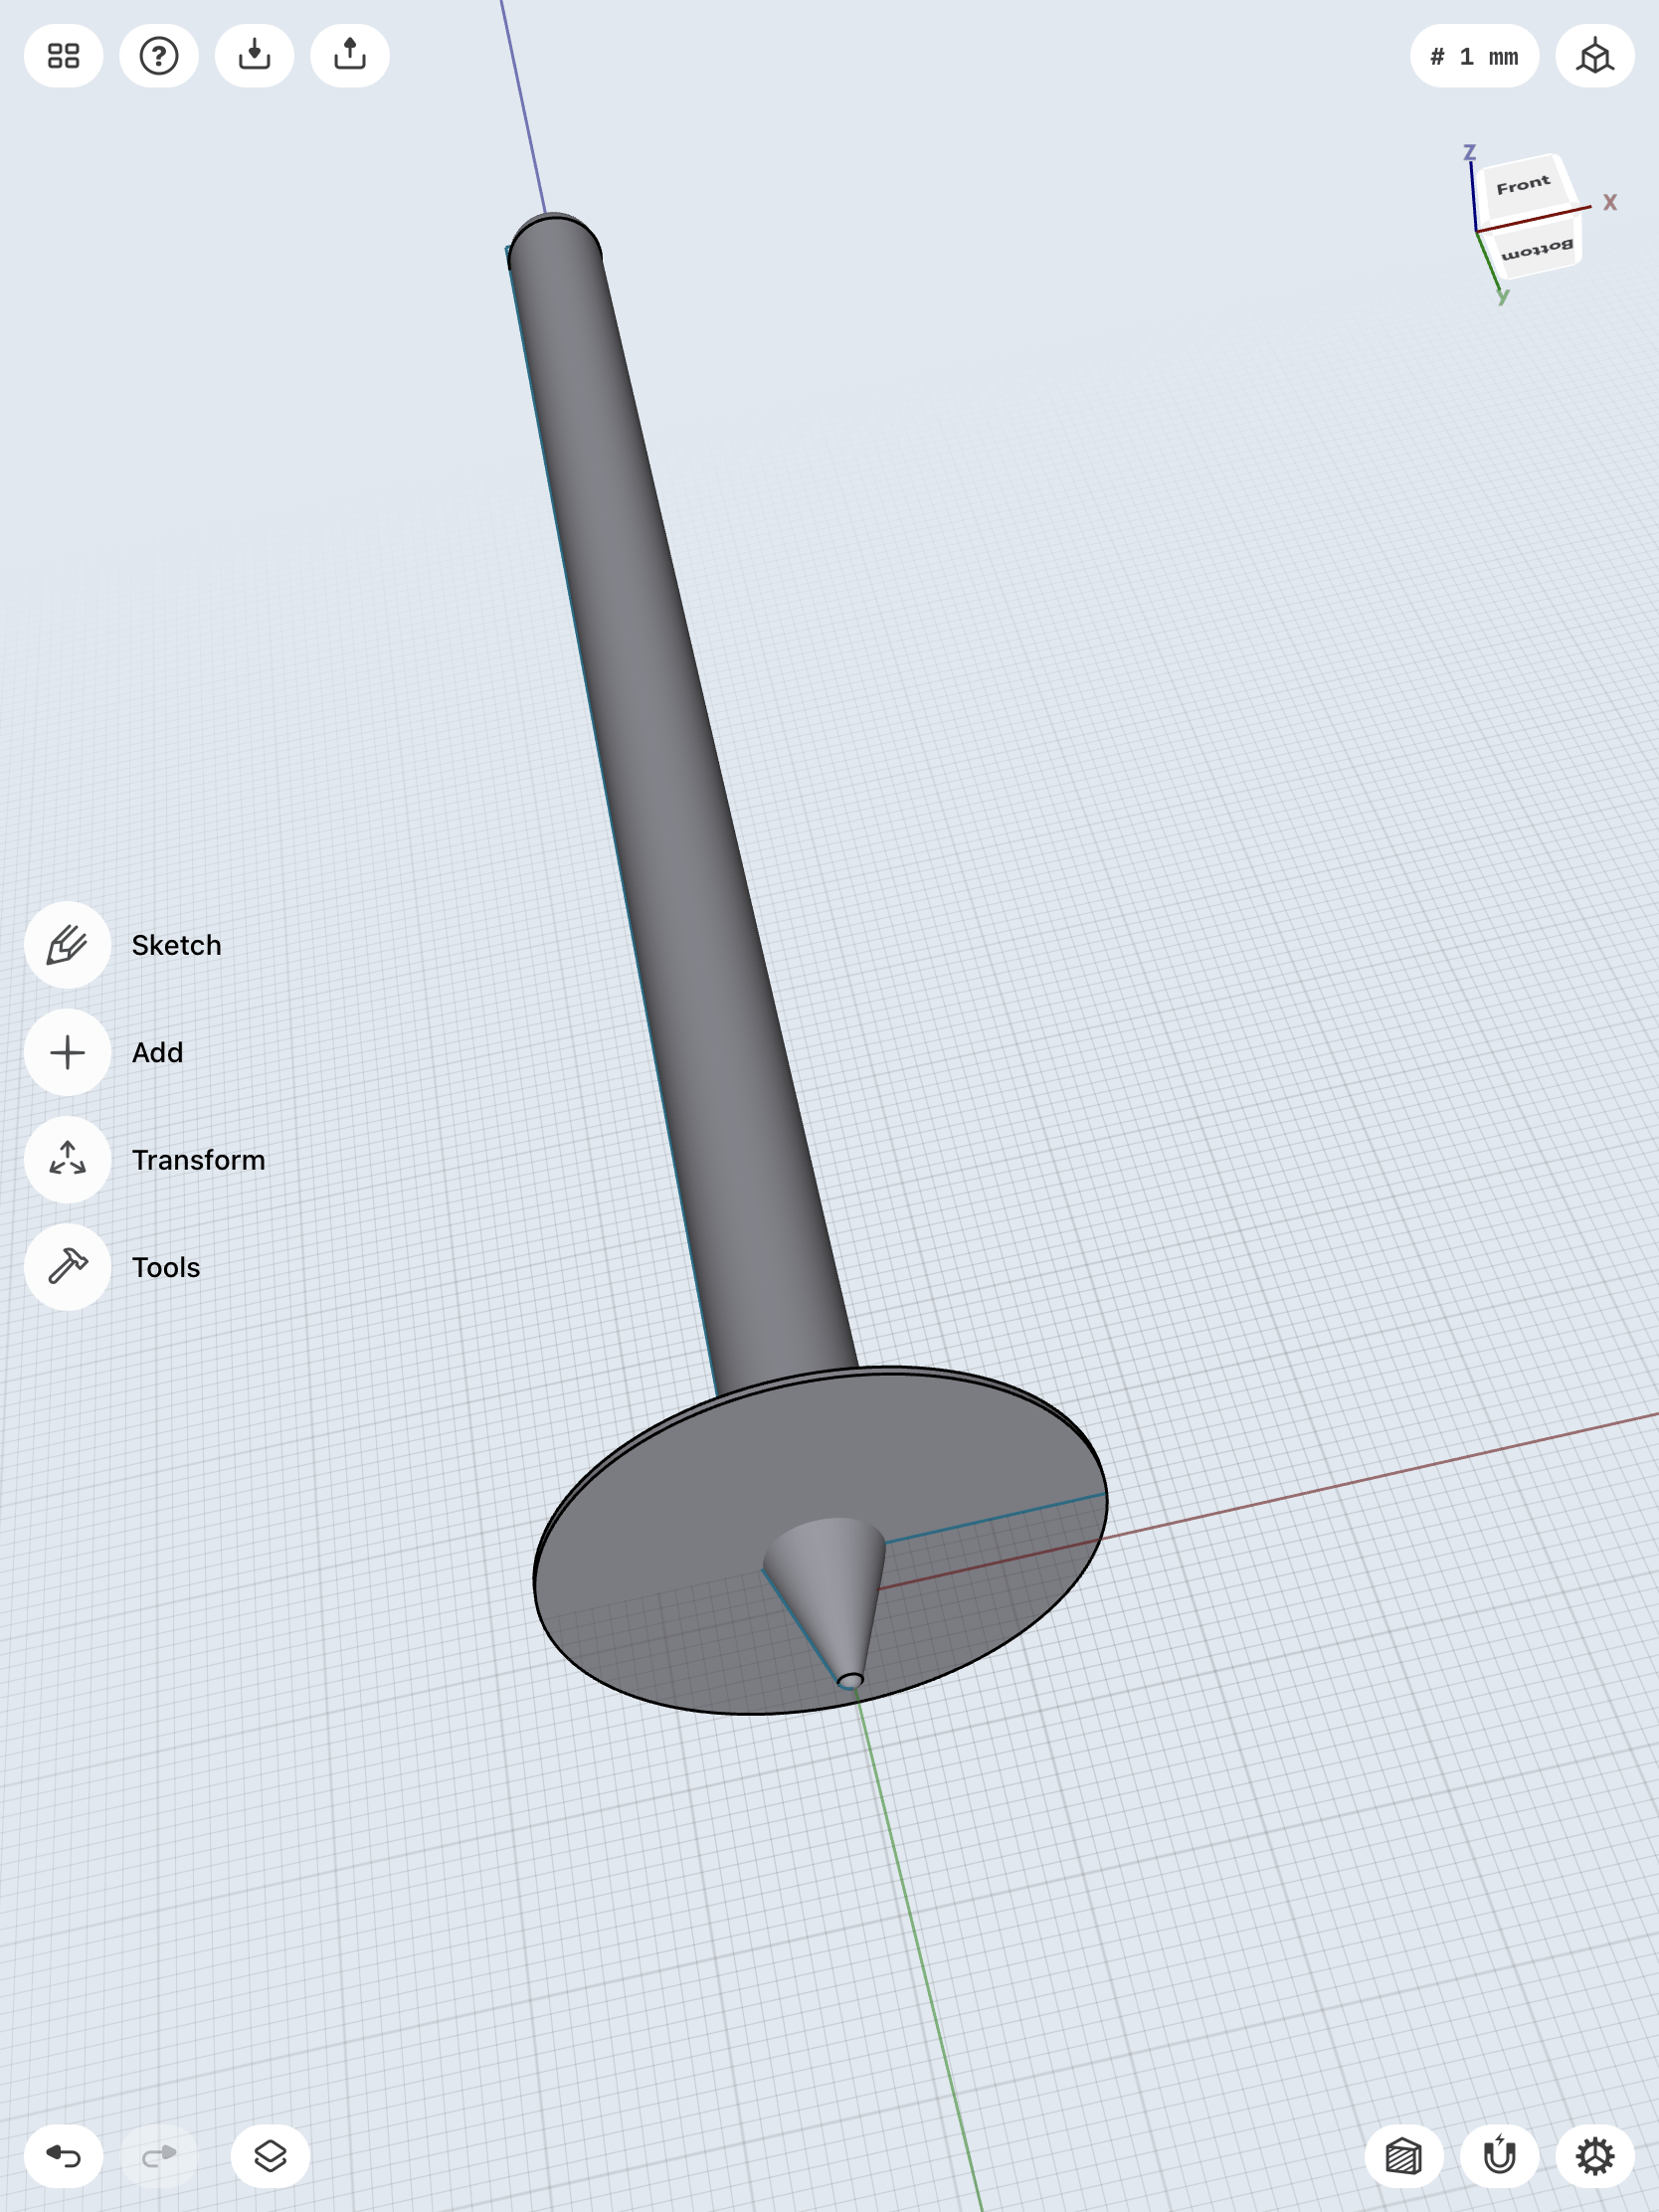
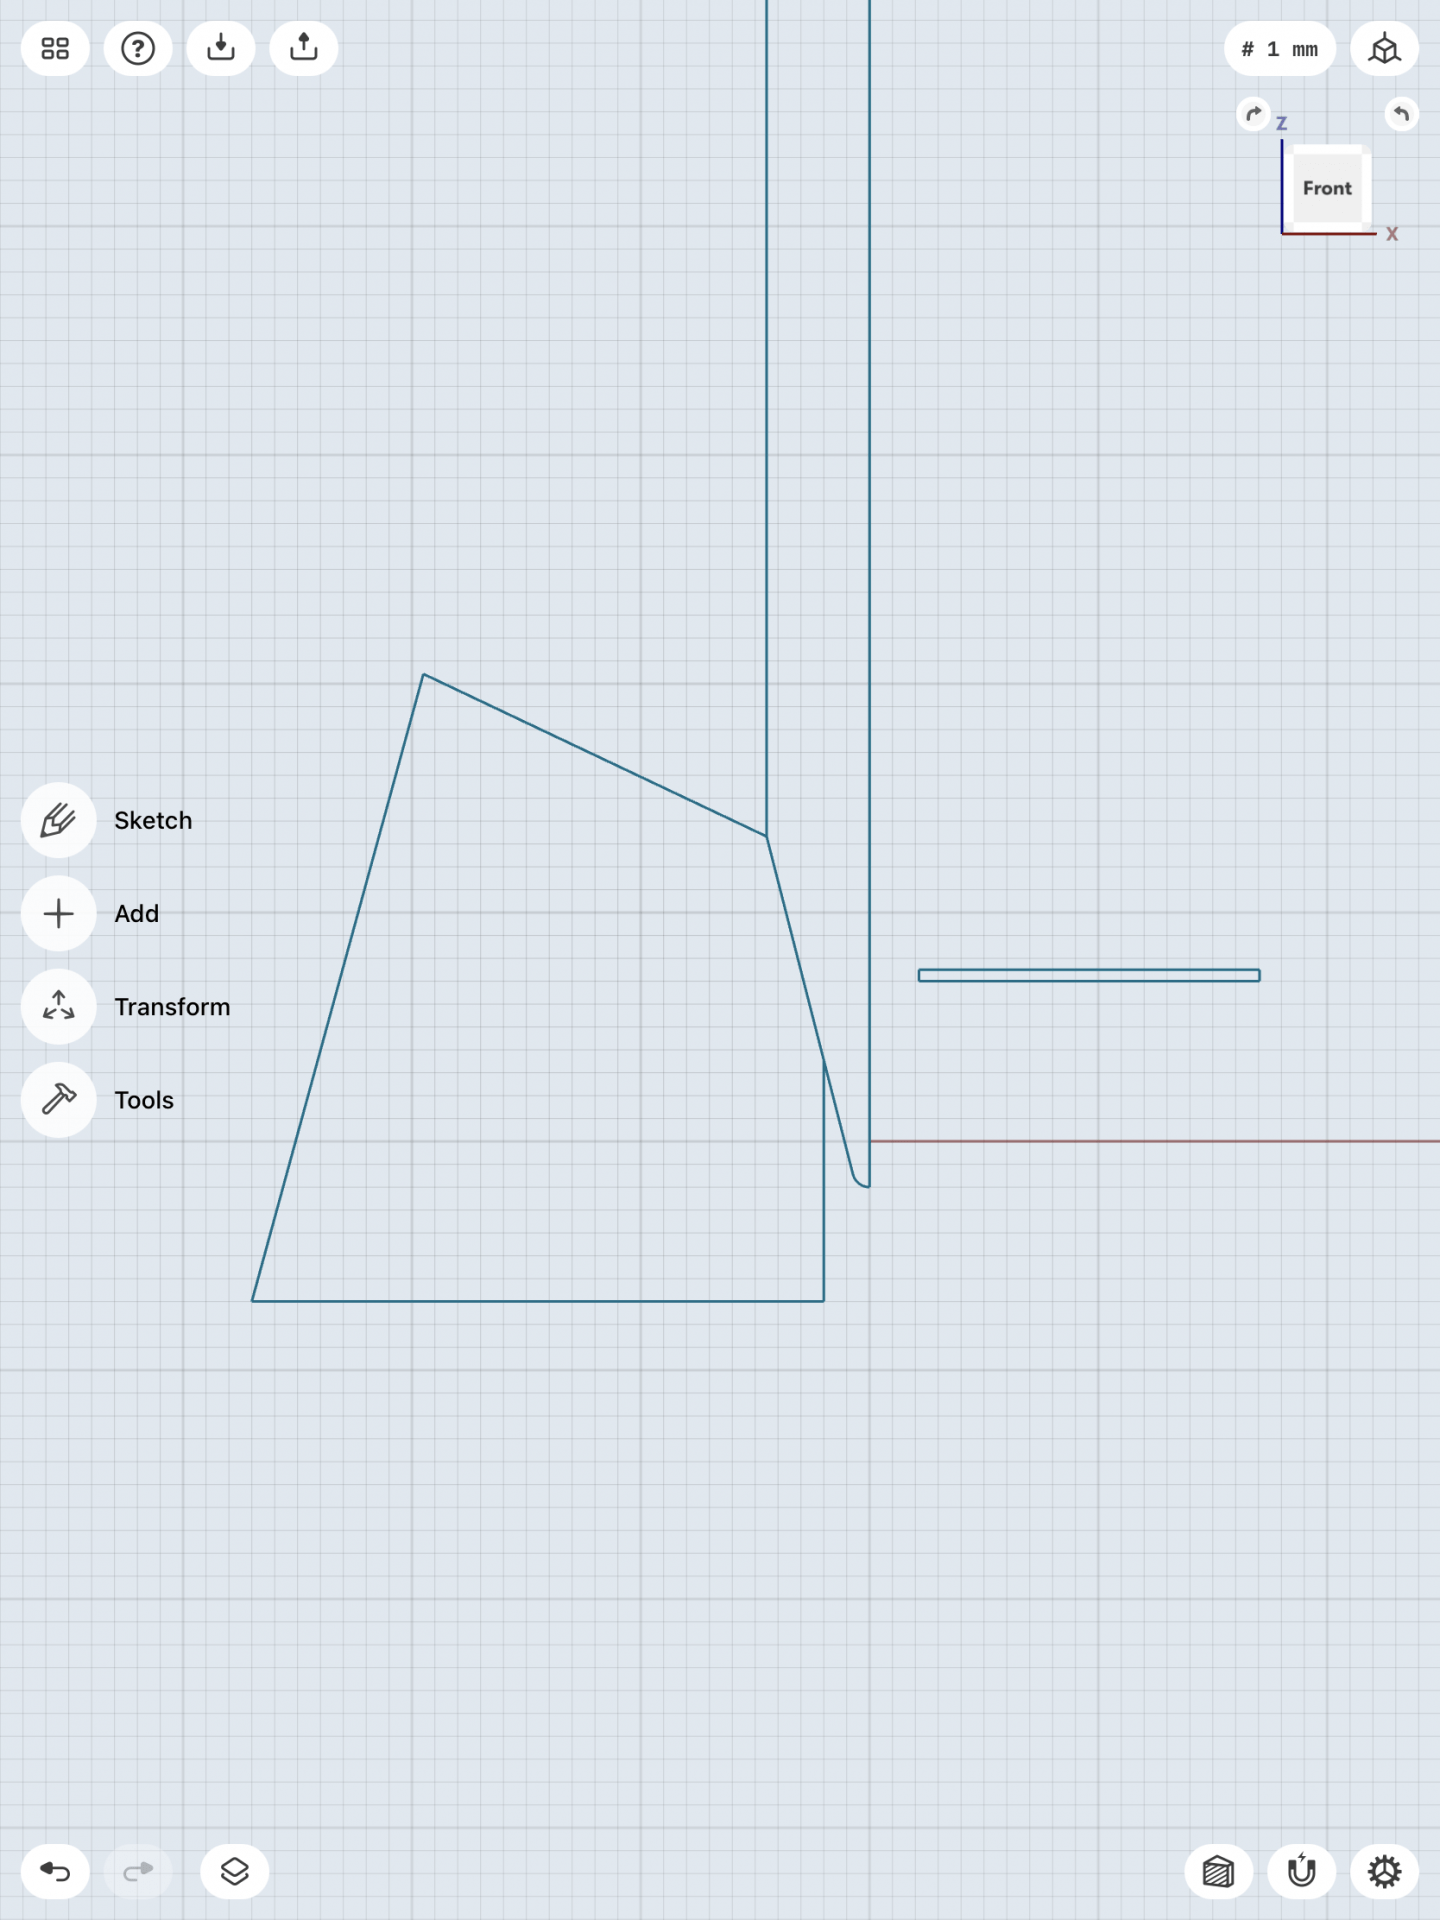
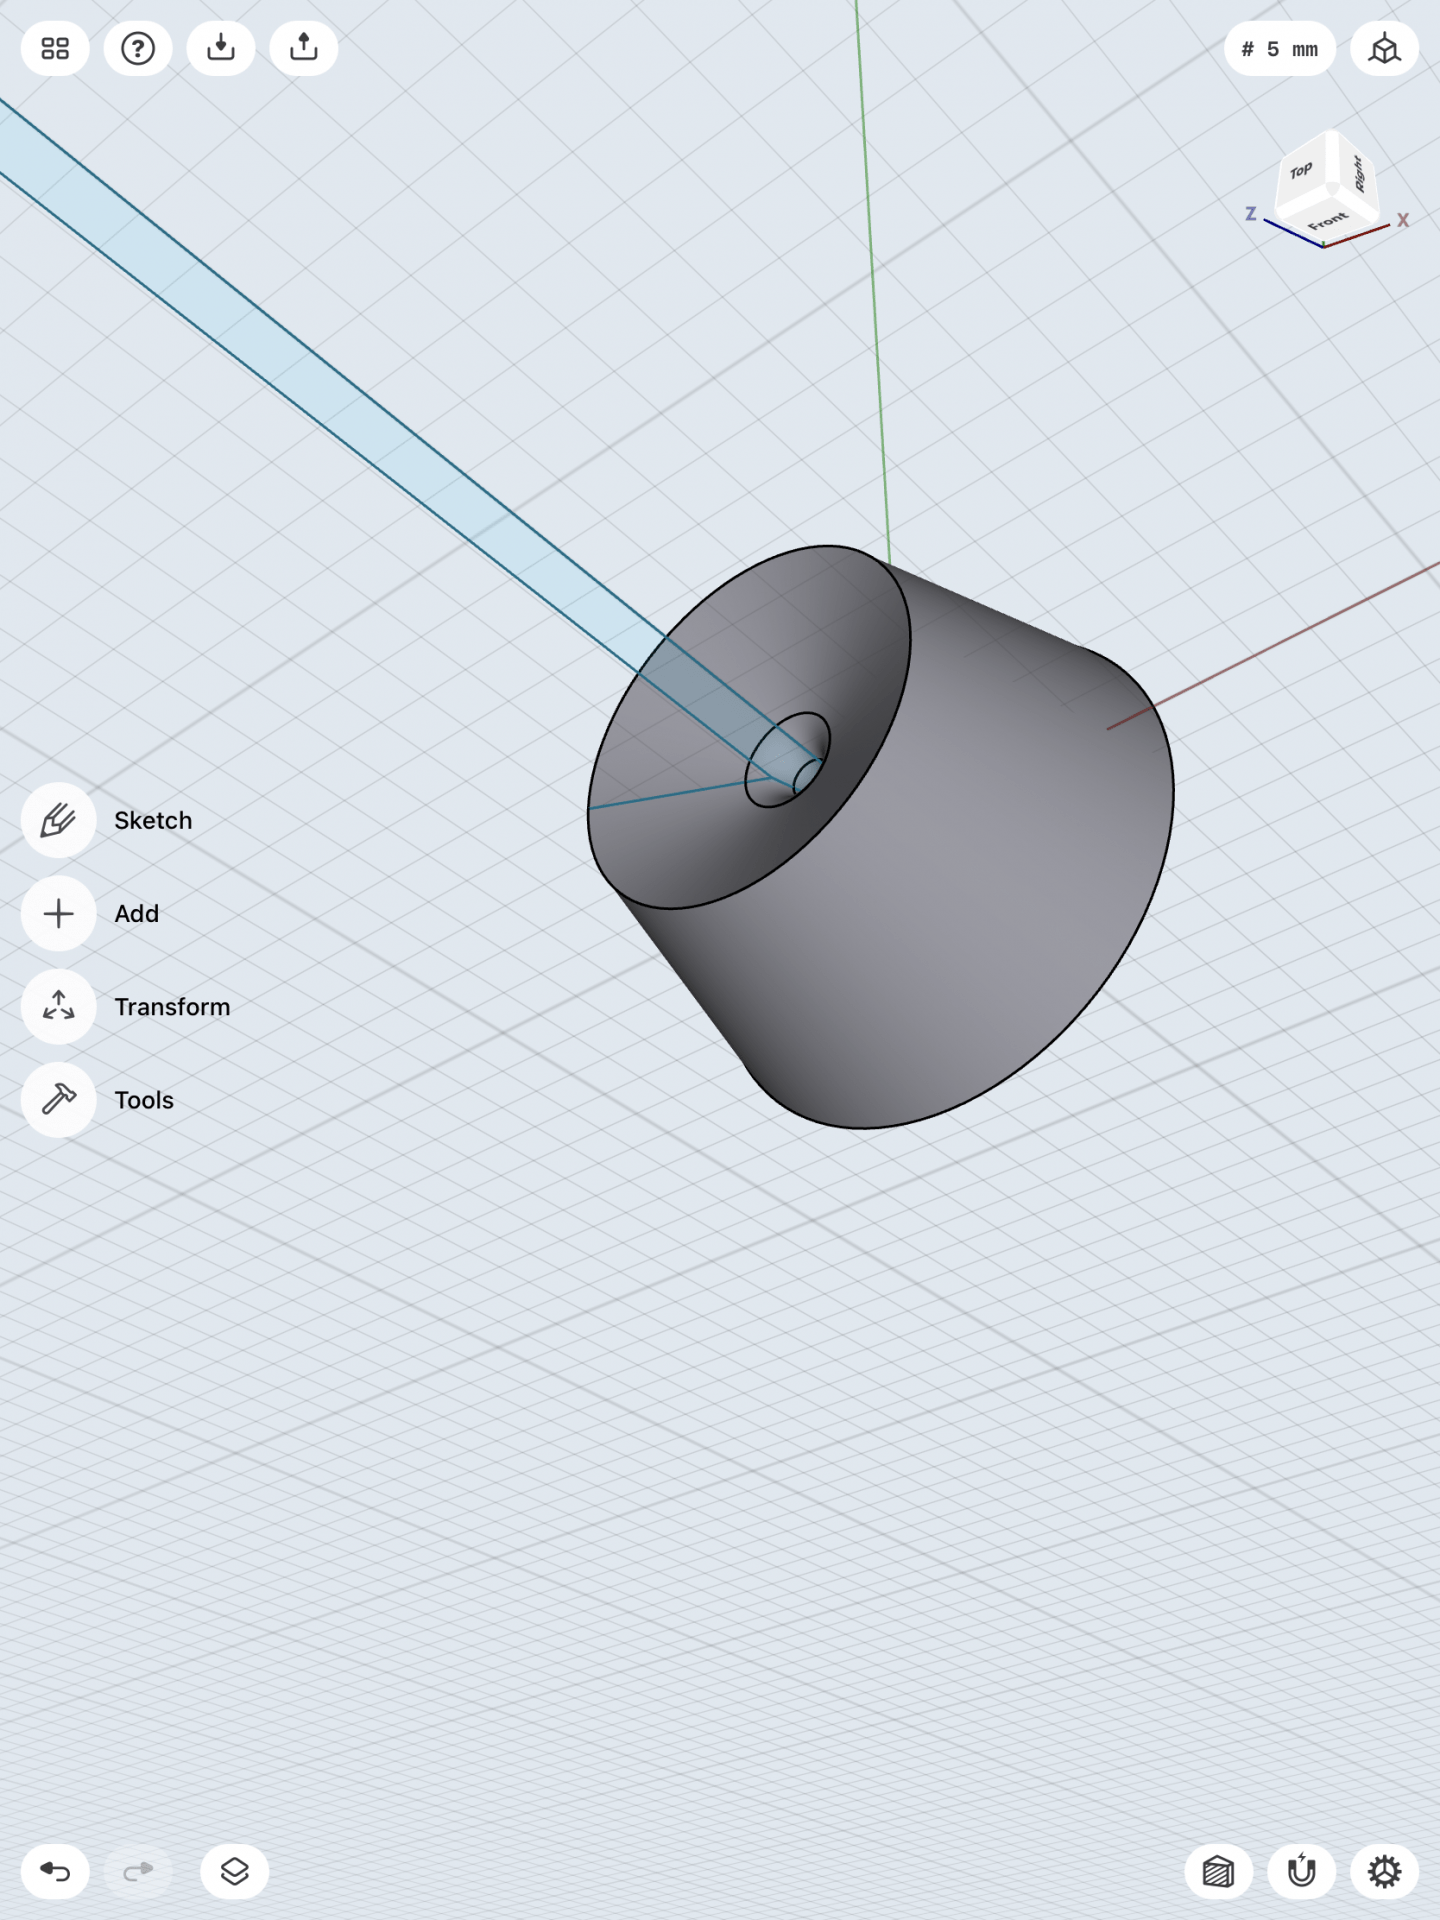
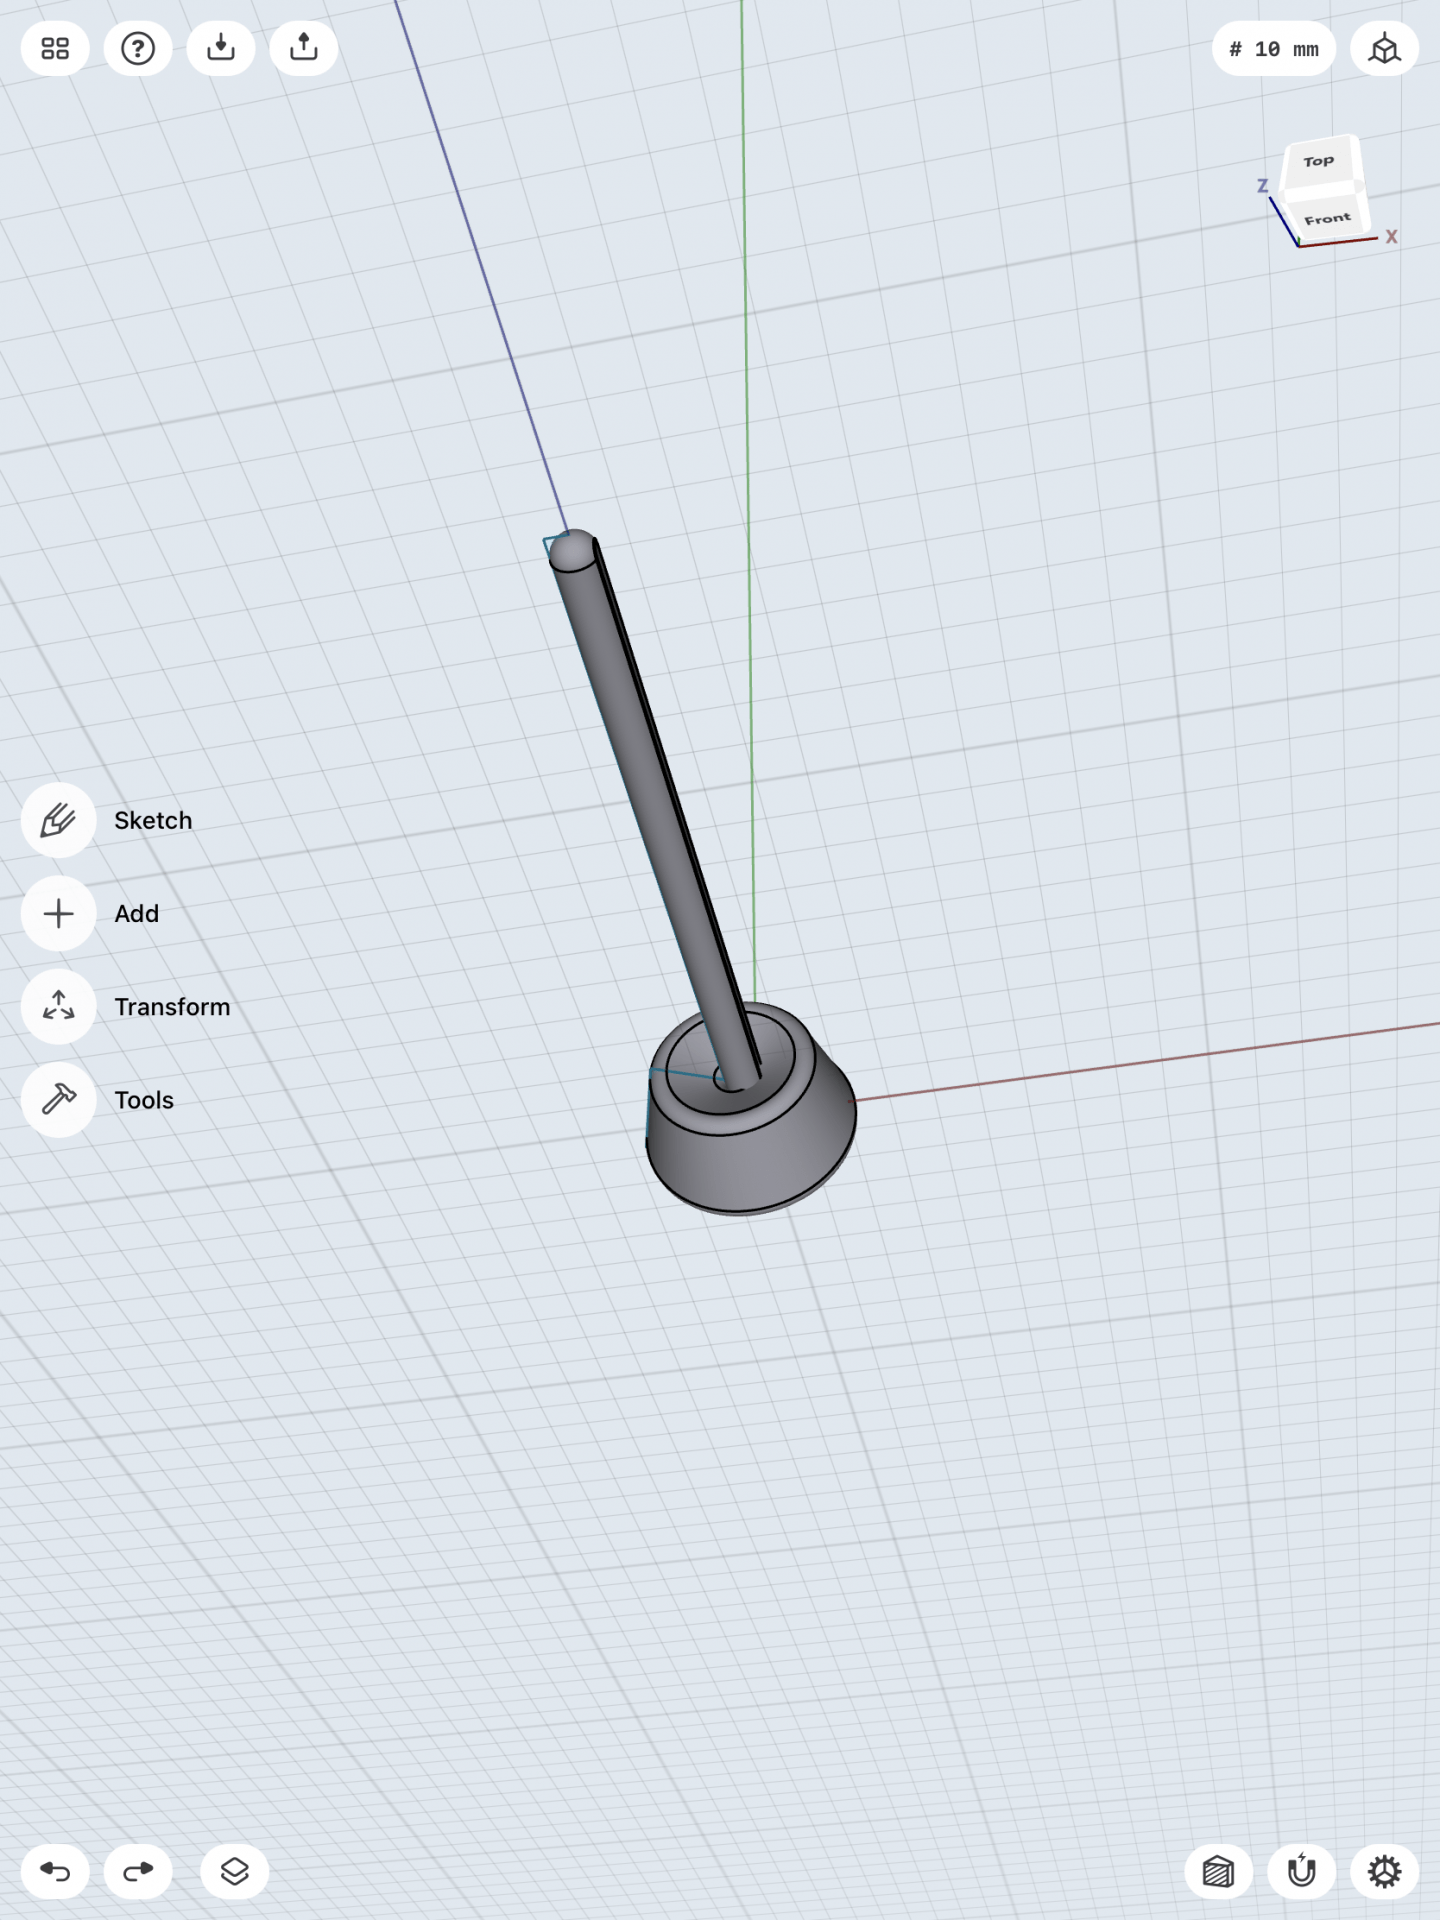
Stylus and Base
Creating the stylus and base was challenging but I still enjoyed the process and learning how to create intricate details that add to the overall look of the object. Starting out with my sketch I had to draw a pencil like shape on a 2d plane. I had to remove a section of the sharp end and add a curve to it so that when I turned the sketch into a 3d model it would have a rounded tip. Using the revolve tool I turned the 2d sketch into a 3d shape. To create the divot between the tip of the stylus and the rest of the body I created a circle that indented into the stylus and then deleted it so that only the indented space was left. The next step was to remove one edge of the stylus. I did this by creating a flat surface on the 2d plane and then extruding it upwards through the stylus. After deleting it the side that I needed to be gone was gone. To create the base was a similar process as the stylus. I drew a 2d sketch and then used the revolve tool to make it 3d. I used section view to cut the 3d model in half so that I could properly adjust the stylus in the hole of the base. I had to adjust the placement of the stylus and round the edges of the base to make it look neat and proper but after these adjustments I was done. I rounded the edges of the base on the top and bottom and my final product was complete. The images below are in chronological order. 3D Modeling a Stylus & Base on iPad | Shapr3d Step-by-Step