Bracket
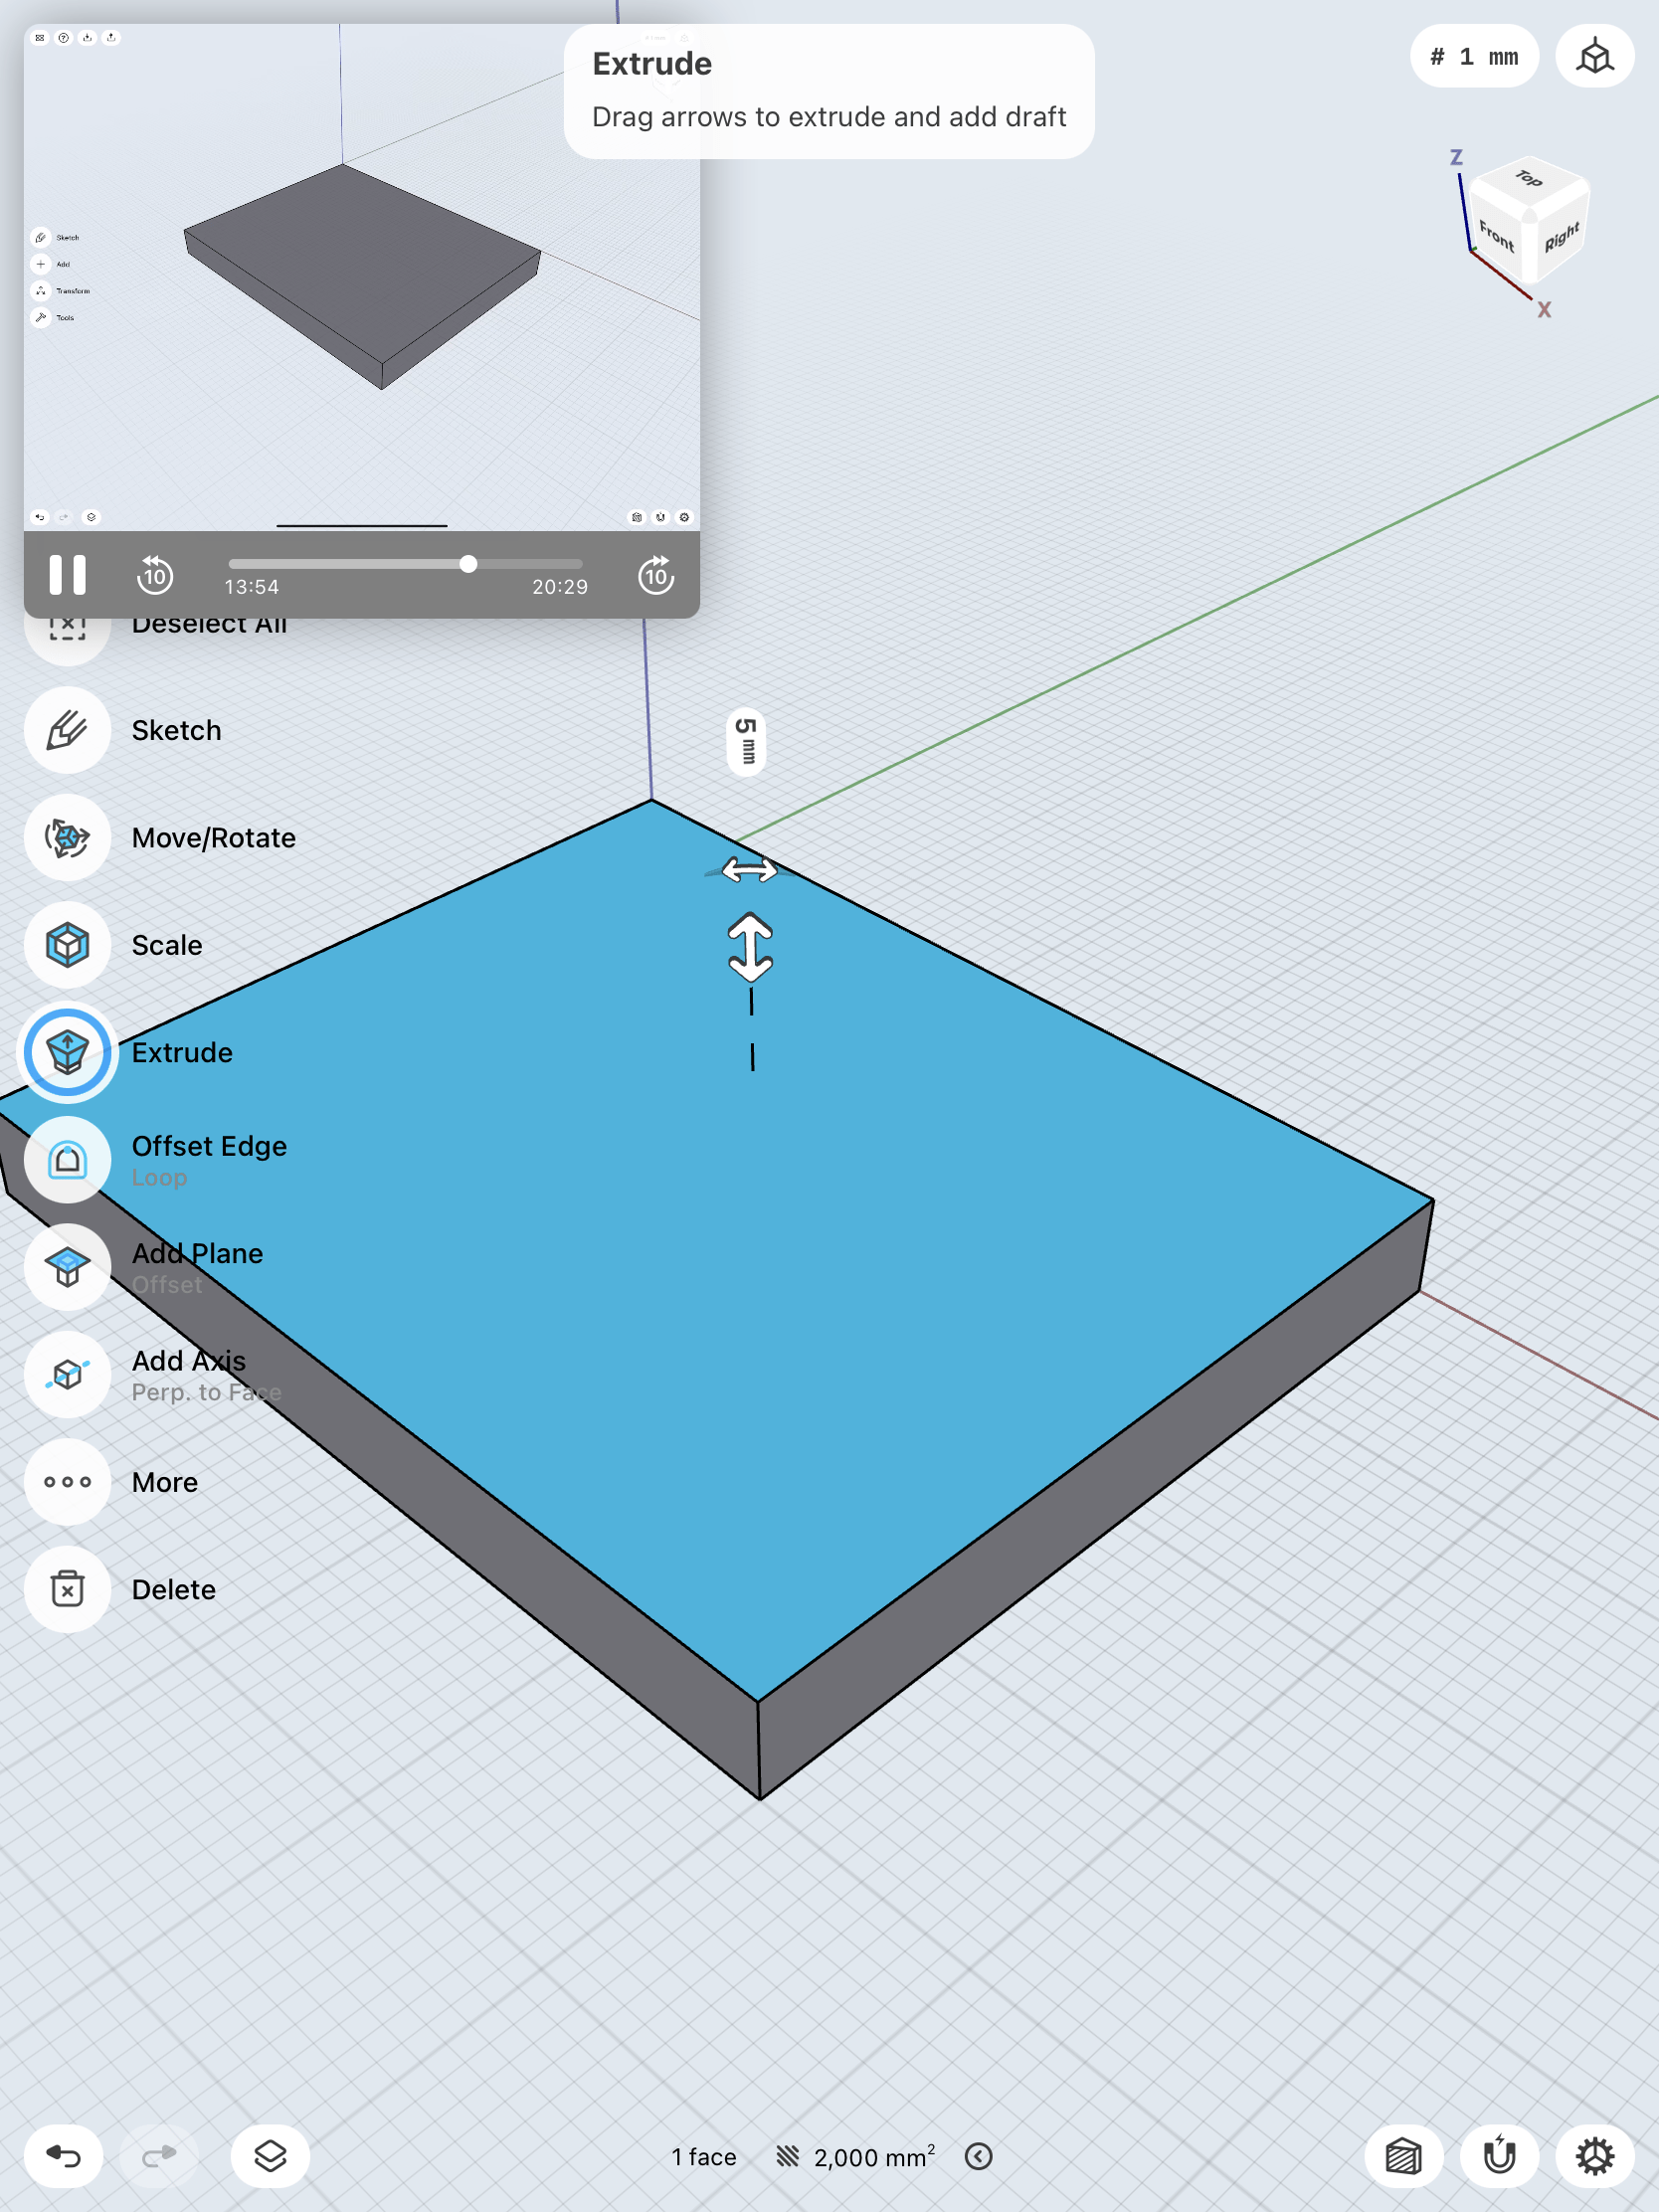
To create this bracket mount, I first needed to sketch out the very simple 2D figure. After the simple sketch was completed, I could select the sketch filling and pull it to create the body. I made the proper adjustments to the body, such as blending the edges and cutting a sketched out hole from the side.


Then, I created a second sketch that would help cut out parts from the body below. I used a white plane to create this sketch on top of the body and then pushed it all they way down to cut out the middle part of the body. However, I needed to get the intersection of the body.


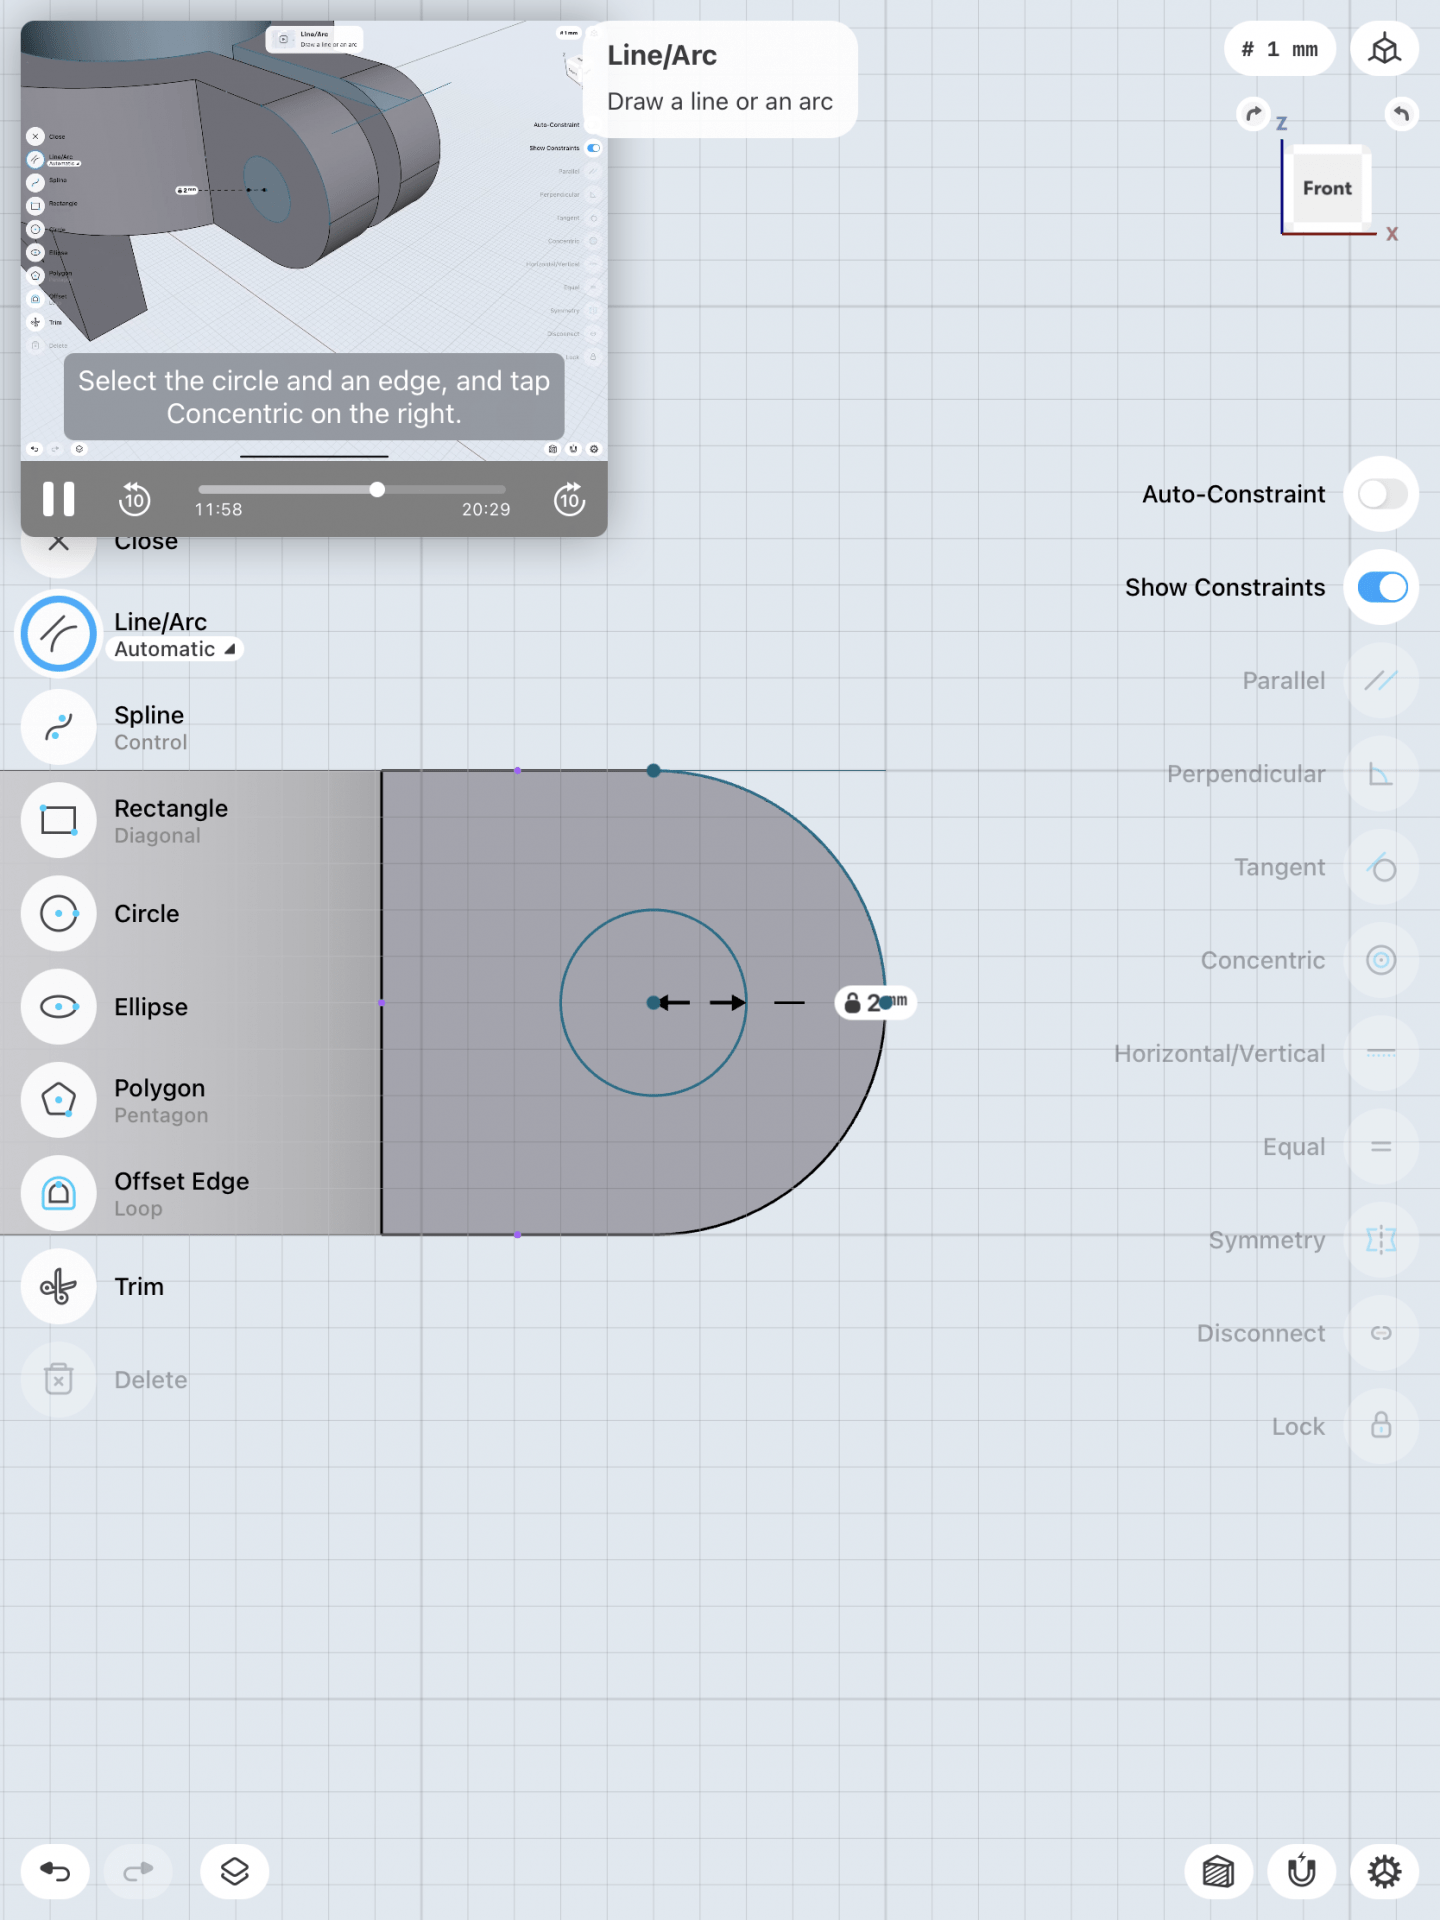
After I intersected the these, I created another drawing of a circle on top that would eventually be cut down the body as well. Whatever circles drawn during this step were centered by hitting the concentric tool.


Now I needed to create the bottom portion of the bracket mount. I began by drawing a rectangle first and pulling it out to create the base body. The edges were blended and circle holes were cut out of all four corners of the rounded rectangle. I chamfered each edge of these four circles to make it look cleaner. After I was done with the two separate bodies, they needed to be united, so I created a union between these two bodies.


Lastly, now that I have one whole united body, I blended some more of its edges and then changed its final color.


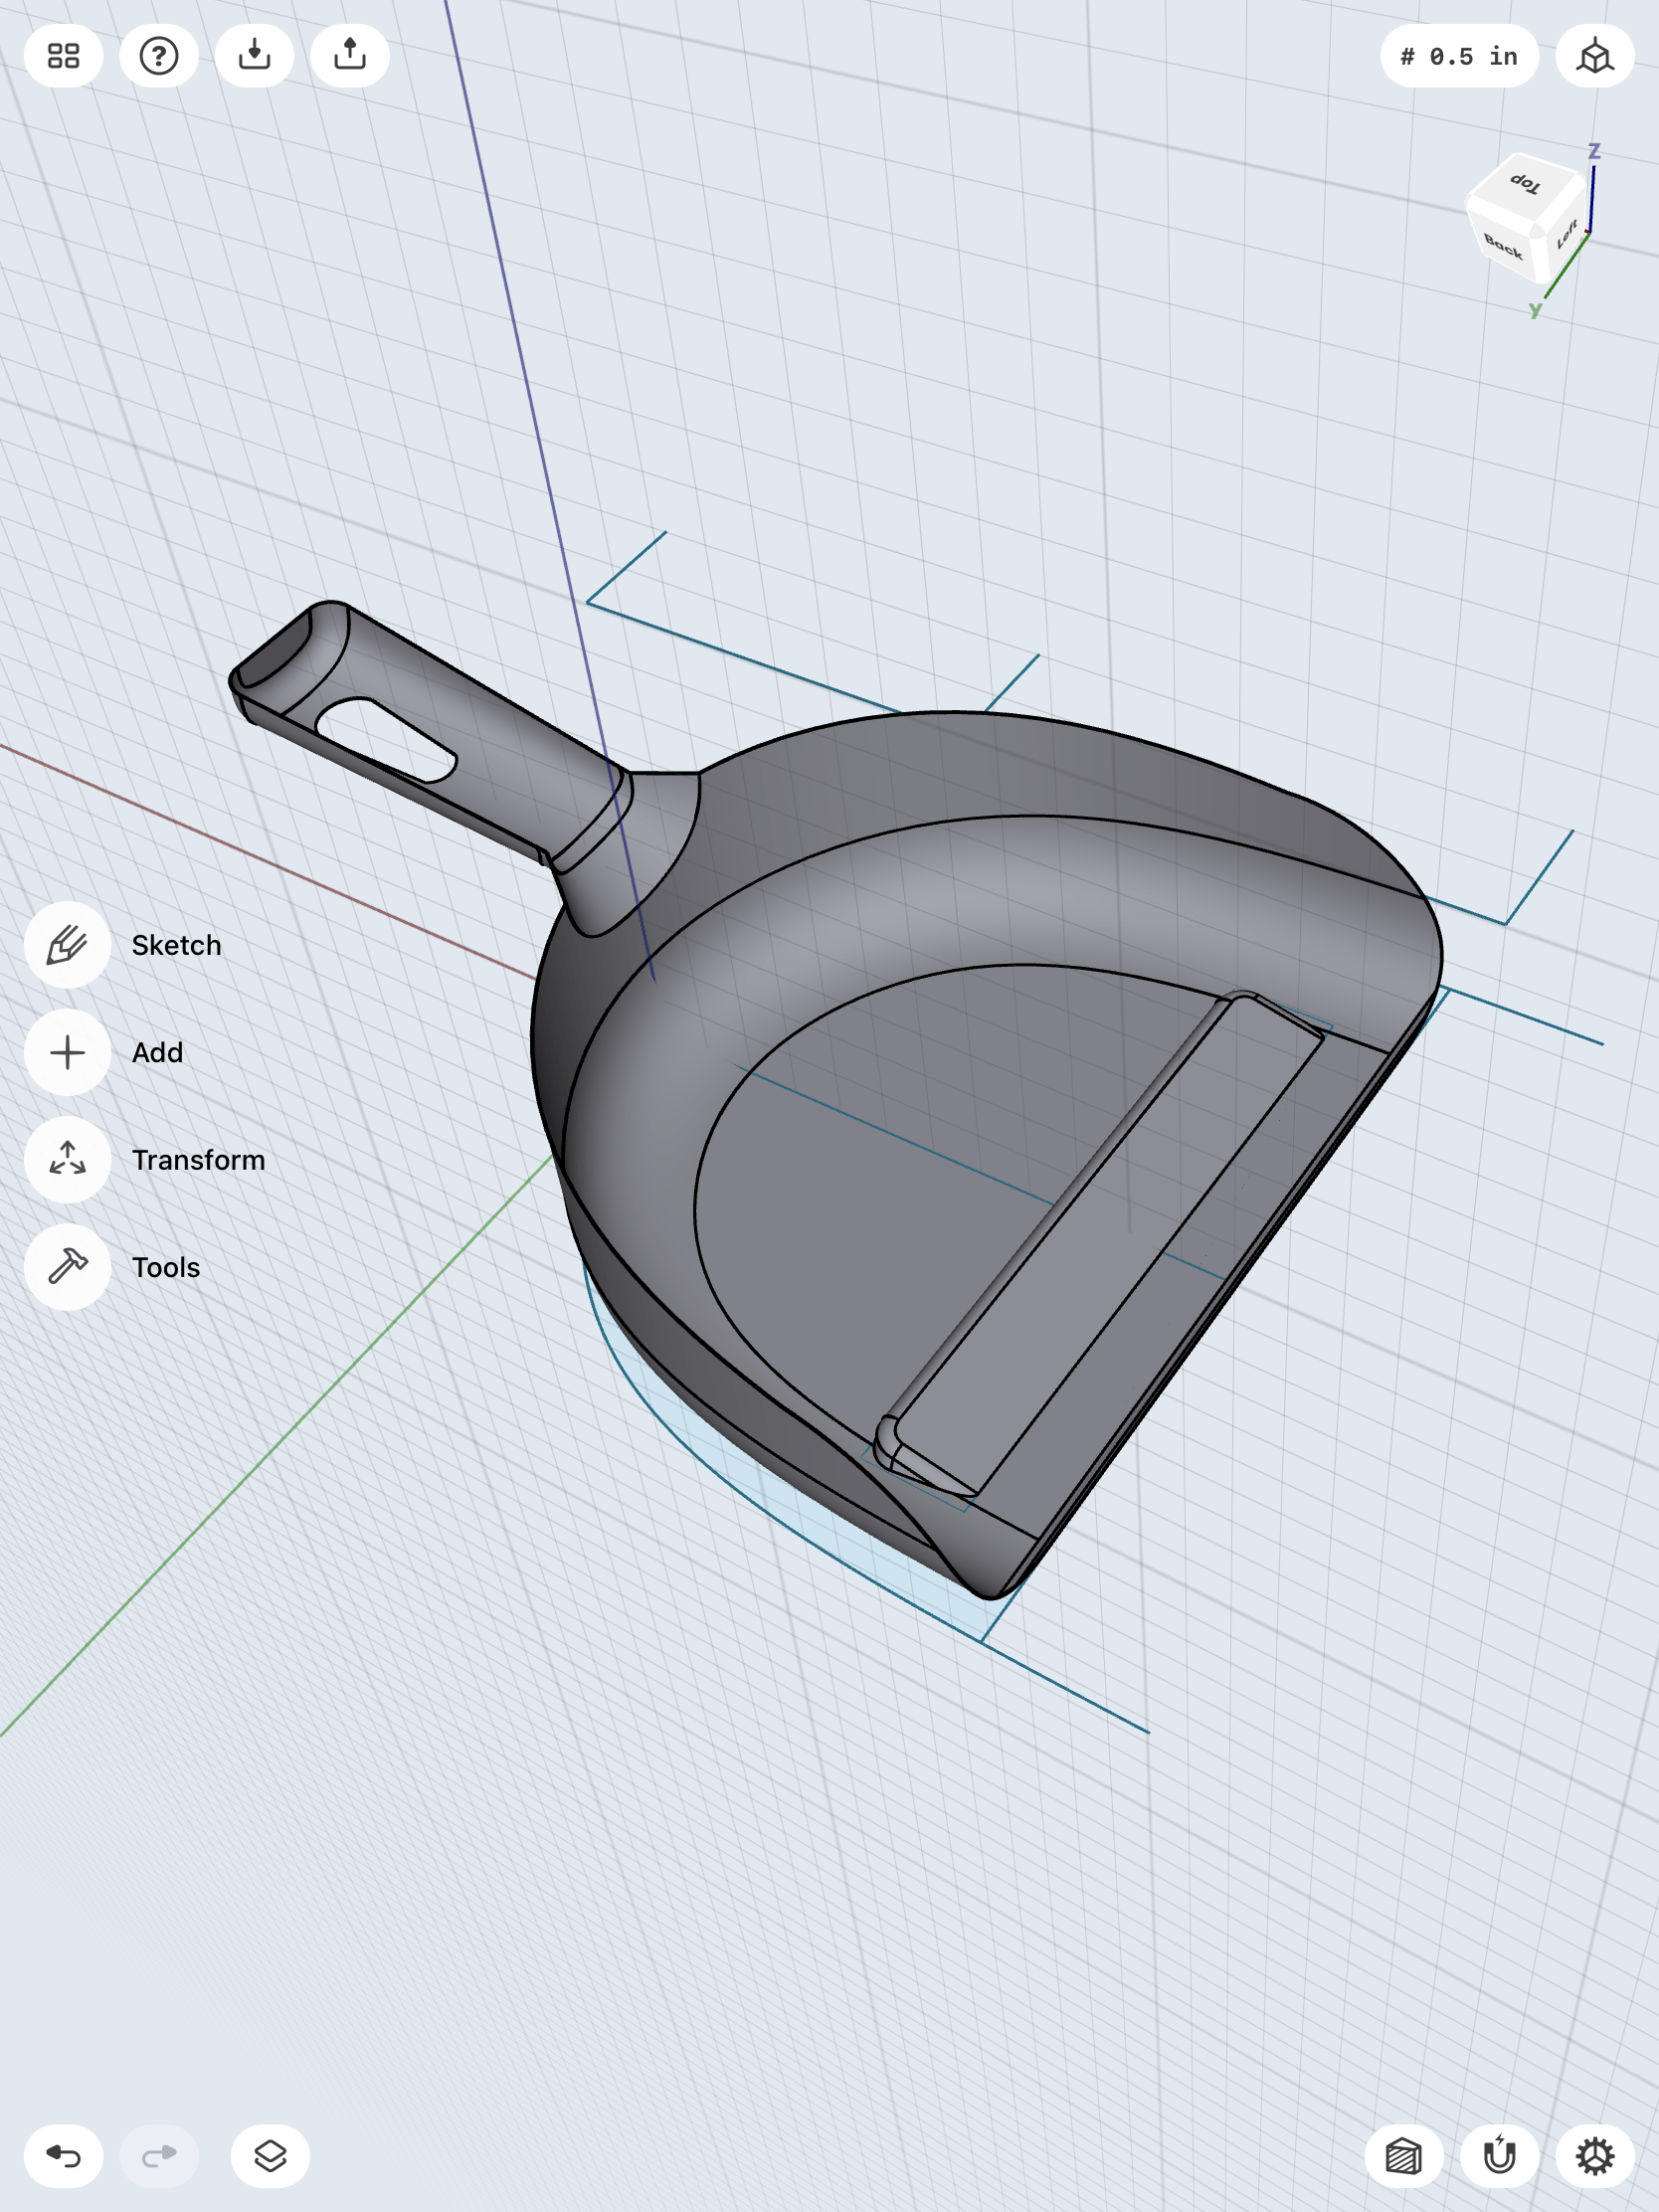
3D Modeling a Dust Pan
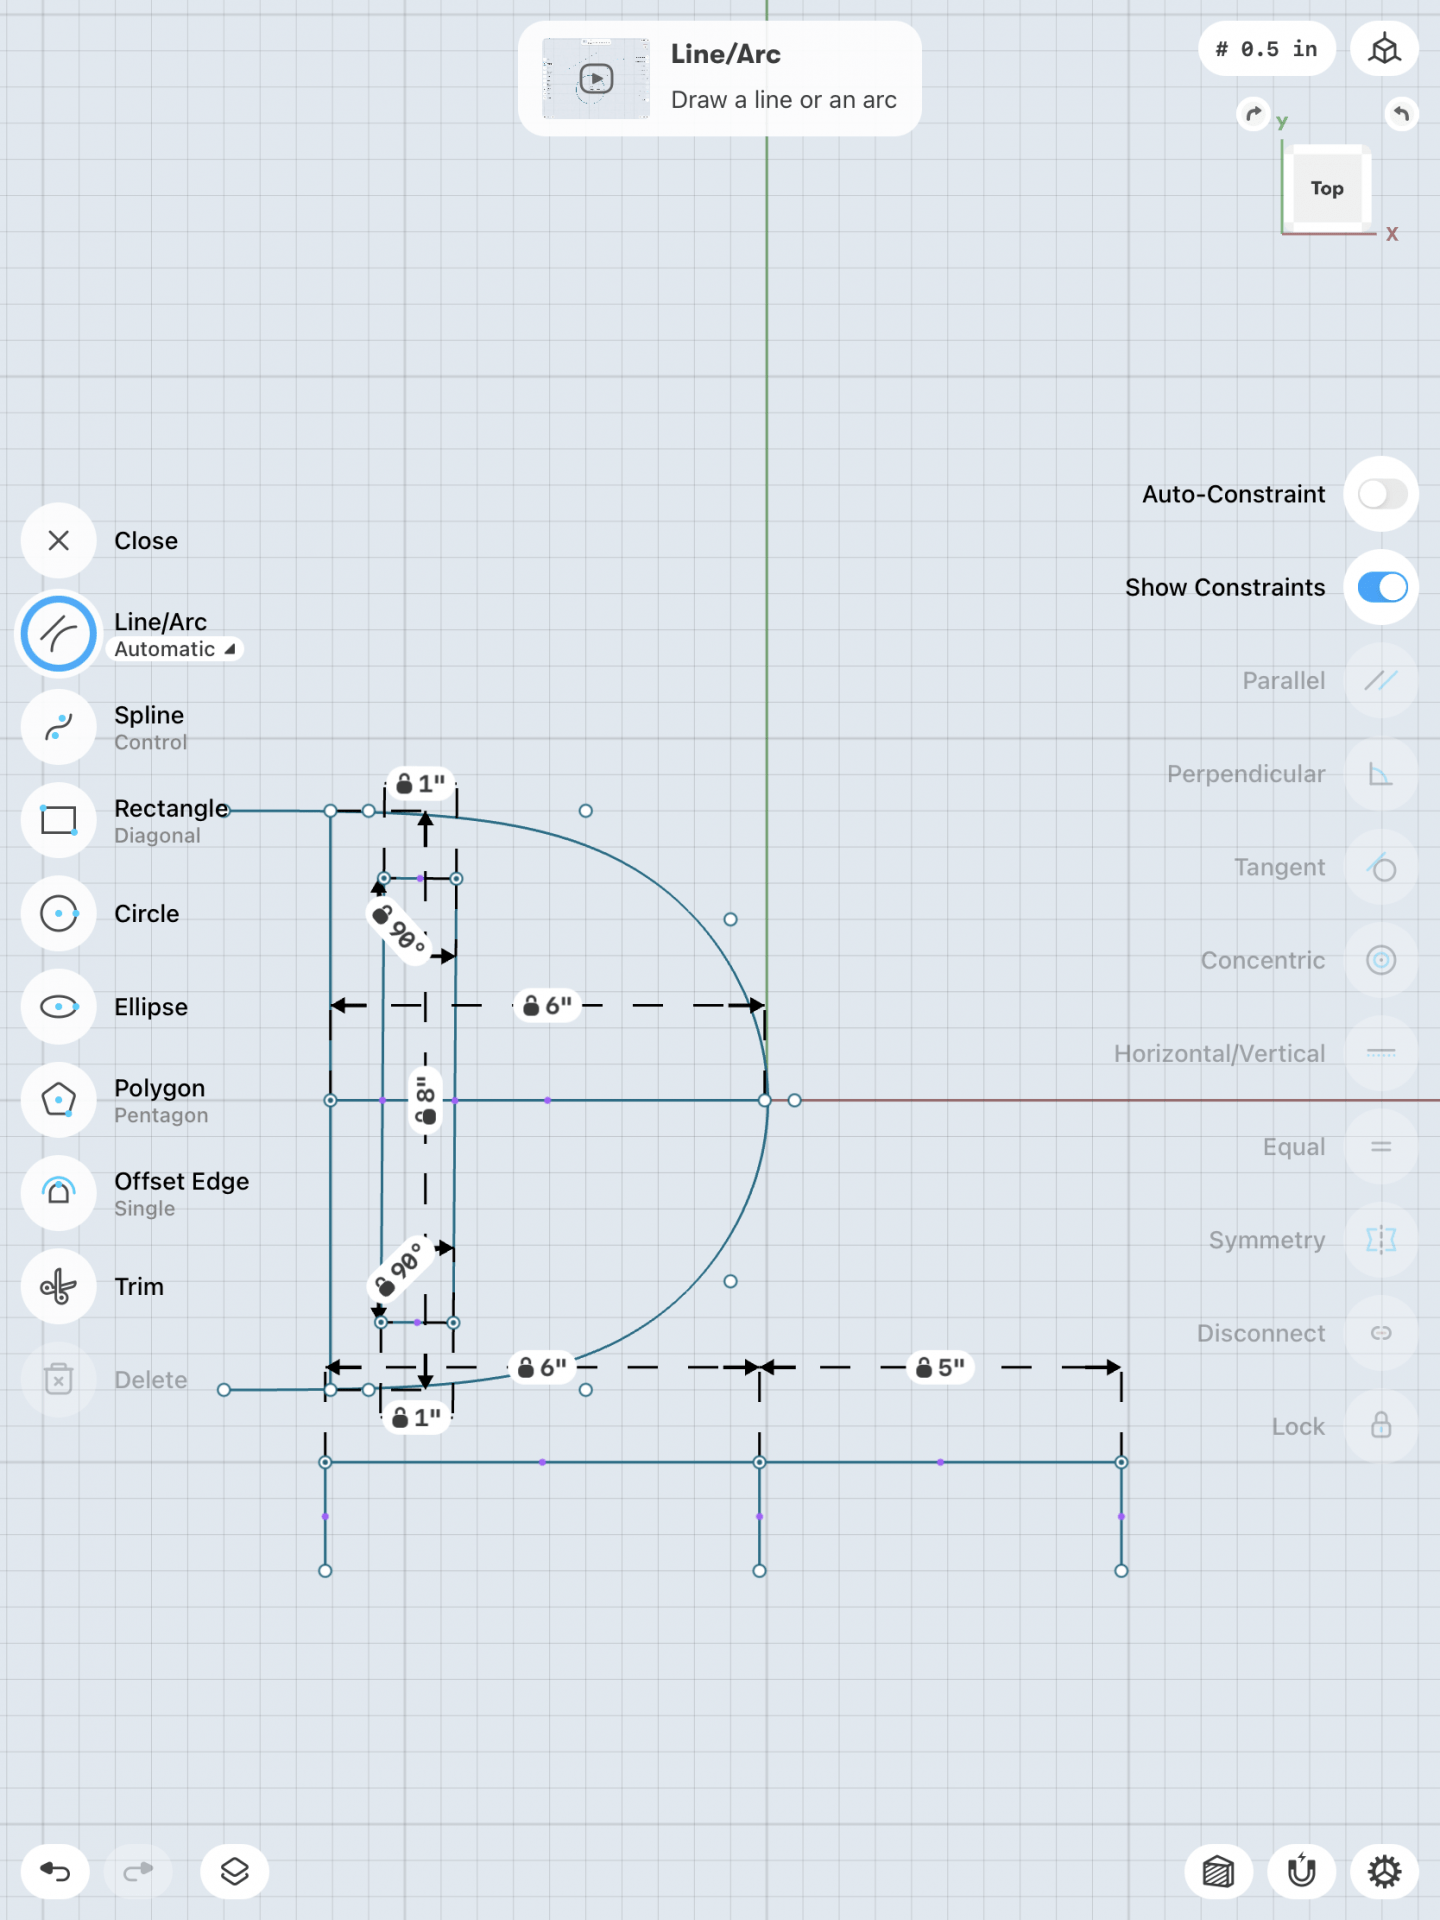
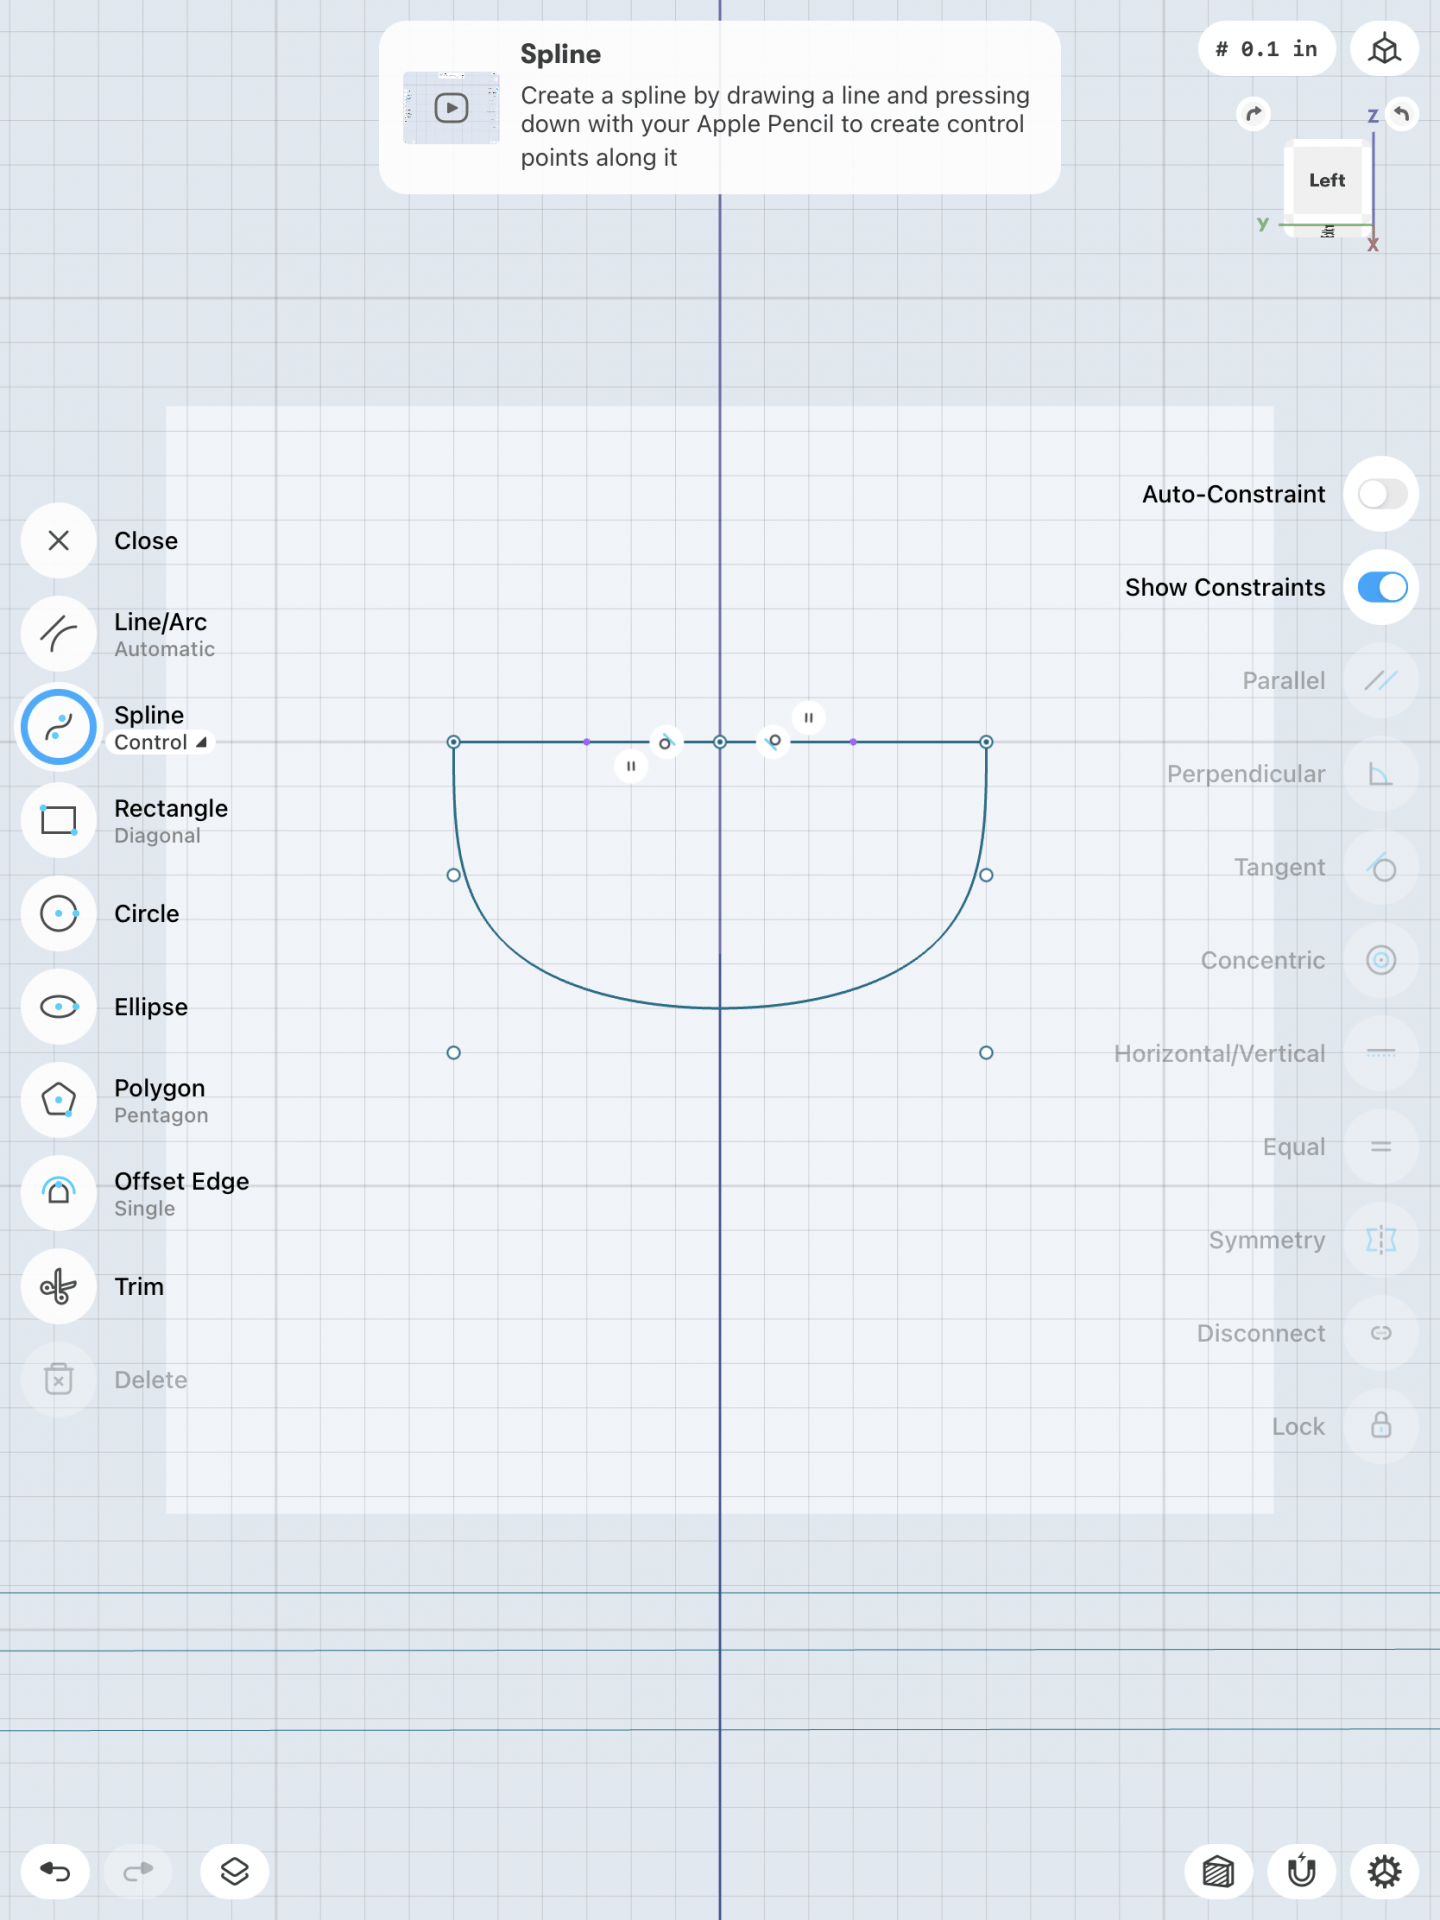
This bust pan model was much more challenging and I had difficulty getting the exact measurements of the tutorial, but it was all fairly close. I first needed to sketch out the overall dimensions of the dust pan and its handle. I was able to use the grid to create clean dimensions, and create clean arcs and splines. Once these complicated sketches were made, I could extrude everything up to create the first body of the dust pan. However to round the corner of the body in a nicer way, I needed to draw more arcs and make them tangent. I made a sweep body and performed a boolean subtract demand, which allowed for a more natural rounding.


Once the main body was basically done, I could begin working on the handle by using a construction plane and splines to create the handles sketch.

After the handle sketch was pulled out to create a body, it needed to be attached to the other body I created by getting dragged into it. I joined these two bodies and then, rounded some of its edges on the handle. I created an outer shelling into the now conjoined body, which made the overall dust pan. I sketched out another shape that was subtracted from the other body in order to add a better function to the dust pan (shown in step 8).
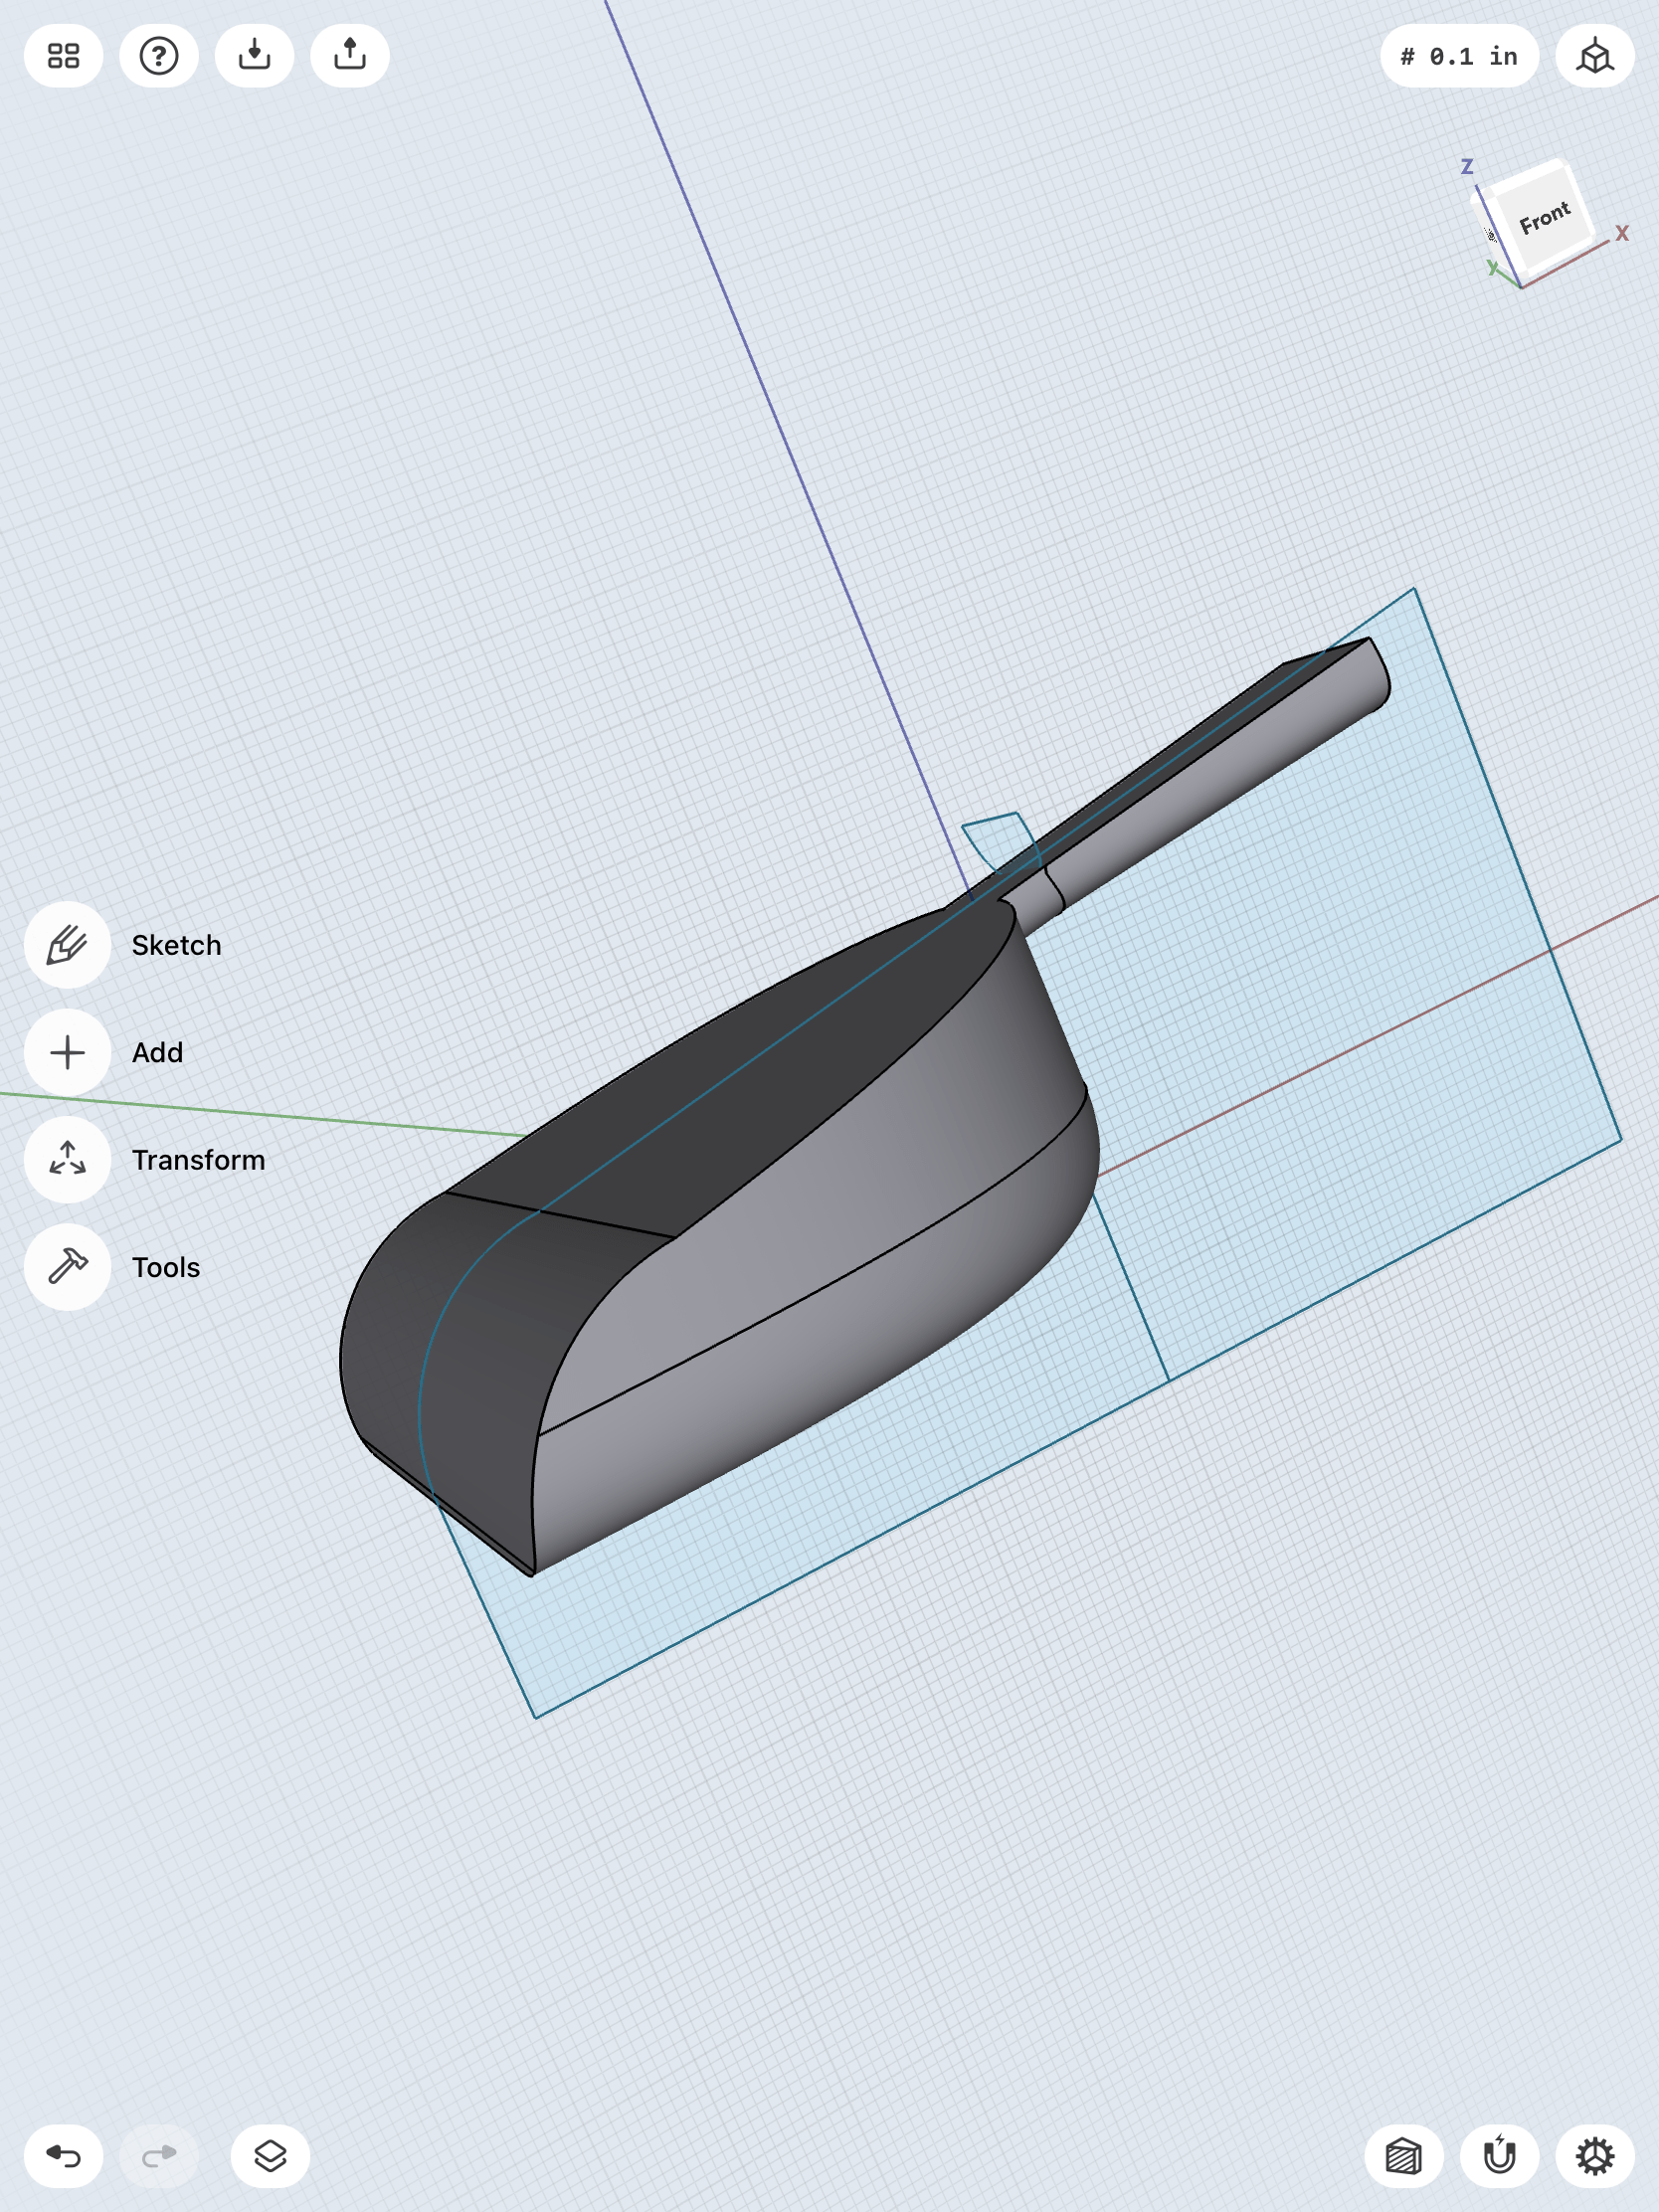


Lastly, I sketched out a hole for the handle by using a construction plane that was viewed at an angle. Finally, I completed my dust pan and changed the entire color of it to yellow!