Research & Concept:

When deciding on what I wanted to choose for this project, I tried to think of things that I found most boring in my day to day life. The one I find most boring is doing the dishes, more specifically the strainer that sits in the sink. This object has so much room for creativity and playfulness as most of the time, it’s staring right back at you as the dishes are being washed. When thinking of this idea and how to add playfulness I started to think of what the purpose of the object is and how I can twist that concept. The strainer is meant to catch any food that was not disposed of prior to doing the dishes. It catches the food that never made it to our mouths. I decided to play with that idea in my concepts. In addition, I’ve noticed that sometimes people purchase strainers that sit on the side of the sink for various reasons (see image below). It’s the same concept of catching food, but with that one I wanted to continue the human anatomy theme I had going.


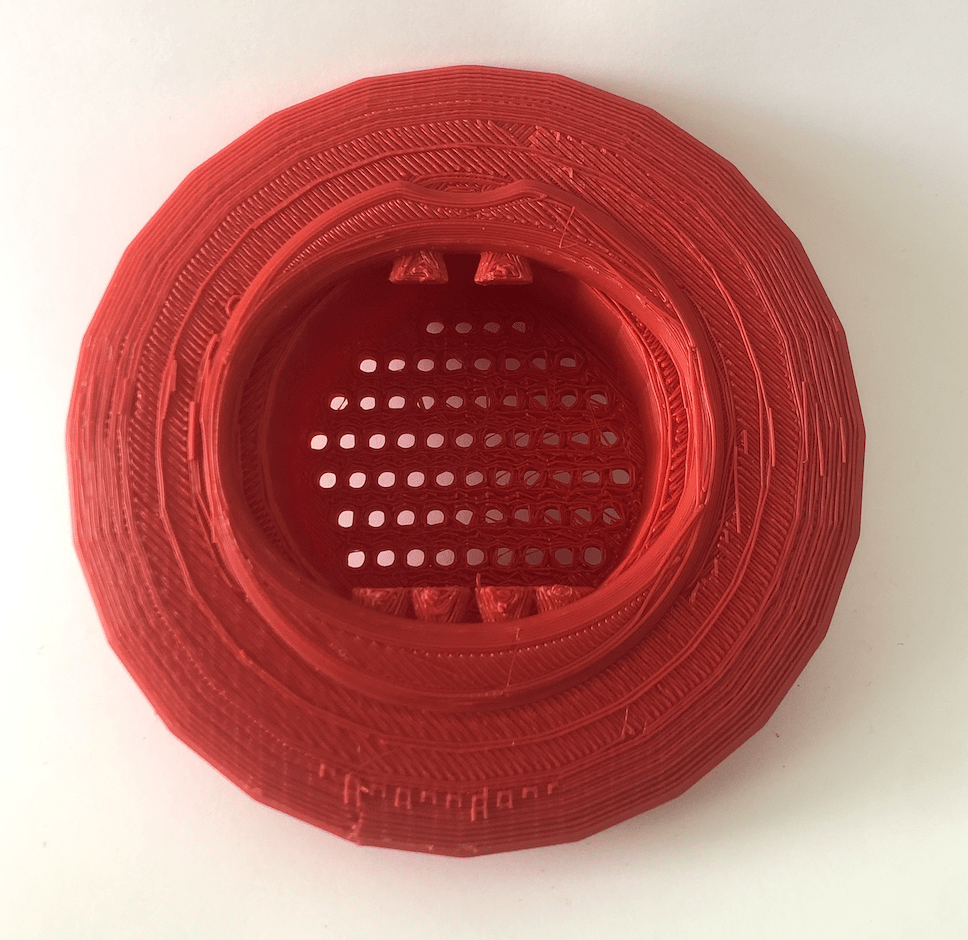
For my concepts, I touched on it earlier, I wanted to “humanize” the strainers. It’s a play on the purpose as well as just adds a little fun. For the regular “mainstream” design I chose to alter it into a mouth. This makes it playful, but also keeps the original purpose in tact. In addition, I created concept two with a nose design for the modern unique example. It made sense to follow the purpose of fitting the strainer into the corner of the sink as well as following the humanization factor.
Iterations:
For my iteration process, I did not have as many issues with the strainer design but more so the mouth that is incorporated on top. However, not to overlook the time invested, the strainer design as the base proved to be a little complicated in the sense that Tinkercad is not great with sphere’s or circle’s. I ran into many issues with sizing and proportions. As you can see in the images below, I had a fairly easy first print, however the strainer had incorrect proportions. As a result, the strainer did not fit into the sink seamlessly. I’m not quite sure if this is because of the dimensions I found online, or Tinkercad just being difficult.

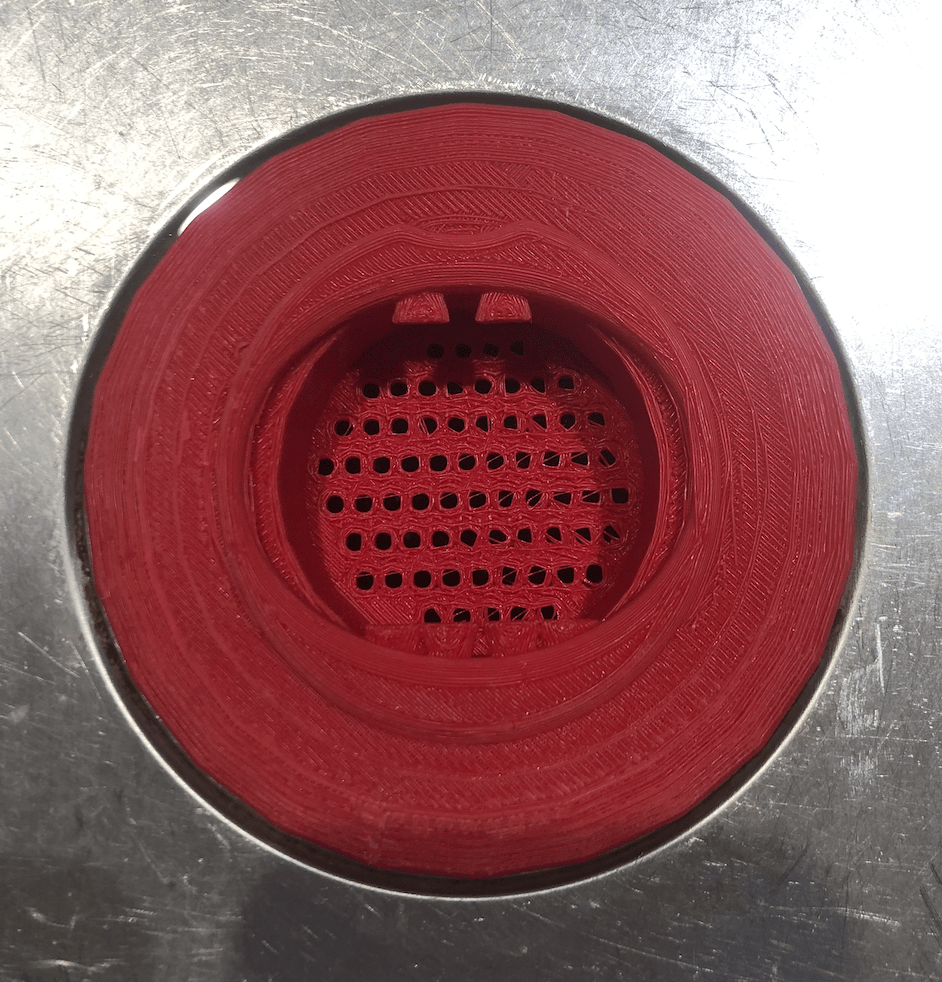
Moving forward, I printed a second time adding the mouth decoration that I had initially intended to. When working in Tinkercad, I ran into so many issues trying to implement curvature that I ultimately decided to just make a print with comical looking teeth as the sole feature. I also adjusted the opening in the middle to be perceived as more of a mouth and not a perfect circle. Some issues with the print were the strings that were much more prevalent in the second print as opposed to the first. I had to do a lot more work cleaning the print up the second time, but I’m fairly positive that is because something I added in between to make the second print slimmer. Otherwise, the teeth printed good and actually, I like the strings that occurred in the mouth, so I kept them. Besides the strings being an issue, the strainer now fits into the sink and could actually be sized up a little more.


For the future, I have quite a bit to go in designing a more complete mouth, but I am interested to see if this is plausible in Tinkercad or if I should pivot toward another program. If lips do not work more to my advantage, I feel as though I could add other features that would still give the same playful experience. Unless something changes, I would like to focus on other features of the mouth, rather than add more curvature with lips.
Final Print and Reflection:
My final print went much better than expected thanks to professor H. The changes I made from iterations to the final were a changed base design to fit easier into the sink, a rework of the top to adjust for lips, a lip/mouth design extruding from the top, and finally, alterations to the teeth. Some of these things were minor with the lips design being the main feature I addressed in the final product. I modeled a mouth/lips in Shapr3d. This process was MUCH easier than in Tinkercad. Again, with the guidance of professor H, this went very smooth. After creating that, I went back into Tinkercad to put the top lips piece to the modified base. This also went smoothly as the dimensions were already set. I will list the exact dimensions below. Other than connecting the pieces, I separated the teeth to add a more whimsical effect. As far as printing, I had issues printing right side up so I flipped the design and added a raft and supports to make the final print look much better. Overall, I am very happy with how this project turned out. I furthered my knowledge of 3D printing and got to use shapr3d for the first time.

Find this on Thingiverse.
Dimensions:
-Top Piece= 4 1/4in. LW
-Bottom Piece= 3.4in. LW
Print:
-Infill= 20