Jenna’s Self Expression

Research and Concept

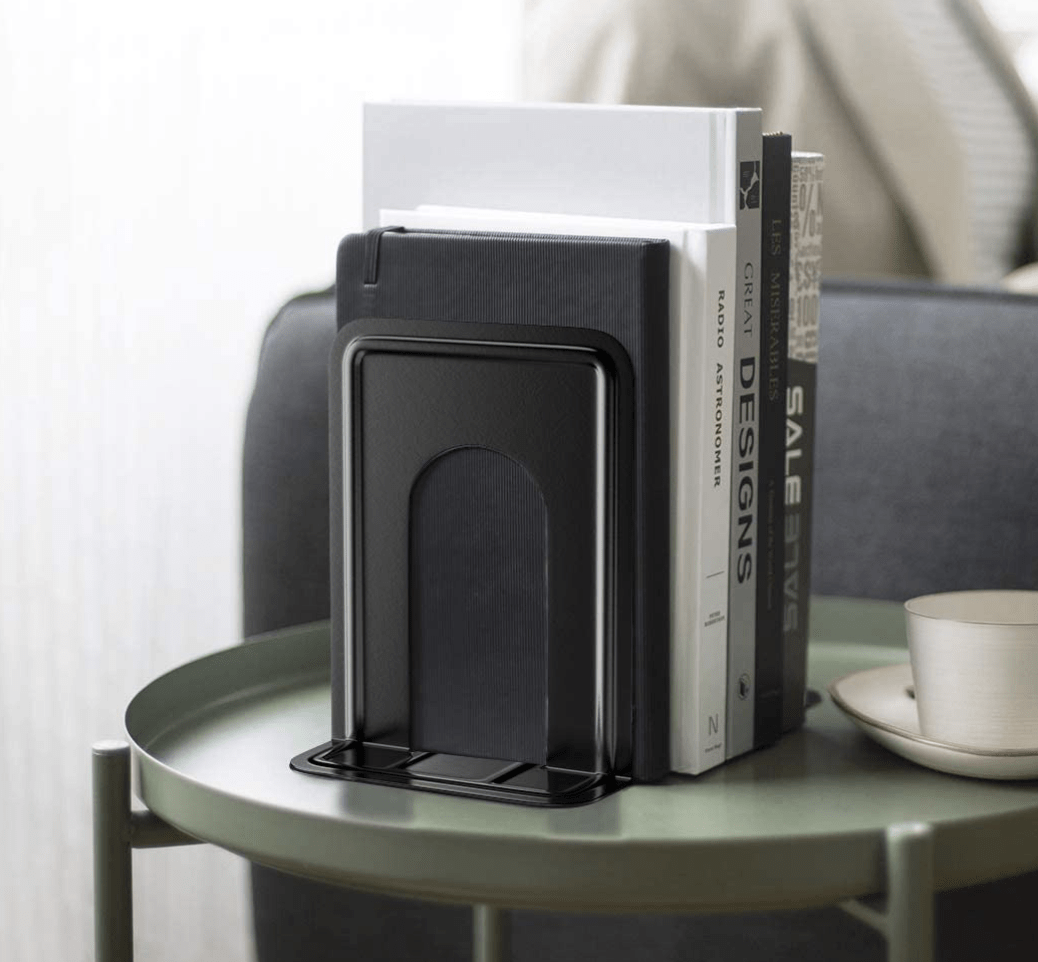
Throughout this pandemic, my grandmother has been someone I have endlessly been thinking about. We have not seen each other in over a year, so calling each other on the phone is something that I have really prioritized doing each day, since she has not been able to go out much or see anyone other than my grandfather in a very long time. We tend to talk about anything and everything, including the annoying amount of medication she has to take each day. As I was coming up with an object that could use a bit of playfulness, I thought of making something I could give to my grandmother. Although a pill organizer isn’t the “coolest” of objects, I figured that it would be something that would remind her of me as she uses it every day. A pill organizers function is to help people organize which pills they need to take on each day. My grandma tends to fill her pill organizer on Sunday nights to prepare for the week. Because she needs to take different pills on different days, her pill organizer allows her to sort out her week of medications once a week and not have to look up everything she needs to take every single day.

I have found it a trend that “playful” objects often include a connection to an animal, so I tried to think of animals that have scales or some type of polygon shape on them that I could use to be the compartments of a pill organizer. I landed on the idea of using a turtle for my playful twist on a pill organizer because I thought the scutes on the turtle’s shell would work perfectly for this function of organizing pills. Seven of the turtles scutes will open up, one for each day of the week, and that is where the pills for the day can be stored. I believe this would be a playful and interesting twist to an object that is otherwise boring-looking and definitely not-so-fun of a thing to use.

Sketches

Iterations

First Iteration

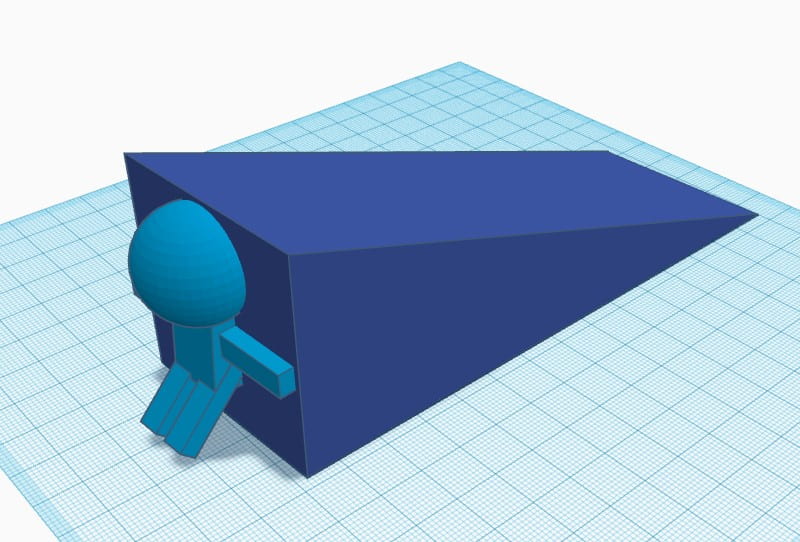
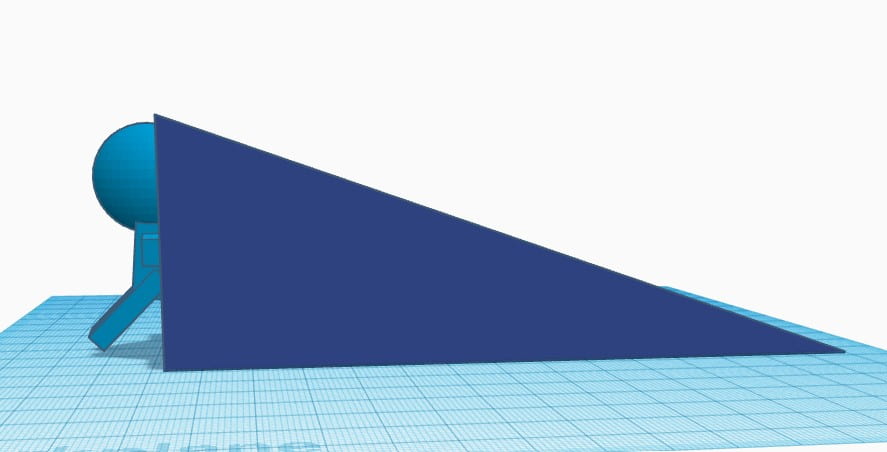
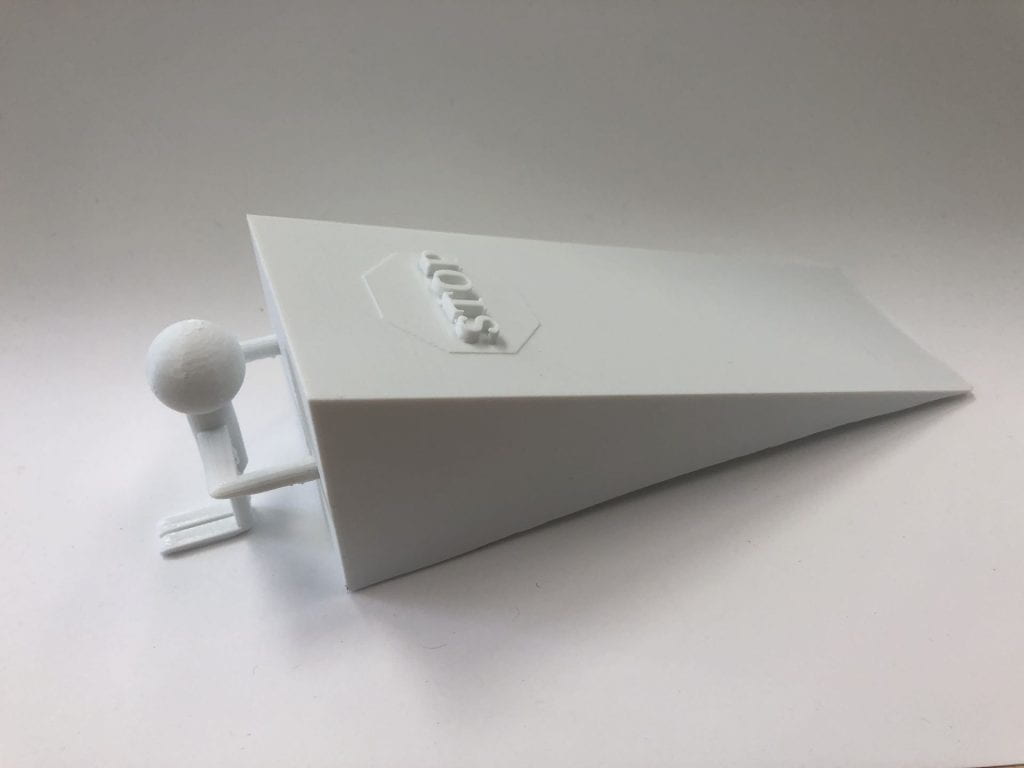
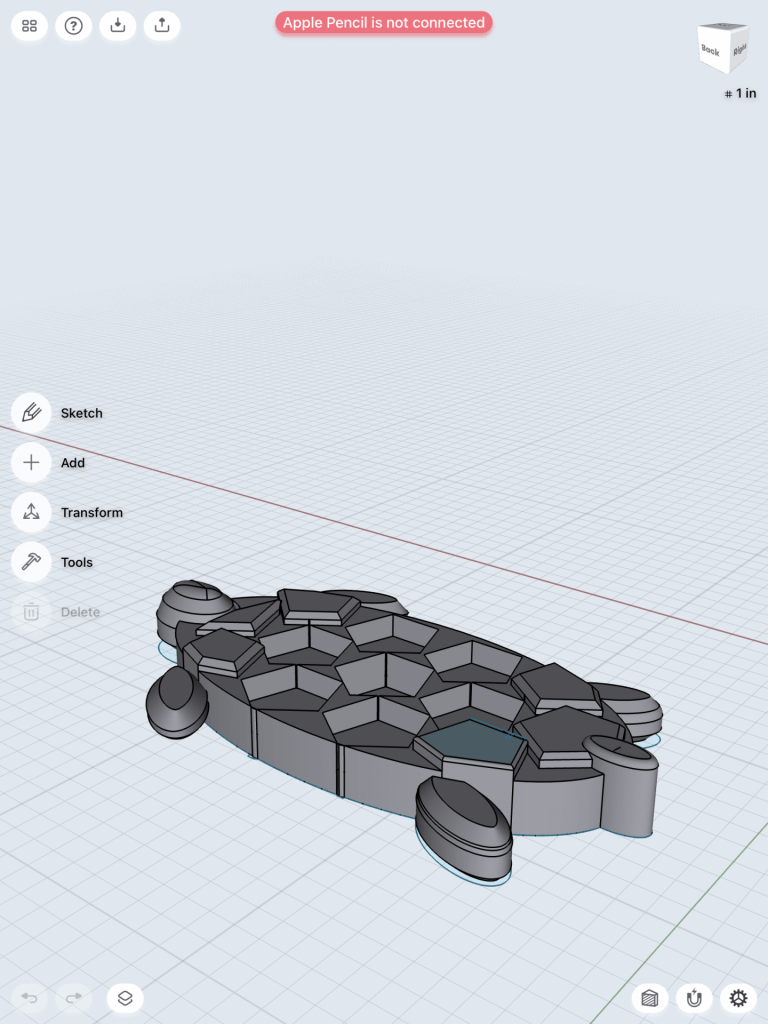
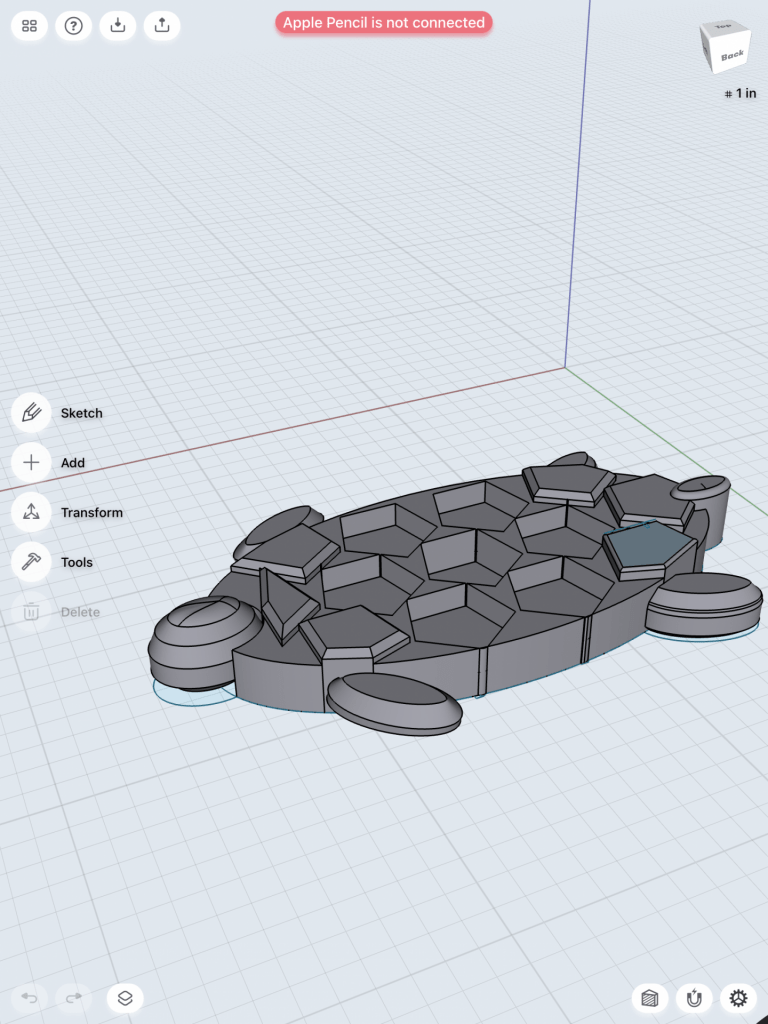
My first iterations did not go how I had originally planned; I spent hours on Shapr 3D attempting to create a turtle figure with its back having compartments for the pills to go, but the integrity of my design was lacking. I compromised the integrity in order to make the design more like how I pictured it in my head, which is obvious by looking at my first prints. Unfortunately, the hexagonal shapes on the turtle’s back, which were meant to be compartments, had holes in them throughout that were not visible on Shapr 3D. I am out of town this week so a fellow classmate graciously printed my design out for me, so I figured that the best way to share that with her would be on Tinkercad where she could look up my profile and find my design to print. When I exported my design from Shapr 3D to Tinkercad, the low-quality export hurt the quality on Tinkercad, and thus hurting the quality of the print. Since I am out of town, I could not print a second time to make any changes once I saw what was wrong with my first print, but I am eager to print this again and redesign a better foundation for this object.

Below is the original design on Shapr 3D.

Second Iteration

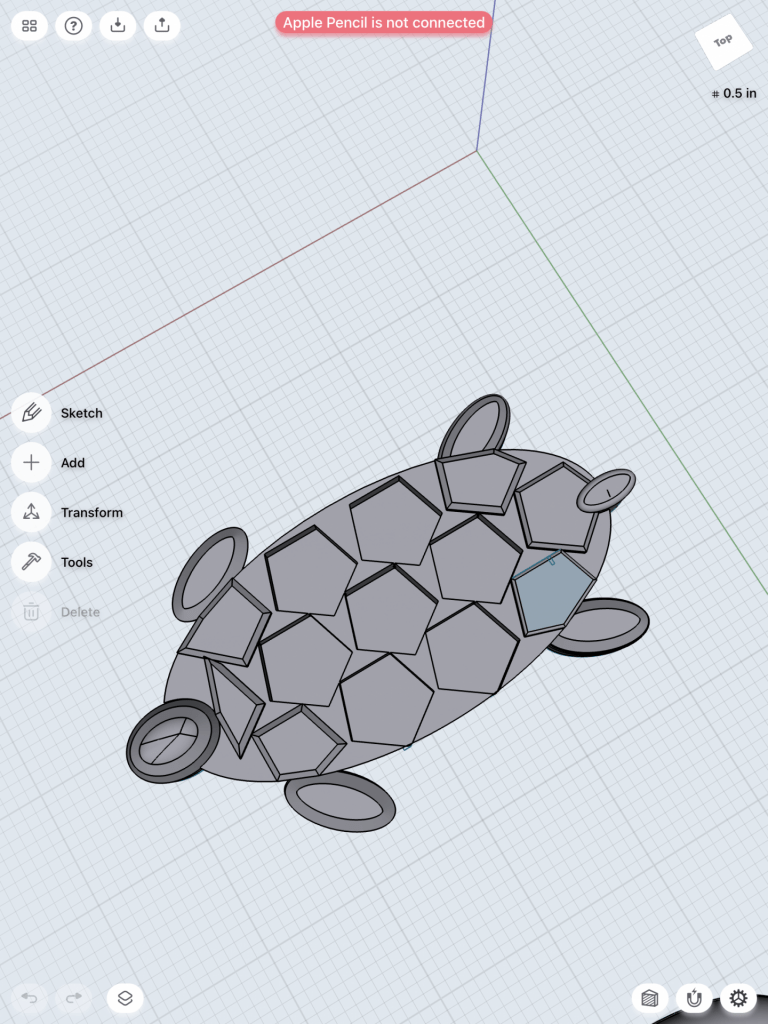
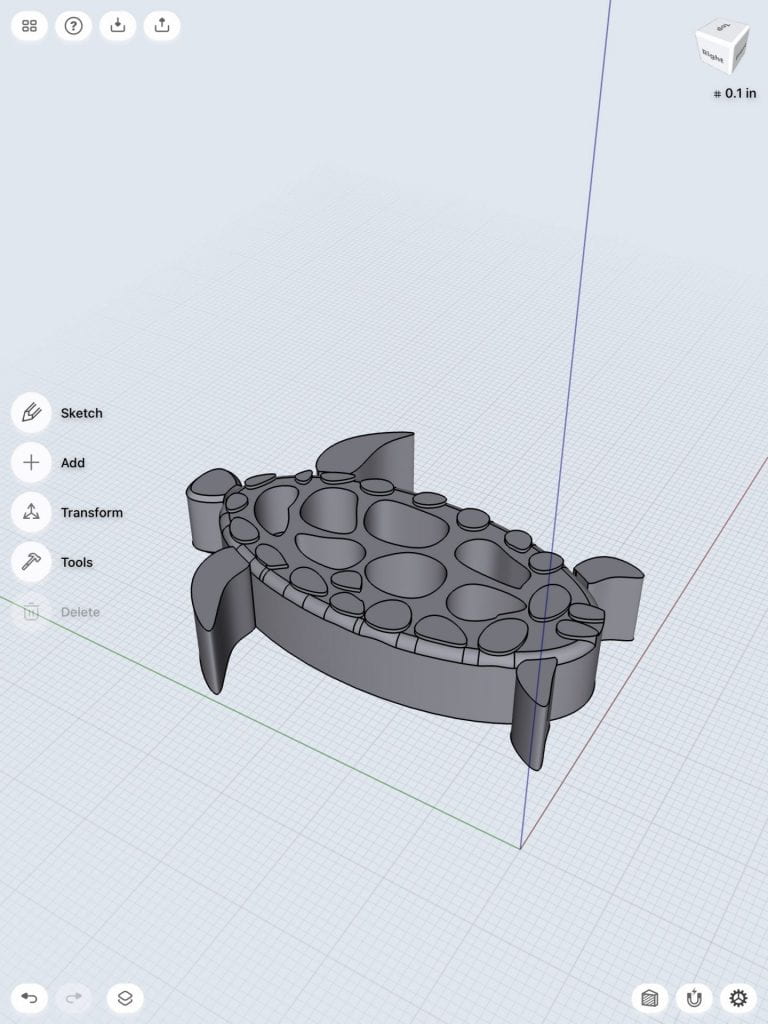
For my second iteration, I felt that I had nearly landed on my final product on the dot. I created a new design on Shapr 3D from scratch, in which I changed quite a few things. Firstly, I made an oval shape and pulled it up to create a one-inch high body. From there, I used the spline tool to make the scutes on the turtles back into more realistic shapes, rather than hexagons as I did with my first print. I made seven scutes larger than the others on the sides for those to be the holes for each day of the week in which pills can be stored. Once I lowered those seven scutes, I added the fins and the head and made the entire model a united body in order for them to be connected. I purposefully made the fins different shapes because when using a reference picture for the design, I saw that these were aspects of turtles that are fairly unique and I wanted to make the turtle more realistic. I rounded out the top and bottom edges of the head so that it looked more like a real rounded head that a turtle has, but would still be stable and not be susceptible to breaking off. Overall, I thought this design was great and I loved the way it printed, however what I found was that the size of the holes were fairly small which would make it difficult to stick your finger in and grab things out of, so I wanted to make that adjustment.

Below is the design for my second iteration on Shapr 3D.

Final Print and Reflection

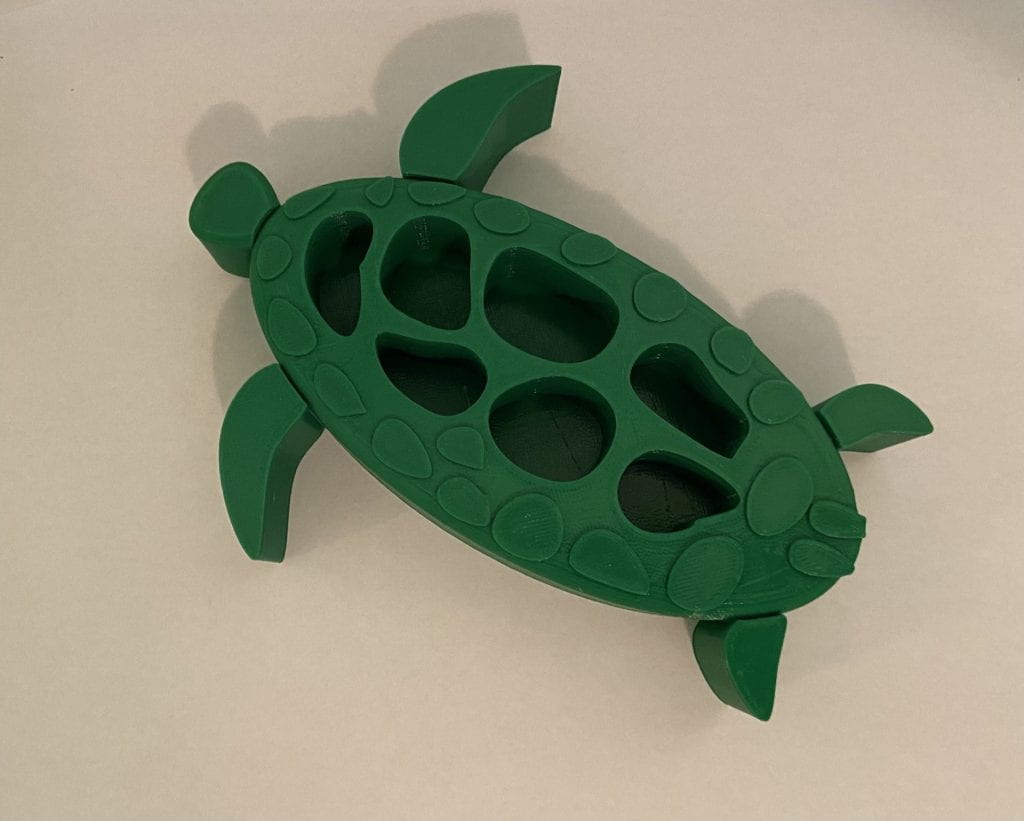
For my final print, I decided that I wanted to take the same design as my second iteration, but put it at 120% scale. This larger print would allow for an easier experience when someone is trying to stick their finger in the holes and fetch out the pills that they put in. The higher scale worked perfectly and I love the way that the final print turned out. The integrity of the design was still perfectly intact, and now the functionality has been raised. As final touches, I spray painted the turtle a beautiful light green color and added glue dots to the bottom; the light green spray paint was used because I loved how my second iteration was printed with green filament, and I wanted my final product to be green as well to emulate the green color that turtles are well-known as having. The glue dots were added so that the print could hold sturdy on a surface, because without it, the slippery plastic filament texture would slide all over other hard surfaces it is placed on. Also, since the holes do not have caps to cover them, the glue dots take the place of ensuring that the pills placed inside of them do not fall out, as the design will remain stable on the surface it’s placed on. I am extremely happy with how this design turned out and I believe that it serves its intended purpose and does a great job of adding a bit of whimsicalness to the otherwise boring object of a pill organizer.

The process of making this final design was quite stress-inducing in the beginning stages. The idea of actually trying to make this design come to life made me wish I had chosen something easier to create, but I needed to stick with it. My first design was quite the eye-opener in the sense that I had found creating the original turtle design to be super challenging, and then when it didn’t print the way it was pictured on my Shapr 3D screen I felt even more defeated. After doing two of the tutorials to create other objects on Shapr 3D, I then learned other tools that made me want to start my design from scratch, so that is what I did. Going in with a bit more pessimism than I did when designing my first design, I started creating this brand new design with caution. To my surprise, my second design was created with much more ease than the first one (who knew that actually learning the tools of a program would help?!). Once this second iteration was printed, I was ecstatic that the only change I wished to make was for it to be bigger. I was so enthusiastic about this print that I wanted to go the extra mile and spray paint it and add glue dots to make it look how I imagined it in a perfect world, and it did exactly that. This is my final product because it turned out to be fully functional, whimsical, and overall simply a fun design. Now, after having been through all the ups and downs of emotions with Shapr 3D, I can actually say that I find the program to be quite fun to work with and I really enjoyed it, and I am really proud of my print.

My design for my print on Shapr 3D can be seen above under my second iteration, because the only thing I changed was the scale. Below is my final design on Tinkercad.

Michaela’s Self Expression

Research & Concept

The functional form I decided to add playfulness to is an ordinary kitchen measuring cup. The original design I worked off of is measuring cups with the measurement for cups on one end, and the measurement for tablespoons and teaspoons on the other end. The measuring cups are used in the kitchen when you are cooking. They allow for you to measure the exact amount of an ingredient needed for a recipe. I knew I wanted to choose a kitchen item to inject playfulness into. When you are cooking in the kitchen, it’s always good to have fun while doing it, especially if you are cooking with kids. As a child, I always loved to cook with my mom in the kitchen, and if we had measuring cups like these it would have made it all the more fun.

I decided to add playfulness to the plain measuring cups by adding a floral appearance to the design. I added flower petals along the rim of the cup side of the measuring cups. Therefore, from a bird’s eye view, the cup itself appears as the center of the flower with the petals flaring out. I designed the tablespoon side of the measuring cup to be in the shape of a leaf, extending from the measuring cup by the handle. When all of the measuring cups are stacked on top of each other, it is meant to create a 3-dimensional flower.

Iterations

The element that worked best on the print of my floral measuring cup was the petals surrounding the edge of the cup itself. I was skeptical at first when designing this model, about the durability of the petals and whether they would fit nicely onto the rim of the cup. I used the scribble tool in Tinkercad to create a free flowing design of the petal, and then copied the design multiple times to give the array of petals the appearance of uniformity. After the print was finished, I was mostly happy with the quality of the attached petals, however I would increase the thickness of the petals in any additional re-prints I make to give them a slightly bulkier appearance. An element that did not work as well as I’d hoped on my measuring cup was the addition of the leaf-shaped teaspoon end. When designing the model, I tried extending the rectangular handle and adding a hollow leaf shape with the scribble tool. During the print, the edges became slightly warped and the hole for the teaspoon was not as defined as it should be.

After my first print, I went back into Tinkercad and made some revisions to refine the original model. I removed the block shaped bottom from under the leaf teaspoon end and I made the hole for the teaspoon larger and more defined.

Final Print

For my final print, I used Tinkercad to fix the teaspoon end of my measuring cup by removing the block base and making the edges smoother to give it a more leaf-like appearance. I also increase the size of the hole in the teaspoon. This is my final print because it incorporates everything I hoped it would when I was initially designing the measuring cup in Shape3D and Tinkercad. I printed the final model with an increased infill and a raft. I was very happy with my final print as a whole. I tested the measuring cup in my kitchen and used it to make chocolate chip cookies. The functionality was successful.

Cole’s Self Expression

Research & Concept

When choosing for an object to put my own playful spin on the first thing that came to my mind was a bottle opener. The function of a bottle opener is to pop the cap off of any glass bottle that doesn’t come as a twist off. The style of bottle opener that interested me the most was a hand held opener with a piece of metal stable enough to pop the cap off. These bottle openers also have a hole put into the design to attach a key chain. Having a key chain attached to the opener helps it become portable and easy to attach to bags to prevent misplacing it.

To make this design whimsical I plan on making it the shape of a lime. My dads favorite beverage is a Corona with a lime so I think this design would be a perfect gift for him. My main concern with creating this tool is figuring out how to shape it to crack open a bottle with ease. This will come with trial and error and I’m ready for the challenge.

Iterations

After completing my final model I was happy with how it turned out. The bottle opener clearly looks like a lime and the key chain loop fits perfectly in the bottom hole. The bottle opener is whimsical while also serving its purpose as a bottle opener to key chain to your cooler. One thing I’d like to change to the print is to find a way to get smoother edges at the bottom. I made many attempts at fixing this but I wasn’t able to create a base that would allow this.

When attempting to create the most efficient model possible I realized my first print on the right was too thick to be on a key chain and my hole was too high on the lime to fit on a key chain. When printing this key chain I printed it on its side which made the lime texture only appear on one which made me print the next one vertical. On my second print it was cosmetically correct and fit on a key chain but the bottle opening end was too short to pry open a bottle cap. This lead me to extending the mouth of the bottle opener on my last print fixing this functional error.

Final Print and Reflection

This is my final print of the lime bottle opener. Overall, I’m pretty happy with how it turned out but I wish I was able to get smoother edges from the printer. I’m happy with its functionality and will be attaching it to our family cooler over the summer. The process of making the opener function properly was very challenging but I enjoyed the process of making small tweaks to the design in order to get the results I was happy with. The aesthetic of the print was very easy to make so I spent most of my time on this project tweaking the mouth of the opener. My favorite part about the finished print was the size of it, the print fits perfectly in your hand and is pretty proportionate to most openers you’d attach to a cooler. I’m proud of my finished design and I know it’ll come in handy.

Daniel’s Self Expression

Research & Concept

It was a bit difficult for me to think of simple items that could be incorporated with a sense of playfulness with its function. As I was thinking of what object to use, the two objects that I thought about was a door stop and a wall hook. I still haven’t made a final decision yet for which item to add playfulness to, but I am debating between these two. These two objects are very simple to use by looking at it and understanding its function. Wall hooks are made to use by hanging items against the wall, whether it be clothes, appliances, and so on. A door stop has a simple function of preventing a door closing by itself by inserting a door stop at the bottom of the door. These objects are used everyday at all locations. Although they might look simple and easy to use, I thought it would be a good chance to add a sense of playfulness to these two items.

As you can see at the images below, for the door stop, I thought about three different ways to add playfulness to a door stop. The normal dimensions of a door stop is usually a height of 1.5 inches, length of 5 inches, and a width of 2 inches. I plan to keep those dimensions the same to keep the functionality of the door stop as it is, but add a sort of playfulness to it. The three ideas I have thought of was a person pushing against the doorstop, a person pushing backwards against the doorstop, and a person on top of the door stop holding a stop sign. These indicate that the person attached to the door stop is preventing the door from closing in some sort of way. I think adding these elements will add a sort of playfulness for a simple door stop. The image below the door stop is the wall hook. I thought about three different ways to add an element of playfulness to a wall hook. The first concept is a simple wall mount, but with a finger acting as the hook to hold the item. The next concept is a wall hook but shaped as a cat. The tail of the cat will act as the hook, holding onto the objects. The last concept I thought about was an elephant. The shape of the wall hook would be a figure of an elephant, and the trunk of the elephant would act as a hook to fulfill the function of the wall hook. I still have not decided what my dimensions for the wall hook will be, since the three concepts that I have thought about for the wall hook would be different than the others.

Iterations

This past week I decided to choose to add playfulness to a doorstop instead of a wall hook. I believe that many people have added playfulness to a wall hook already, and I think that adding playfulness to a door stop would be creative. For my first print, I decided to go exactly as I planned on my sketches. As you can see the model below, this was my first draft of the model. I decided to make the length of the doorstop 127mm, width of 50mm, and a height of 38mm. I also incorporated a stick figure acting as it is pushing and stopping the doorstop, preventing the door from closing. The stick figure pushing and preventing the door to close is my playfulness to an everyday object. However after my first print, it didn’t print as I hoped. The door stop itself printed as it is, but the stick figure itself had a bit of an issue. It was able to print the head and the two arms. However, the bottom half of the stick figure did not print correctly. I believe this is because I may have made a mistake on my measurements and the structure of the stick figure itself. Due to an inconvenience, I was not able to make another print. I also learned that the wedge on Tinkercad is not evenly sized. As I printed the door stop, I could tell that the lip of the door stop wasn’t a straight line. It looked as if it was around 175 degrees instead of a straight 180.

For my next prints, I plan to make the door stop itself a big larger. It does fulfill its purpose of preventing the door from closing, but the size is a bit too small. I also plan to make sure the doorstop dimensions are evenly measured and does not look slightly angled. I also plan to make some edits of the entire model on Shapr3D. I want to make my stick figure look more realistic, as well as more smooth than it was before. I want to emphasize the stick figures details, and make it easy to know that the stick figure is acting as like a door stop and preventing the door from closing. Below are some edits I have done to my model. I plan to make the height of my model to be 50mm, a length of 150mm, and a width of 50mm, so it would be more stable of stopping a door from closing. I also changed the model of my stick figure, putting its back against the door stop, another way to interact of how it is preventing the door from stopping.

Final Print

This was my final print for my everyday object with added playfulness. This process was very interesting. The very first doorstop I had printed was a bit smaller from before, so I decided to expand the dimensions of my doorstop. Before it was about 127mm in length, the new final model is now 181mm including the stick figure attached to it. The width from the first model was about 50mm and a height of 38mm. The new final model now has a width of 53mm and a height of 50mm. These changes have made the function of the doorstop much better than before. I had many trail and errors throughout printing this model. Most of my prints from before never really printed perfectly. There was always some sort of issue with the print. The images below are the results of my final print.

From before the prints weren’t printing correctly. Sometimes the bottom of the doorstop wouldn’t print to the bottom of the adhesion, making it look lopsided. The main problem was the stick figure attached to the doorstop. I had printed four different models from before, and the stick figure would always be an issue when printing. The stick figure wouldn’t be printed. Sometimes the bottom half of the body wouldn’t print and there would be filament around it, as you can see above from my first prints before a while ago. Throughout these four different prints, it is always the stick figure that wouldn’t print correctly. I have used Tinkercad with making these stick figures and I figured that was the problem. Whether it be the shapes not forming correctly, or grouping correctly. In the end I decided to use the Shapr3D app on the iPad. I figure that if I were to hand sketch my own 3D stick figure it would print much cleaner and easier. The image below is what I have made in Shapr3D.

The figure of this stick figure looked much better and well constructed as it was before in Tinkercad. I then uploaded this model onto Tinkercad and grouped it with my doorstop. I also added a small stop sign on top of the doorstop to give it the detail and definition of the purpose of the doorstop, preventing the door from closing. I then finally printed this model and it came out just the way it looks. I’m glad that in the end I have fixed my mistakes and issues and that the print worked out great. This was a fun project to do and throughout my experiences I am starting to get used to the methods of 3D printing when using both Tinkercad and Shapr3D. You can find and download my model here on Thingiverse.

Karina’s Self Expression

Research & Concept

As I was trying to come up with an object that I could inject a sense of playfulness into, I came up with the idea of creating a whimsical bookend. The function of a bookend is in its name, it is designed to be placed at the end of books to hold them upright. Bookends are sturdy and tall enough that they are able to support and hold books up. They usually have a platform at the bottom, so that way the object itself is more sturdy and capable of holding the books up. The weight of the books on the platform keep the bookend from slipping and moving away from the books. Overall, a bookend allows for easy access of any books and a better display of such books as they are held upright. When I was gathering inspiration, I came up with a great whimsical and playful design to add to the bookend so that it wasn’t just plain and boring.

I plan to make this bookend whimsical by making two separate pieces in which each end is a stick figure doing an action that appears to be holding books up. The people stick figures will appear as if they are doing such actions to keep the books from falling on them. One end will be of someone pushing the books upright, while the other end is of someone kicking at the books so they don’t fall on it. I will also be adding a hole into the arm of one of the stick figure ends, so that it serves the function of holding my favorite pen and appears as if the stick figure human is holding a sword or something. Below you will find my sketches of what I am envisioning.

Iterations

To design my object, I created individual stick figures on Illustrator and downloaded the SVG file to Tinkercad to create what is shown on the left.

However, I made a mistake while creating the figures on Illustrator. I had forgotten to make each shape on the Illustrator drawing into one. To do so, I had to create a path that combined each shape. That is why, in the images above, the stick figures are not filled in. At first, I thought I wanted this design, but then quickly realized that it would cause problems when printing. If I were to print the non-filled in version, then the walls would be way too thin and not print correctly. In the image above on the right you can see where I started to begin filling in the shape to fix this problem. However, I realized it would be extremely difficult to do so using only Tinkercad. Therefore, I went back into Illustrator and added the path to the overall tick figure shapes that I could later import into Tinkercad and have the full filled-in version of stick figures. The prints of these iterations are shown and explained below.

I first printed these iterations shown above with different settings. I had scaled down both iterations to 80% just for the purpose of it being an iteration and saving time. The purple one had a layer height of .2 and an infill density of 20%, and it took a total of 6 hours to print. This one’s platform also printed differently as it came out more curved. In the middle image of the purple prints, you can kind of see the curve I am talking about; however, this error is not that noticeable nor does it cause a problem.

The red print printed out perfectly and just how I wanted. I simply changed the settings of the printer so that it could come out stronger and sturdier. Considering that these bookends will be holding up books, it needs to be sturdy and strong. Therefore, for this print I made the setting as .1 for layer height and 30% infill density, with a printing time of 10 hours. The only thing I am realizing that I need to change, is the hole made for the pencil on the hand of the stick figure. Although these iterations were scaled down for the sake of fast printing time, I still think I need to adjust the hole size so that it is actually capable of holding a pen or pencil. Therefore, below you will see this adjustment via Tinkercad 3D view.

The two images below are supposed to show the different hole sizes. The left image is the initial, smaller hole size. Meanwhile, the right image is of the adjusted, bigger size.

Final Print & Reflection

This is my Self Expression final print of a playful two-piece bookend. The two human stick figures shown kicking and pushing at the books add a playful design to a simple bookend.

The entire design works really well with the function of the object. It is sturdy and strong enough to hold any size books. The platform of the bookend keeps the object from slipping and sliding because the weight of the books hold it in place. The way each figure is “pushing” at the books allows for a good hold of them. Having two separate pieces to the bookend permits for an adjustment in-between space size. In other words, the two separated bookends could be closer or further apart depending on how many books need to be held up. The hole placed on one of the pieces, can hold my favorite journaling pen and it still adds to the playful design. Now my pen and whatever book I wish to grab, can easily be accessed. The bookend pieces are small and take up very little room on my desk.

The overall process to obtain this final print was very easy and fun. I encountered very little errors when designing the object and printing it. The only difficulty I had while creating this bookend, was finding the right size for the hole that would hold the pen. After a couple prints, I was able to quickly solve this problem and create the right hole size. I was a little nervous about the size of my bookends, but they turned out to be perfect. They do not take up much room on my desk nor do they slip and slide all over the place. This is my final print because it came out clean and exactly how I wanted it to. Therefore, I am really happy and proud of the final print I have created and I know this is an object I will definitely use. I hope others can find this design helpful (and playful!), and will wish to print it as well!