Adrienne’s Story

Dimensional Letterforms

Jump to: Research | Concepts | Iterations | Final Reflection

My final dimensional letterforms

Twenty-six forms that represent sounds combined can create words with meaning that develop story. The visual depiction of these iconic symbols can be as simple as the scribbles of a preschooler to structural objects as seen in Lo Siento’s 4D alphabet.

Lo Siento 4D alphabet

Research

OOOOOooooooo

Both capital and lowercase letter “O”s are the same form and structure. When thinking in three dimensions, I immediately think of spheres, donuts, and targets. Taking this glyph further than extruding the surface to make a three-dimensional form is a goal.

  1. Vectorstock-circle-spherical-design-element-vector
  2. laundry-amazon
  3. www.notimeforflashcards.com
  4. Isamu Noguchi’s Skyviewing Sculpture in Red Square at Western Washington University
  5. Torus-istockphoto

Lowercase h

Or is it a chair? The stem and leg of this glyph brings ideas of architecture and furniture design. But when looking into the visual vocabulary of the lowercase “h”, I discovered how to draw a bird or to craft a house. I do love a good Old English form too.

  1. Chair + h SandroJalabadze-Dribble
  2. www.drawinghowtodraw.com
  3. www.notimeforflashcards.com
  4. logodix.com/chair
  5. Old English printableletters.org

Lowercase g

The lowercase “g” is the glyph to understand what a typeface can do for you. It’s form is versatile and unique with an ear, bowl, sometimes loop, other variants are tails. It is an obsession, just as the ampersand, to most type geeks. So much character can be derived from one character.

  1. https://qz.com “Can you recognize the letter “G”?” by Thu-Huong Ha & David Yanofsky
  2. free-printable-gothic-calligraphy-lowercase-letters-gothic-calligraphy-lowercase-G
  3. G. Ogaki Poster display typeface by Aron Jancso
  4. commons.wikimedia.org/wiki/File:G-samples
  5. The italic ampersand from Baskerville and the g from Newzald.

Back to Top

Concepts

The beginning of letterform exploration in two dimension…

Sketches by Adrienne Hooker
Sketches by Rowan Wang

Back to Top

Iterations

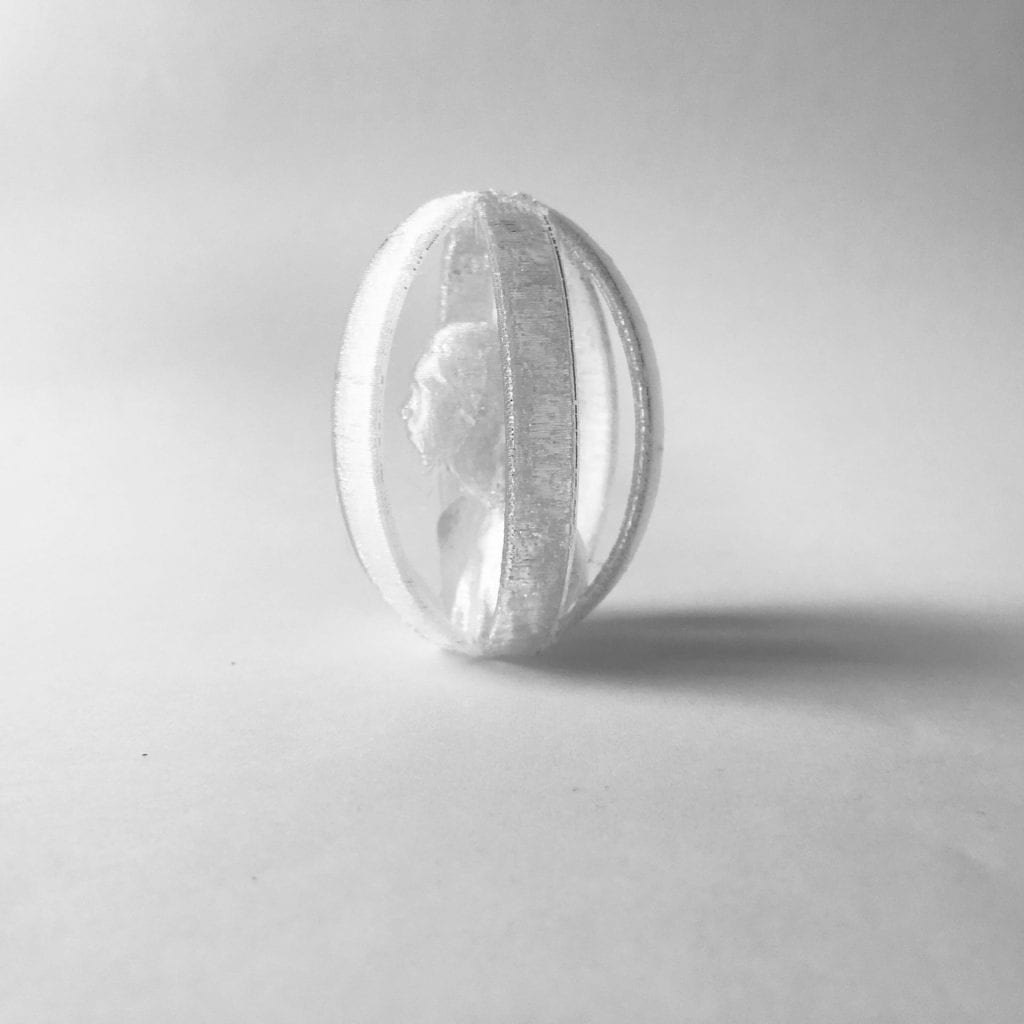
I wanted to tackle the patterned torus for the letter “O” but unfortunately time ran short so I had to settle for my oldest child, Oscar, being encased in multiple O’s. It was my first attempt at bringing in a 3D scanned model into Shapr3D and the program handled it well.

My next letterform is the lowercase “h”, fashioned after a modernist chair. It was fairly quick although a couple of the edges could be rounded better.

The letterform that took the most trial and error was the lowercase “g”. This glyph has so much character, I wanted to try and sculpture a two-story version in the round.

Test Prints

After modeling each letterform in Shapr3D, I test printed each on my Jellybox printer to get a sense of form but also how the models worked together. Each model took approximately 1 1/2 hours to print.

The C‘h’air felt more like a loveseat rather than a chair with the 65mm 50mm dimensions. So I’ll reduce the width to 35mm for the final print (as seen in the 3D view below).

First test print, 100% scale, coarse preset, no raft/supports, printed on side
Predetermined dimensions of 65mm x 50mm are more of a sofa than a chair.

The caged Oscar test print results were better than expected. The top connections of the multiple O’s need to thicken, but overall the bust and curves held up well.

The sculptural lowercase ‘g’ is still a work in progress, but I was successful in creating the top sphere with ear and the bottom tail. I’d like to refine the connection between the two stories. The 3D view is at low resolution since Tinkercad couldn’t handle a model with more than 300,000 triangles in the mesh. Initial print 100%, coarse preset with raft and supports. The ball of the ear snapped off when removing supports and still need to remove more support material underneath the top story and in between the tail.

Timelapse of 360° view of test print. Need to flatten bottom a bit to stand upright.

Back to Top

Final Prints & Reflection

Deadlines always push the limits to what we can achieve. I attempted to print my final letterforms at home so the class could use the 3SPACE lab, but unfortunately, my Jellybox said no. With a thermal runaway error midway through the prints, I had to go into the lab.

Jellybox final prints never made it past 50% due to temperature errors.

But I would say my printing issues at home were kismet. For the first time all term, being in the lab provided that in-between time with students. It felt good to have those teachable moments again (just as much for me as them). I thoroughly enjoyed this special topics class, and I hope I can dive into the 3D relm with students another time.

Below are the final prints of my three letters: lowercase h, O/o, and lowercase g. Not sure why it took me this long to realize I chose the letterforms for “hog”. As for printing, I would like to try my c‘h’air standing upright since the side on the plate didn’t keep it’s soft edge, and my lowercase ‘g’ has been printed on its side and upright with neither keeping it’s ear. The flattening of the bottom does help it stand better, but I’m not quite satisfied with how to finish it since the supports are difficult to reach or roughs up a beautifully pristine sphere. The caged O needed a little egg top and flattening of the bottom. Overall the 360° view of the letters are where I want them to be.

Back to Top

Michaela’s Story

Research & Concept

Each letterform in the English alphabet is unique, but also contains the same basic line forms and structures. Many of the letterforms are very similar to each other, such as “P” and “R”, or “O” and “Q”. These forms are only differentiated by a single slanted line placed in the form. However, when letterforms are converted from 2D to 3D images, there is a lot more room for different interpretation of the forms and unique styles to emerge.

First Glyph: “M”

The first letterform I chose was the letter “M”. I chose the letter “M” because it is the first initial in my first name, as well as my dad’s first initial. The letterform “M” is unique to me because it can have very straight, pointed edges at the top of the letter, or the edges could be curved, like arches. The typical form is straight line stems on either side of the “M” that come to a point where they meet at the top. There are many different styles of the capital form of “M” seen in various fonts.

Second Glyph: “R”

The second letterform I choose was the letter “R”. The letterform “R” has a straight stem on the left side with a curved edge on the right with an extended line. “R” has a very similar letterform to the letter “P”, with the addition of a slanted line. I choose the letter “R” to design a 3D print for because it structure and form. I prefer the capital form of the letter R to the lower case form because of the curved upper half and the line that extended from the middle to the base of the glyph.
Iterations

For my M letterform, I wanted to create a curved yet triangular shape for the arches in the capital M. I used two elevated 90 degree 3D triangle forms and had them intersect at one of their 45 degree angle points. I added long rectangular posts on to both outer sides of the triangles to give the form the appearance of the letter M. I used the tools in Shapr3D to blend the edges of the triangle to give them a curved, rounder shape. I also blended one side of the bottom edges of both rectangular posts to add a reverse mirroring effect to the letterform. I exported the file with my letter design from Shapr3D and imported it into Tinkercad.

After receiving feedback from my peers, I went back into Tinkercad and added semi-circular holes to the triangles forming my ‘M’ letterform. These arches in the triangle are meant to give the letterform the illusion that the lowercase form of ‘m’ is inside of the uppercase form of “M”, giving the letterform a multi-purpose.

For my ‘R’ letterform, I wanted the design to appear slightly whimsical. I added a curved loop that extends upward at the end to a rectangular post to create the ‘R’. For the initial design, I used the scribble tool in Tinkercad to formulate my idea into a 3D model. I then attempted to use Shapr3D to re-create the design with the spline tool. The design on Shapr3D did not turn out the way I had envisioned it in my head and the edges were too rigid and not curved enough. I then went back into Tinkercad to smooth the edges of the ‘R’ and give it the original appearance I had hoped for.

Test Prints of ‘M’ and ‘R’ Letterforms

Final Prints

For the final print of my ‘M’ letterform, I went back into Tinkercad and added a rectangular base to the bottom of the triangle arches because in my test print, the bases of the arches were very thin and not proportionate to the rest of the letterform. I also increased the width of the letterform as a whole to increase stability when standing the 3D letterform upright. In my test print, the width was too small and the print was unable to stand properly.

For my final print of my ‘R’ letterform, I removed the space between the body of the ‘R’ and the rectangular post. I also increased the width of the body to make the loop bigger and give the extended leg of the ‘R’ a longer, more curved length. I also added a box-like extension of the loop on the left side of the rectangular post.

Jonathan’s Story

Research & Concept

Letters are unique in that they can be designed in so many uniquely different ways while still maintaining the same meaning. While many letters can vary, some can be written with entire elements included or excluded, and our brains are still able to read them as the same letter. For my letter sketches, I experimented with how different parts of the letters interact to create a cohesive glyph.


First letter: G

The first letter that I chose is the uppercase “G”. I thought this letter would be interesting to experiment with due to the different ways that it can be written. The letter always curves around from the top to bottom, and then moves inward to the left. It is unique because it may or may not have a spur protruding downwards from the right side. The angles and shape of the curves may also vary widely.

Inspiration and sketches

Second letter: Q/q

For my second letter, I decided to design the letter “Q”. This is a fairly simple letter, as most of the letterform is just a round shape. The uppercase version has a tail that touches or bisects the bowl. The lowercase version, however, rather than having a tail, includes a descender moving deeper below the letter. For my ideas, I tried to focus on different ways that the tail/descender can interact with the rest of the letter.

Inspiration and sketches


Iterations

G

For my first letter, G, I decided to model the letter based off of the cube-shaped form that I sketched. I began by drawing out the base shapes that I needed, and then I simply extruded the sketches and arranged them to create the cube letter.

After I imported the model into Tinkercad to generate the preview, I also had the idea of changing the model so that it can be read from 2 angles. However, it isn’t as readable when viewed diagonally, so I’m not sure if I will go with this iteration.

Q

For my next letter, Q, I was originally going to model the flat, blocky version from my sketches. I started to draw the angular outline of the letter, but Shapr3D misinterpreted my stroke and created a curved line. I actually liked the way it looked and thought it looked more interesting, so I continued to model the rest of the letter using curves instead of only straight lines.

Test Prints

To test my prints, I printed both of my G iterations and my Q at low detail. Everything came out as expected.


Final Prints

G

After seeing my test prints in the physical world, I thought that my original G model had too much empty space on the left side, and I liked the “double G” design better. There wasn’t anything that I really wanted to change with that model, so for my final I just printed it once again but at normal detail.

I am really happy with the way this letter turned out, and I like the way the depth of the model helps it to be readable from multiple angles in a 3D space.

Q

For my Q, I wanted to make sure that the thickness was the same on each side. I went back into Shapr3D and made some adjustments to a few measurements and curves. I then printed it at normal detail, this time laying flat on the plate instead of standing up with supports.

I found it a bit harder to use depth for this letter in the same way I did with my G, but I am still pleased with the way the curved shape came out. I like how the “macaroni” shape of the tail connects to the curvature of the rest of the letterform, and also creates a flat surface for the shape to stand on without sticking downward.

Thingiverse link

Michael Mensah’s Story

Research and Concept

Letterform is the most basic but most important part of written communication. There are countless different types of letterform that can be created. Although this is the case the human eye is still able to detect what ‘letter’ is tryin got be displayed. This is the beauty of letterform because it allows for creativity to take place.

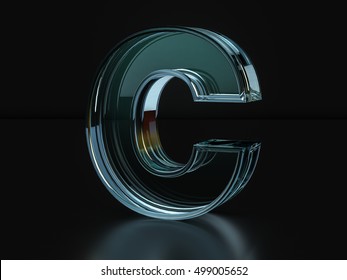
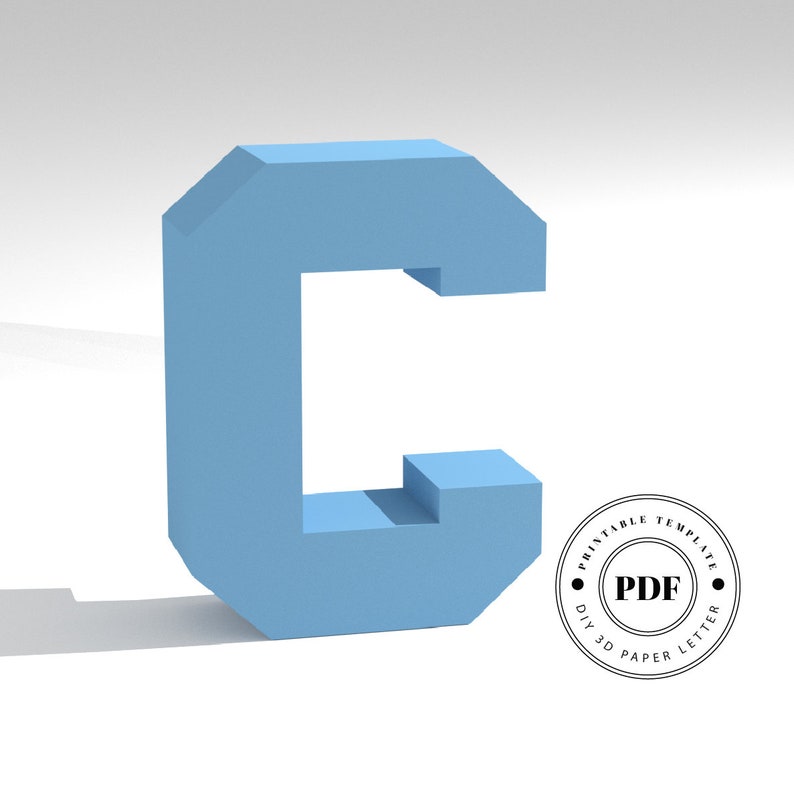
The first letterform I chose is ‘C’. I chose this letterform because I thought this would be a letter from I could get really creative with.

Below are some of my inspirations for my first letterform.

3d Letter C High Res Stock Images | Shutterstock
Printable DIY template PDF. Letter C low poly paper model | Etsy
3D Layered SVG / 3D letter C SVG / Letter C Cut File. (1203341) | Cut Files  | Design Bundles

Below are some of my sketches for my first letterform

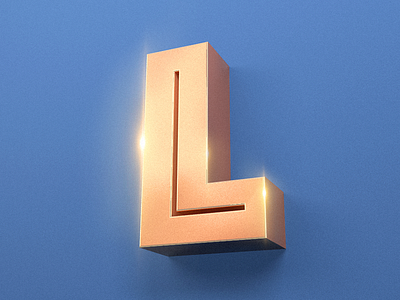
The second letterform I chose is the letter ‘L’. I chose this letter form because similar to ‘C’ I felt as if this is a letter that I could do a lot of different things with and truly exemplify how letterform can be used.

Below are some of my inspirations for my second letterform.

Capital letter L. From the white interwoven strips on a black background.  Template for emblem, logos and monogra… | Lettering, Initials logo, Logo  branding identity
L is for Lite Brite by Noah Camp on Dribbble

Letter L by Balo on Dribbble

Below are some of my sketches for my second letterform.

I am not extremely artistic when it comes to my hands so these sketches may not show truly what my vision is for these letterforms but I plan to make them into something very unique.

Iterations

For the letter C I decided to break it up into three sections that come together to create the whole letter. I used the extrude tool in shapr3d to bring the base letterform to life and make it a 3d model.

For the letter L I wanted to go with a block design at first but I decided that I could create something better.

I decided to turn the letter L into a mini ladder. I used Shapr3d to create the base of the the letter and then used the extrude tool to create the 3d model.

Final Prints

These final prints were also my first prints but I felt that they came out so perfect that there was no need for me to reprint my iterations of these letterforms.

‘C

I am extremely happy with how the final model of the letter C came out. The three sections work perfectly together to make a letter C. Even though they are not connected, they can still be decoded by anyone who is viewing it and can be seen as the letterform ‘C’.

L

The final print for the letter L came out just like I wanted it to. You can see the letter L clearly. The ladder part looks like smaller Ls combined together to create another shape. This print is probably my favorite out of the two letters that I made.

Conclusion

All in all, this was my favorite project to work on. Shapr3d gives you a lot more creative freedom to work with I feel like so I was able to create a more polished model than in previous projects. I am extremely happy with the way my prints came out. This goes to show how letterform can come in all different shapes, sizes, colors, etc. and a human will still be able to decode it and recognize what letter it is.

Chance’s Story

Research and Concept:

For my story, I chose the letters “Tt” and “Yy.” I chose these because I feel as though there’s quite a bit of structure in them, but also room for creativity and room for change. For the “T” I think that the stems at the top are something I can’t ignore so for the most part I stuck with designing around what I could do and change while also preserving the integrity of the letterform. The largest part about letters and letterforms is what is communicated and while I want to create something cool and exciting, I also want to keep the original integrity in tact. Both T and Y are very similar so I want to keep the designs separate as the two deserve their own spotlight.

“T”-Inspiration:

“T”-Exploratory Sketches:

For the letter “Y” I wanted to do the same as far as preserving integrity, but I chose to be a lot more playful in these sketches. I feel like pushing and changing dimensions is something I will strive for in the finished product.

“Y”-Inspiration:

“Y”-Exploratory Sketches:

Iterations:

For my “T” design, I wanted to play around with the view from each side. I found this to be more difficult than I initially thought. My plan was to create the bottom right design from my sketches, however my dimensions were not working for what I wanted. At first I couldn’t get the angle right in order to fit all four sides. So then I moved to creating more of a platform to allow for more space (see image1). I ended up leaving what I had because it looked as though the T was getting too bulky. Which brings the project to what the viewer sees in the tinkercad iframe. I want to ideally create something that brings design to all four sides, not just the two it has now. Feedback is the next step in my process. Another design I tried can be viewed in image 2, this design was an effort to incorporate a lowercase t. If I did move forward with that design I would hollow out the lowercase t and make the same on all four side. Again, not entirely sure the direction I want to go yet!

For my “Y” design, I had hoped to incorporate both and upper and lowercase Y, but ultimately I chose to go with the puzzle design that is in my sketches. I’m not set on this design (reference iframe), I more or less just chose one to draw out. I feel like this is nice, but some of my other designs might be a better fit for the assignment. For more inspiration, I drew out a lowercase y, just to see if I’d like to incorporate it into a different way. The puzzle is nice, but I would Ideally like to push the concept further.

Lower case Y, playing around with designs

For my T print, I changed the design as I didn’t know exactly what direction I wanted to go in. This print turned out decent, I printed it multiple times during the iteration process. Each time I couldn’t get the gaps exactly right. Pictures show that by the wonky structure. I will be adjusting that for the final.

For my Y print, it went better than expected, but I printed with a raft which caused the back to be raised on each piece. As a result, the Y was wonky as well. For the final I will take that off and see how it works then!

Final:

For my final on my T letterform, I fixed the gaps so that it created enough room for them to be flush with one another. In addition, I scaled it to 65mm to follow project requirements. This print worked the best using a raft. Overall, I’m happy with how this turned out. I wasn’t too sure of what direction I wanted to go with it, just that I wanted to incorporate both an uppercase and lowercase T.

My final Y letterform stayed fairly consistent start to finish. The only complications I had were in iterations with a raft causing a lip that pushed the pieces forward when stacked. I made the simple decision to not use a raft and it worked like a charm. I also scaled this letter to 65mm. I’m also content with how this turned out!

Megan’s Story


Research & Concept

Letterforms:

Letterforms are unique in that they are identifiable by specific features that generally stay the same no matter the design. They can be written, design, or constructed into 2D, 3D, or 4D designs and all still be identifiable as the same letterform due to these characteristics.


First Glyph: “I”

The first glyph that I was assigned was the letter I. The letter consists of one vertical line with two connecting horizontal lines– one at the top and one at the bottom. After analyzing the letter I only had one potential 3D design idea, which was a simple block letter I. I decided to look for some inspiration and ended up finding the three designs below. These three images became the inspirations for my sketches for the first glyph “I”. In my sketches, I ended up using a simple block letter form for most of the I glyphs mixed with fun cutouts.

Inspiration

Second Glyph: “b “

The second glyph that I was assigned was the lowercase letter b. The letter consists of a line with a half circle attached to the right side of the line. I’m pretty familiar with the letter since my last name starts with a b, but I often only really write and look at the uppercase version of b. As I was examining the glyph I realized that there was plenty of potential to redesign the letterform into a 3D shape. After analyzing the letterform, I began to do some research to find inspiration for my potential designs. In my sketches, I ended up using a general bubbly type font base. The majority of my designs for b have soft edges with lots of curves. Though, I did design a few with a more box-like shape to give the design more of an edge.

Inspiration

Sketches


Iterations

First Glyph 3D Model:

3D Designing Process:

For my first model, I decided to alter my original design by changing the cutout. This is because I didn’t like how dull and boring the initial design looked in Shapr3D. So, I began trying other forms of cutouts such as making the i bigger, moving it around, and finally cutting out a capitalized I. After making this adjustment I ended up really liked the way it looked. I feel like it is a lot more sophisticated looking and sleeker.


Second Glyph 3D Model:

3D Designing Process:

As for my second model, I didn’t end up making too many adjustments throughout the process. The main thing I did throughout this process was figuring out spacing and readjusting and making more lines. I did this until I got the swirling effect that I liked the best and thought looked the coolest.


Final Prints

First Glyph 3D Model & Print:

Second Glyph 3D Model & Print:

Pictured above are my final prints for this project. Overall, the printing process for these letters wasn’t too bad. For my first glyph, I only had to print it once after editing the original design and it turned out perfectly. I wasn’t as lucky with my second one though. I ended up having to print the “b” once and then make some slight adjustments. In the end, though they both turned out just the way I had imagined.

Daniel Drecun’s Story

Research & Concept

Letterforms are an interesting art-form that simultaneously has strict rules but is still very customizable. Different fonts or styles can impact the way a letter is perceived by a viewer. Certain textures and lines might express a tone like playfulness through bubble letters on a children’s game, or a more antique feeling can be portrayed through script-handwriting letterforms. Working with letterforms is an art because the whole challenge is expressing what you want creatively while still maintaining traditional letter standards.


Glyph 1: Capital A

Capital A is a very symmetrical letter in most instances which makes it a little more constricting because whatever is changed on the left side will most likely have to be mirrored onto the right. I chose this letter because my middle initial is A and coincidentally, my girlfriends name starts with A in case I don’t have money to get her a gift.


Glyph 2: X

X is the most under-represented letter in our alphabet. It is seen in a lot of commercials for products with flashy names that appeal to kids. I chose this one because I love an underdog story. Theres a lot of surface area to X so I feel like I have a good bit of space to work with creatively.


Iterations

A

My first iteration attempt was on the letter A. I looked at the sketch in the bottom right and I thought of ring toss and I’ve been meaning to play ring toss recently, so why not center it around my middle initial? I think I made a pretty fun whimsical decision with this. I need to print this one out to see how big I should make the ring; I’m not a professional ring tosser. I tried Shapr3D for this one but my hands are so shaky it made it hard.


X

My second iteration was the letter X. My sketches for this one were pretty uninspired so I looked at the one in the bottom right, played around with it and tried to translate it into 3D. They almost look like puzzle pieces being put together. I think I did an alright job but I’m going to try drawing something new in Shapr3D because I feel pretty limited with Tinkercad and I think this letter has potential.


Final Prints

I had a very rough time dealing with my final prints. I tried to print my ring toss A twice before but they ended up turning into spaghetti right near the end. I think I just got unlucky because on my third print it came out beautifully. The only thing I changed from the initial design was increasing the size of the triangle hole in the center.

My X print came out wonderfully and I love the design of it. I thought it was a weak entry at first but I really like the way it looks and it was very satisfying to rip the supports off and be left with such clean lines.

Julianna’s Story

Research & Concept

Letterforms are a very important part of culture. No matter how many different shapes and sizes a letterform can come in, it is still distinguishable by the human eye as to what letter it is. Letterforms can be made in 2d, 3d, or 4d and still have the same meaning to a person.

My first letterform that I chose as “f” I chose this letter because it is the initial of my middle name and I thought it would be a fun letterform to work with. At first it was very hard to find inspiration and I did not know exactly what I should be sketching. Once I finally got started I was on a roll and felt very good about my ideas.

These were some of the photos I drew inspiration from to create my sketches. All of them are very fun and interesting to me and I think I am going to have a hard time choosing a final idea.

I am happy with my sketches although it was hard for me to get across exactly what I meant in these sketches I am hoping that one of them comes to life the way I wanted it.

The second letterform I chose was “b” because it is the first letter of my last name. These ideas did not come as easy to me. It was hard for me to see all that could be done with its shape unlike the “f”. I am not particularly happy yet with any of them but hopefully I can come up with something using what I have planned already. Below is some of the inspiration I used.

Here are my sketches and as I said before I am not very fond of any of them yet but hopefully over the next few days or when I am designing on Shapr3d I will come up with something better than what I have. So far, this has been a little more difficult than I thought I would be but hopefully I will be satisfied with my final products.

Iterations

For my first iteration I modeled the letter “B” This one did not turn out exactly how I planned but I think I like it better this way. I did not originally plan to have a hole in the middle of it but in order to shape the curves on the “B” and extrude the faces I could not figure out a better way to do this.

I actually ended up enjoying the contrast of the hole in the center makes to the extrusions in the upper and lower parts of the “B”. I am definitely open to critiques on this one and still want to figure out how to make it the way I originally planned and see if I like it better.

My second iteration was for the letter “f”. This one was a lot harder than expected but I think it turned out decent.

I had to sketch the f and extrude it then I chamfered all the sides until it was completely round. Then I had to take it into tinkercad and add parabloids to make the spikes around it. The spikes are not exactly how I would like them and I am not sure if the “f” is shaped correctly, there may have been an easier or more efficient way to make it so I am going to keep working on it.

Overall, I am super happy with how my iterations are looking so far!

Final Prints

Unfortunately one of my iteration for “B” that I turned in as my final print I do not have a photo of. I do have a photo of another iteration of “B” that is not as good due to the infill density being off but it is not horrible.

I ended up adding a small block to the bottom in order to help the letterform stand up but I did not take into account the weight from the extruding centers of the “B” so it was uneven and very hard to get to stand straight. My final letterform of this that I turned in was the same exact thing but the infill density was lower so the print came out much better.

For my letterform “f” It actually printed very well on my first try but I tried to make it stand on the spikes but my first try did not work. I then printed it out again and added a fourth spike to the bottom but unfortunately it was too short so I then needed to sand down the other spikes to make it even. This helped a little bit and now it can stand up but only when it is placed perfectly. There were a ton of supports and rafts that needed to be removed from this print but it was worth all of the struggle of clipping them off.

Overall, I am very proud of how my letterforms turned out. Making them completely on Shapr3D was definitely a challenge but they turned out almost perfect. Had I had an easier time getting back and forth from printing and doing it in time I definitely could have made these letterforms perfect.

Unda’s Story

Research & Concept

Each letterform has its own distinct characteristics of dimensionality and texture that allows it to be able to be recognized standing alone. Although letterforms are distinct there are still multiple methods used to customize the letterform’s structure in a way that still keeps its essence but alters the appearance of the letter character. No matter what alteration, typography allows us to recognize a letterform and its shape unconsciously.

First Letter: “Z”

The first glyph I chose was the letter “Z” because I felt that it was a very unique yet simple letter. I like how angular the letter is and that it contains sharp edges. This letter form has two even horizontal line connected to the each end of an angular, vertical strip. When written it is similar to the shape of a zig zag. Depending on the font or style, the letter “Z” will sometimes contain the personalization of a serif or a san serif. Below are some examples of my own alterations of the letter “Z” along with sketches.

Second Letter: “U”

The second glyph I chose was the letter “U” because it is the first letter of my name and because it is completely opposite to the letter “Z”. I thought it would be interesting to go from a completely angular letter to a softer, more curved letter. The letter “U” contains a simple upwardly curved line. When it is in lowercase it additional has a tail attached to it. The “U” also can be alter differently depending on if it is serif styled or san serif styled. Below are some examples of my own alterations of the letter “U” along with sketches.

Iterations

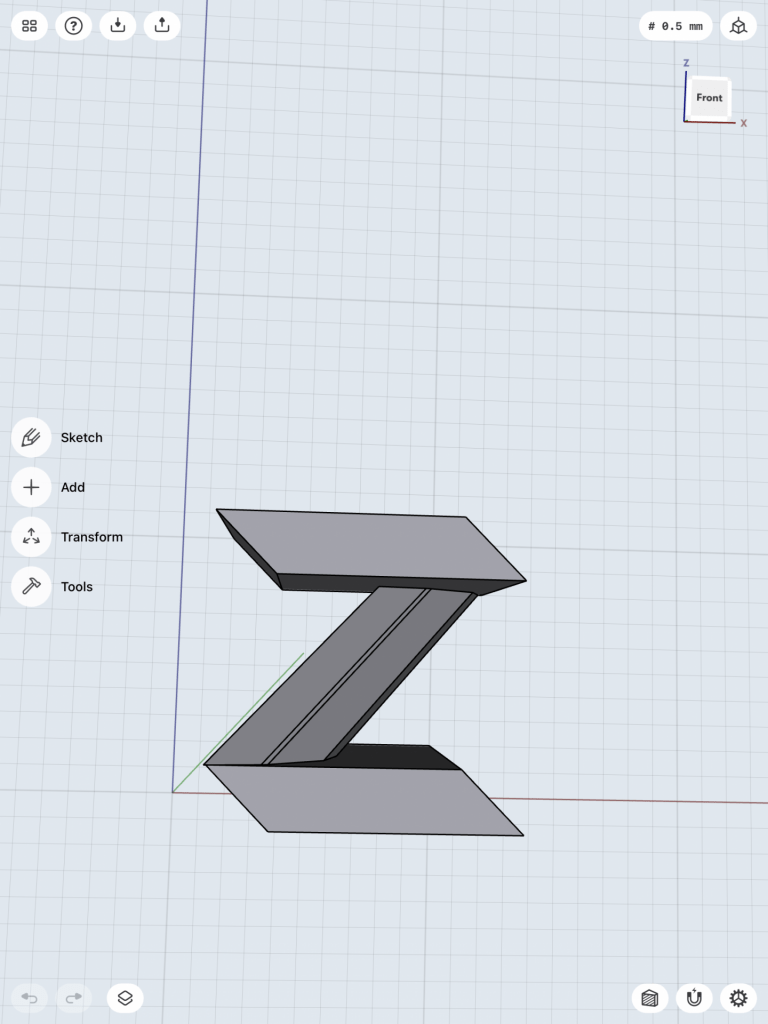
My first iteration for the letter “U” was pretty straight forward because I was able to draw out the shape that I wanted on Illustrator and then transferred that file into Tinkercad. My “Z” letter took more of a process because I originally started with a design of a Z shape that is hollow on the inside but as I was playing around with the outline more I came up with a more 4D type of design that I really liked.

After looking at 4D letters and taking inspiration from letter sculptures, I thought that the “Z” was simplistic enough to be able to play around with its shape and angles as well as morph its form. I also really wanted to take advantage of how clean cut the letter is so I wanted to create a more challenging design for this letter. Because of that, I thought that it would be the perfect opportunity to create the “Z” in a way that could be read at all angles when it is turned in a circle.

This is the first “Z” letter design I came up with.

This is my second “Z” letter design. If you move it around you can see that it takes the shape of a “Z” no matter what angle it is in.

I like both designs but I prefer how the second design turned out because I enjoy its unique 4D quality. The 2nd design to me also has a lot more potential as well to be altered in a creative way.

For the letter “U”, because it is the complete opposite of the letter “Z”, I wanted to take a different approach to it. My main concern when I chose the letter was how it was going to stand up on its own because the base of the letter is curved. After doing the research I came across many designs where the curve of the “U” is slightly more angular but still holds the true essence of the letter. I really love the style of old english and thought it would be clever to create a 3D print of a letter that looks like it came straight from a written pen or off a page of an old book. Below is the design I came up with. You can see that the bottom of the “U” is also sharp enough to stand on its own as well if needed.

Final Print & Reflection

Before printing out my final letter form I had to make some slight changes. For the letter “U” I tidied the corners up so that the letter form as a whole had a smoother edge. Below is the final design of the letter “U”. For the letter “Z” I decided to keep that the same because the test print came out really well.

Below you can see the two final forms of my two letters “Z” and “U”. On the top is the final design for the letter “Z” and on the bottom is the final design for the letter “U”.

Overall I’m super happy with the final prints for this last project. As shown above, you can see that both letters both stand upright on their own. I’m most happy with the outcome with my letter “Z” because it can be viewed as a “Z” in all directions. I’m also content with my letter “U” because I love how it is able to stand up on its own due to the old english font it is in. Both letters were fun to make and a nice challenge to play with their letter form.

The process to obtain these prints were mostly easy but I did come across some obstacles. The test prints for these objects came out super well even though I accidentally broke the “Z” taking it home. When I went to print out my finalized letters the 3D printer glitched and melted the back of the letter prints. The supports also didn’t print with the “Z” and so it spaghettied everywhere.

After this I reprinted the letter and they came out very nicely. The supports actually printed and the overall form of both letters looked clean. Below are my final letters together. They two prints came out the cleanest and are the sturdiest!

Cole’s Story

Research and Concept

Letter forms can be represented in numerous styles, textures and sizes while still holding its value. The recognizable formation of the letters allows the viewer to still view the meaning of the letter form no matter how much you morph it. Whether it be 2D or 3D the letter form will remain readable.

First Glyph “S”

The first letter form I have been assigned is S. This letter is easily distinguished by its too curves that look almost like a circle was cut in half, separated and flipped opposite ways. This letter for is often seen shaped by everyday objects such as a rope and creatures like a snake. These curves allow for a lot of room to play with form and be creative with it.

Inspiration

Sketches

Second Glyph “r”

The second letter form I was assigned is “r”. This letter is identified by its streak with an end hook at the top. This letter form is similar to a “P” but only contains half the oval connected to the streak. This letter forms distinct resemblance to a hook sparked my mind when exploring different ways to morph its form.

Inspiration

Sketches

Iterations

‘S’ model

When creating my ‘S’ model design I knew I wanted to give it a 3D look while also giving off the look of a lifted fold. The model still has a lot of work that needs to go into it to give off this effect but I think I’m heading in the right direction. In addition, I want to add some more features to the front face of the ‘S’ to make it pop. I enjoyed working on this model and I’m excited to work on the results I’m looking for.

‘r’ Model

I’m pretty proud with how my ‘r’ model turned out. One thing I think I need to work on with this model is making the ‘r’ in the rose more clear when viewing the rose. Instead of adding a whole stem as I drew up in my concepts I decided to put two petals at the bottom of the rose and I think it helps to viewer to instantly acknowledge what the design is. I really enjoyed making this model and I’m looking forward to making some adjustments and doing a test print.

Final Prints

Final S Reflection

When creating my final ‘S’ I attempted to add more of a curve to the model to stray away for the ‘Z’ shape and I somewhat got the results I was looking for. I tried to create a new model and print it but my printer was shut off so I was sadly never able to get a second variation. I think the design of this model is really cool and I think it turned out great but I wish I was able to get my second variation printed as well.

Final ‘r’ Reflection

After completing my final print for the Rose ‘r’ I was very proud of the results I had. I’m happy with how the ‘r’ in the rose came out and how clear it is that the model resembles a rose. Before beginning this model I was a bit nervous about how it may turn out and these are the results I was looking for when I thought up the design in my head. Overall, I’m very satisfied with how this print turned out.