Daniel C’s Self Expression


Research

When considering what functional object that I wanted to inject whimsicality and playfulness into, I began brainstorming by considering the things around me which I most frequently use. This led me to my pencil holder. A pencil holder is a commonly owned household item, providing users with great organizational benefits. In order to save desk space, users can insert any type of pen, pencil, marker, or even scissors into it. This item is generally distributed in boring and uncreative shapes, such as cylinders or rectangles. They are fairly straightforward items, found in most department and office supply stores. In order to house writing utensils, the shapes are hollow and lid-less. My current pencil holder isn’t even designated for its job, as it is merely a cylindrical coffee mug with no sense of inspiration or playfulness.


Concept

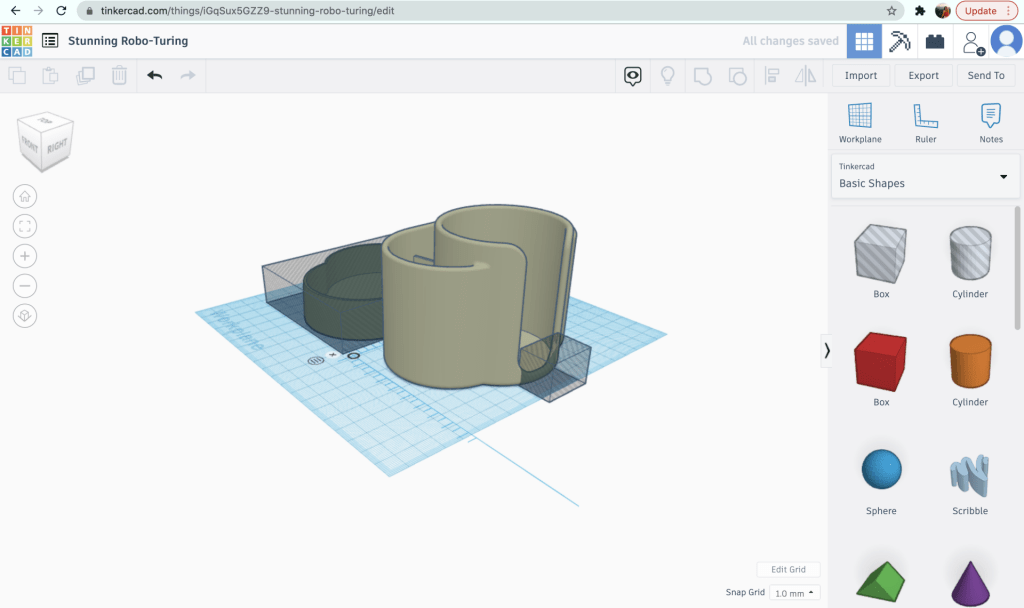
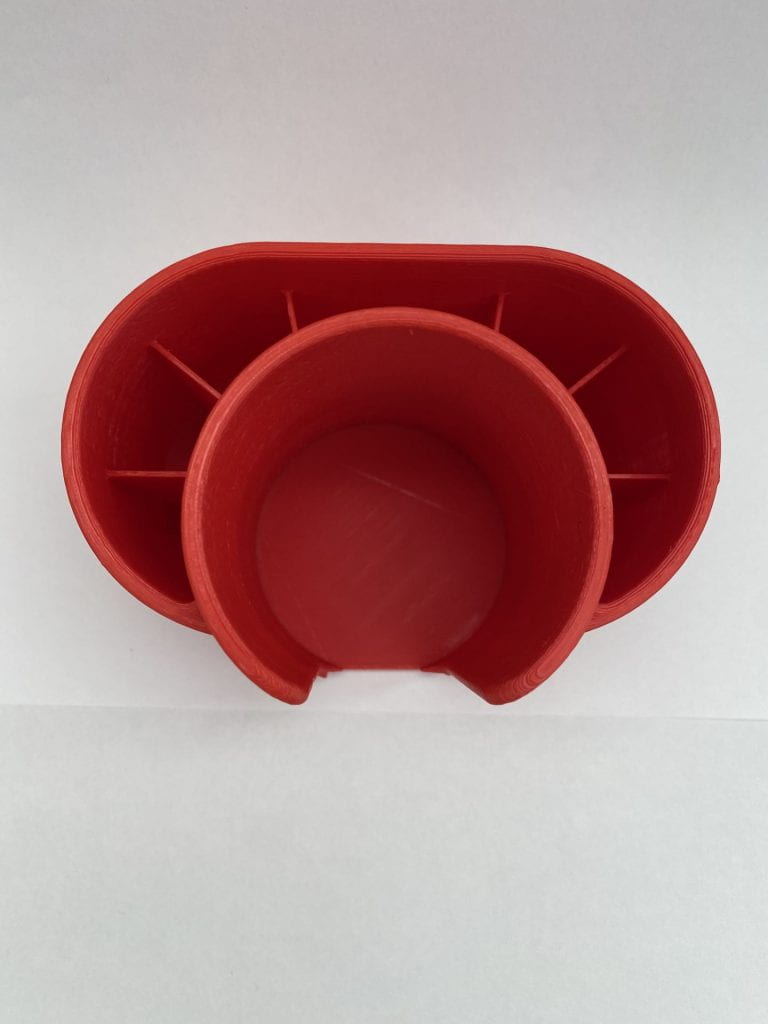
To make this object more playful, I decided that I would ironically intertwine the object’s functionality and purpose with its literal name. I plan on designing the pencil holder in a way that emulates a hand holding a pencil. To do so, I will couple a pencil container, representing a pencil itself, and a base––the hand. The hand will position the holder at a slight angle, allowing the stored writing utensils to be more accessible to the user. Instead of an eraser at the end of the ‘pencil’, there will be a hollow opening into which users can drop their pens and pencils into. This tongue-in-cheek design is a good representation of my humor, and it will also serve me very well, as I lack adequate storage for my writing utensils. Although one can hold their pencils in almost anything that is hollow and has a hole on the top, I am seeking to add a touch of my creativity into this simple yet functional object.


Iterations

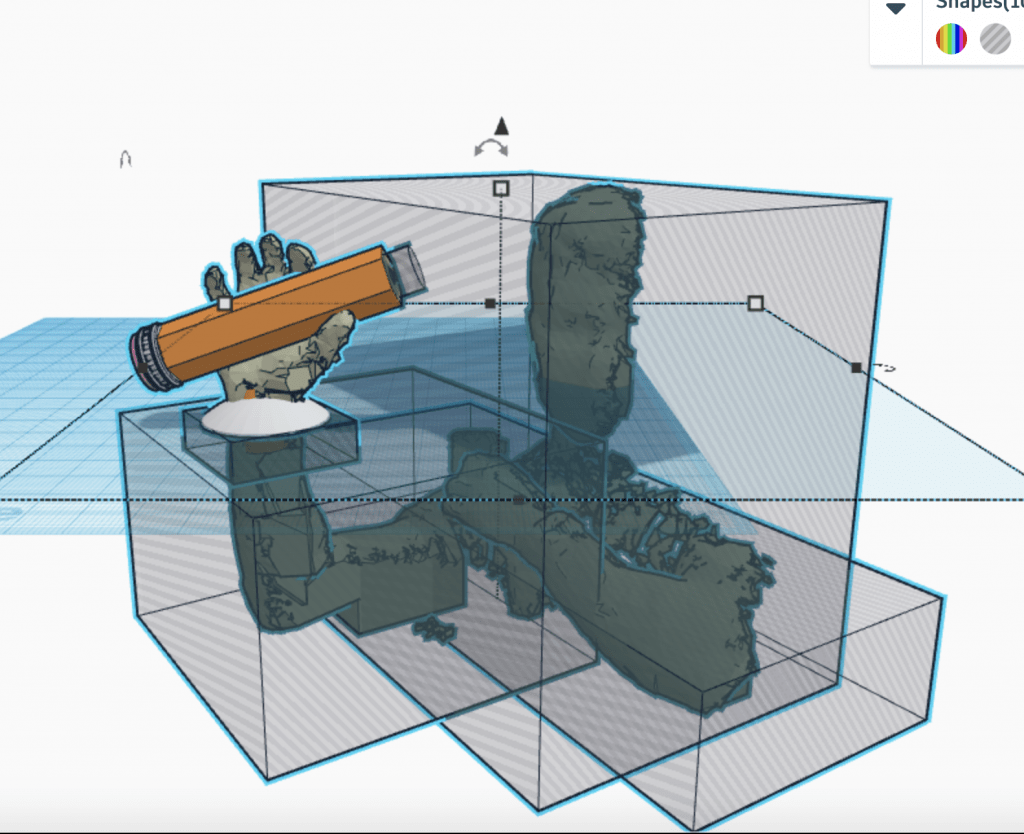
After completing my research and created a concept sketch, I was ready to start designing the object in Tinkercad. There was only one problem: how was I going to design a hand with the available software? The answer to this problem came about while I using an iPad mounted LiDAR camera, paired with the Monocle Structure Scanner application while working on the 3D Bust Scan project. During the process, I realized that I could use the camera and scanning software to create a 3D scan of my hand, which I could import to Tinkercad. With the help of Professor Hooker, I held my hand in a manner that emulated the position of the hand-drawn in the concept sketch in the previous section. After transferring the .OBJ file of my scanned hand onto my computer, I converted it into a .STL file in Tinkercad.

Below are a series of pictures that document the transformation process.

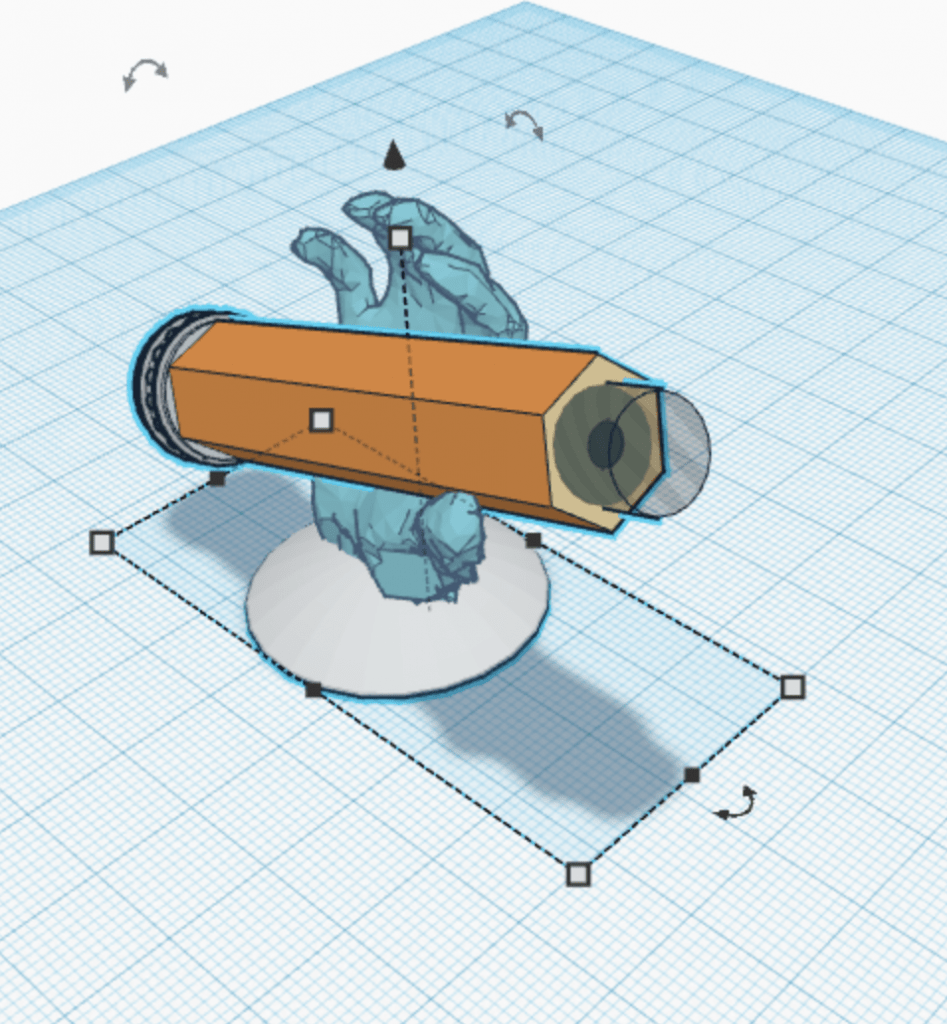
As seen in the pictures above, I had to utilize numerous ‘holes’ in order to isolate my hand. Besides that, the design was pretty straightforward. Thankfully, in Tinkercad’s ‘Making At Home’ list there was a readily available 3D model of a pencil. I merely inserted a cylindrical hole into the pencil to make it hollow, grouped them together, and then positioned the pencil in a way that allowed for the hand to grip it. Finally, I added a saucer where the wrist meets the palm, in order to create a wider and more stable base for the holder.

Due to time constraints, I have only been able to print out one iteration. In order to save time and resources, I printed a scaled-down version of the model, to make sure there were no glaring issues regarding its printability. There are a few edits I need to make in Tinkercad and Mesh-mixer, but other than that, I am quite satisfied with how my 3D model turned out. Upon viewing the iframe, one may notice that part of the hand intrudes into the hollow part of the pencil. I tried to address this issue with no success, but am certain this design flaw will be solved by the time I make my final print. I also plan on using Mesh-mixer to better conform the hand’s grip to the pencil.

The current model is roughly 4cm in height and 6cm in width. In order to function properly, I will have to print the model on a much larger scale. The only problem that arose during the print was on the printer’s end. As evident in the pictures above, the printer’s under extrusion resulted in the deformation of the pencil’s base and left an unwanted hole as well. In conclusion, this iteration has helped to point me in the direction I need to take, in order to achieve the results I am looking for.


Final Print & Reflection

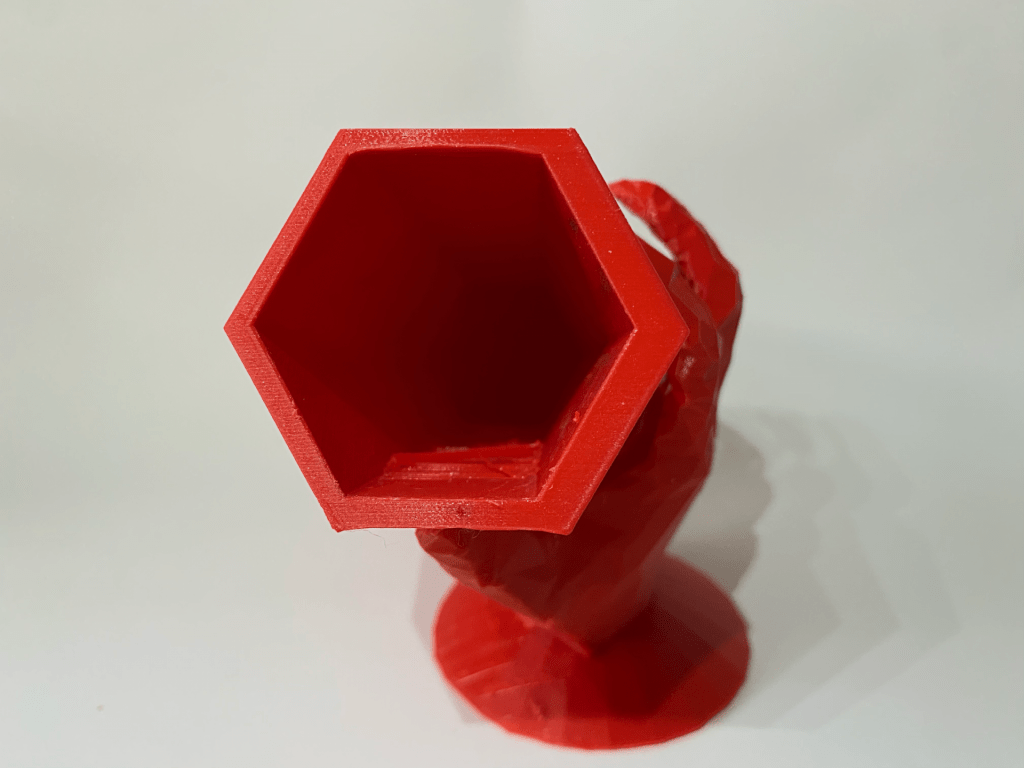
For my final print, I decided to make the ‘pencil’ that the hand is holding much larger, and changed the hole from a cylinder to a hexagon in order to maximize storage space. By widening and lengthening the ‘pencil’ part of the pencil holder, I hoped to ensure that there was enough counterbalance present. This would allow me to house an adequate amount of pencils, without worrying about it tipping over. I also modified the ‘pencil’ part of the pencil holder by making sure that its base would be level with the base of the hand. Although I tried my hand at Meshmixer, I was unable to smooth out the hand or change up the grip to make it conform to the pencil more tightly. I spent the better part of an hour and a half trying to rescan my hand with professor Hooker, but it was to no avail.

After multiple printing attempts, I still remain unsuccessful in obtaining a finished product. Below is a screen capture of the print settings I used and the estimated printing time. Currently, I am in the process of making my third print. I will have to post an update regarding its outcome. So far, it seems as if the problems stem from over-extrusion and lack of printer cooperation. Unfortunately, this process has garnered more pain than pleasure, but I guess that is all a part of the learning experience. I have been able to avoid any major problems in my previous prints, but that success has not carried over to this project. I am really hopeful that I will be able to obtain a good print by the end of this process.

Below are a couple of pictures that capture the various issues I have faced throughout this process.

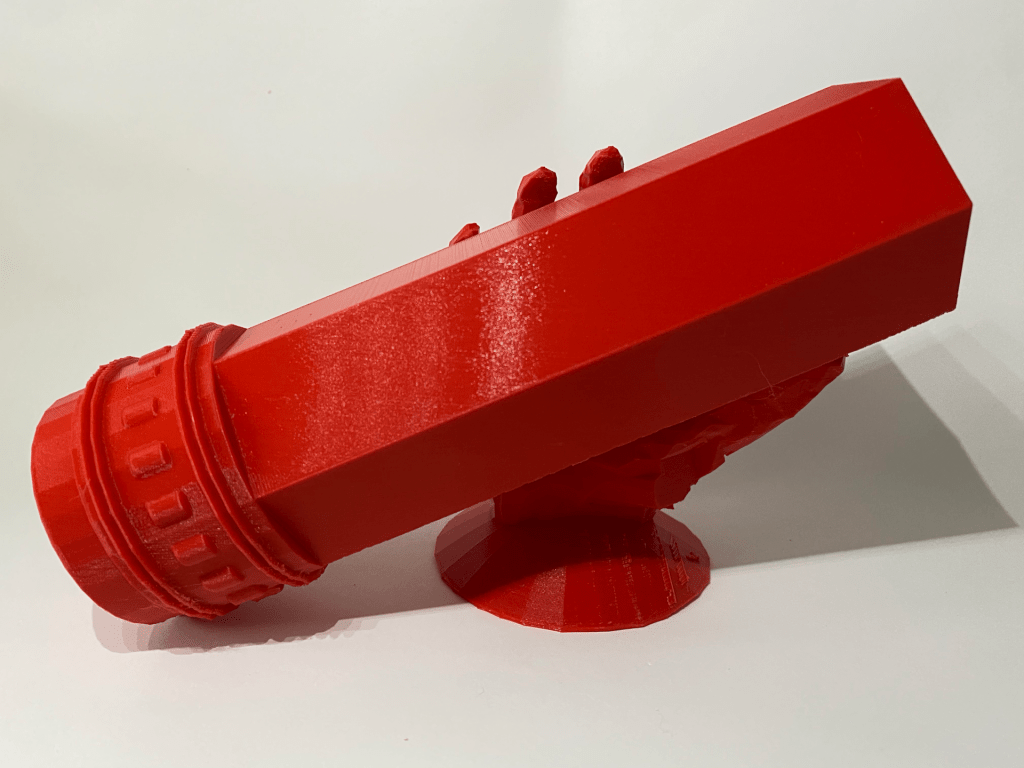
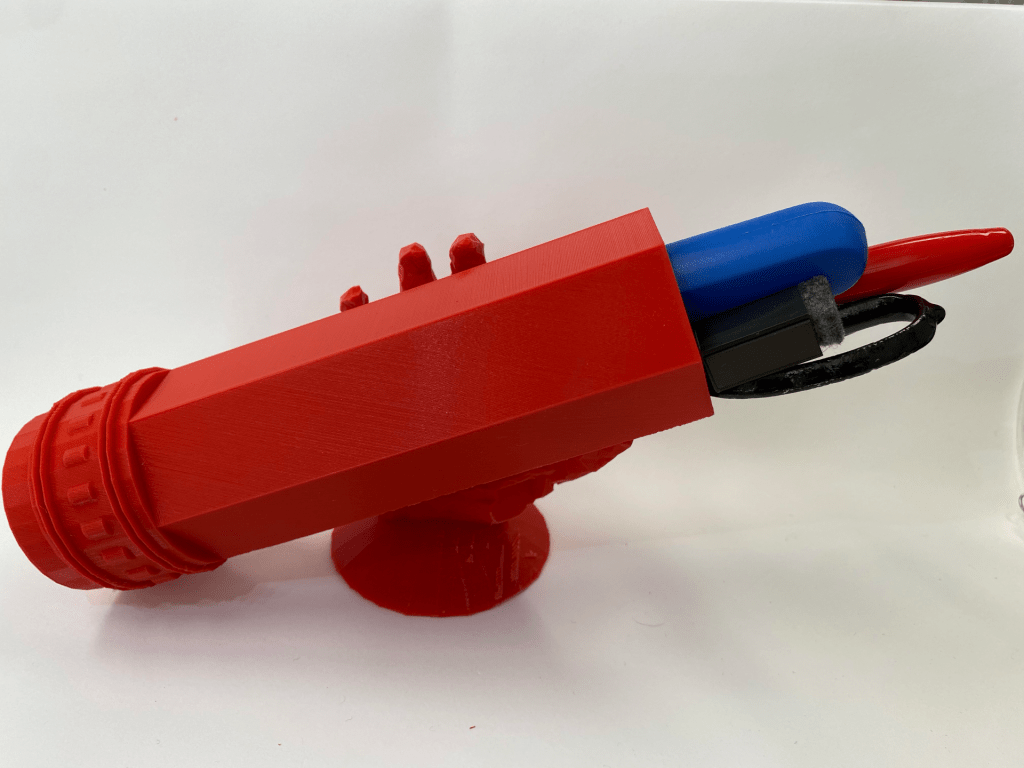
Upon closer inspection, and two failed prints, I realized that the reason for the misprints was due to my incorrect calibration of the print settings. Professor Hooker brought it to my attention that I might have forgotten to add supports to the print settings, which was in fact the case. Upon making this correction, I was able to obtain a successful print of the pencil holder. Below are a few pictures that showcase the successful print.

I purposely made the sides of the holder that come into contact with the hand thicker, in order to ensure that none of the hand bled into the hollow space of the holder. Overall I am pretty satisfied with how the print turned out. Although the third picture makes it seem like objects placed into the pencil holder are easily accessible, thus fulfilling its function, the holder is actually longer than all the mechanical pencils, pens, and highlighters that I own. Unfortunately, this negatively affects its usability to a degree. Other then that

Link to the design:
https://www.tinkercad.com/things/3KWh80n6pTj

Jenna’s Self Expression

Research and Concept

Throughout this pandemic, my grandmother has been someone I have endlessly been thinking about. We have not seen each other in over a year, so calling each other on the phone is something that I have really prioritized doing each day, since she has not been able to go out much or see anyone other than my grandfather in a very long time. We tend to talk about anything and everything, including the annoying amount of medication she has to take each day. As I was coming up with an object that could use a bit of playfulness, I thought of making something I could give to my grandmother. Although a pill organizer isn’t the “coolest” of objects, I figured that it would be something that would remind her of me as she uses it every day. A pill organizers function is to help people organize which pills they need to take on each day. My grandma tends to fill her pill organizer on Sunday nights to prepare for the week. Because she needs to take different pills on different days, her pill organizer allows her to sort out her week of medications once a week and not have to look up everything she needs to take every single day.

I have found it a trend that “playful” objects often include a connection to an animal, so I tried to think of animals that have scales or some type of polygon shape on them that I could use to be the compartments of a pill organizer. I landed on the idea of using a turtle for my playful twist on a pill organizer because I thought the scutes on the turtle’s shell would work perfectly for this function of organizing pills. Seven of the turtles scutes will open up, one for each day of the week, and that is where the pills for the day can be stored. I believe this would be a playful and interesting twist to an object that is otherwise boring-looking and definitely not-so-fun of a thing to use.

Sketches

Iterations

First Iteration

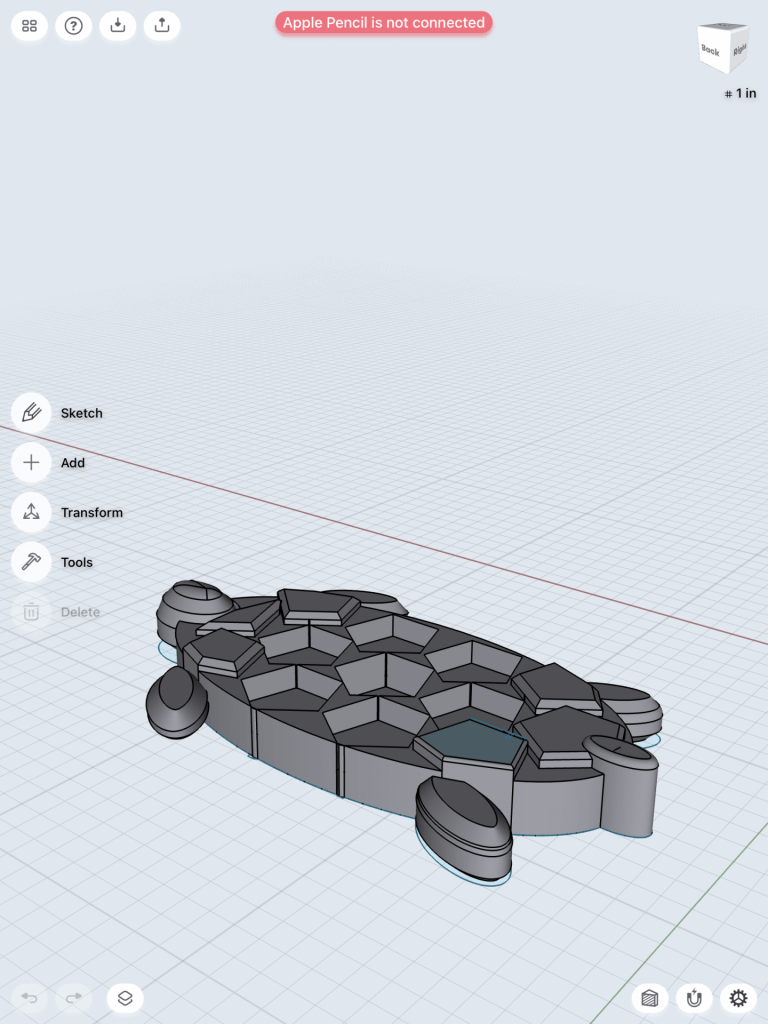
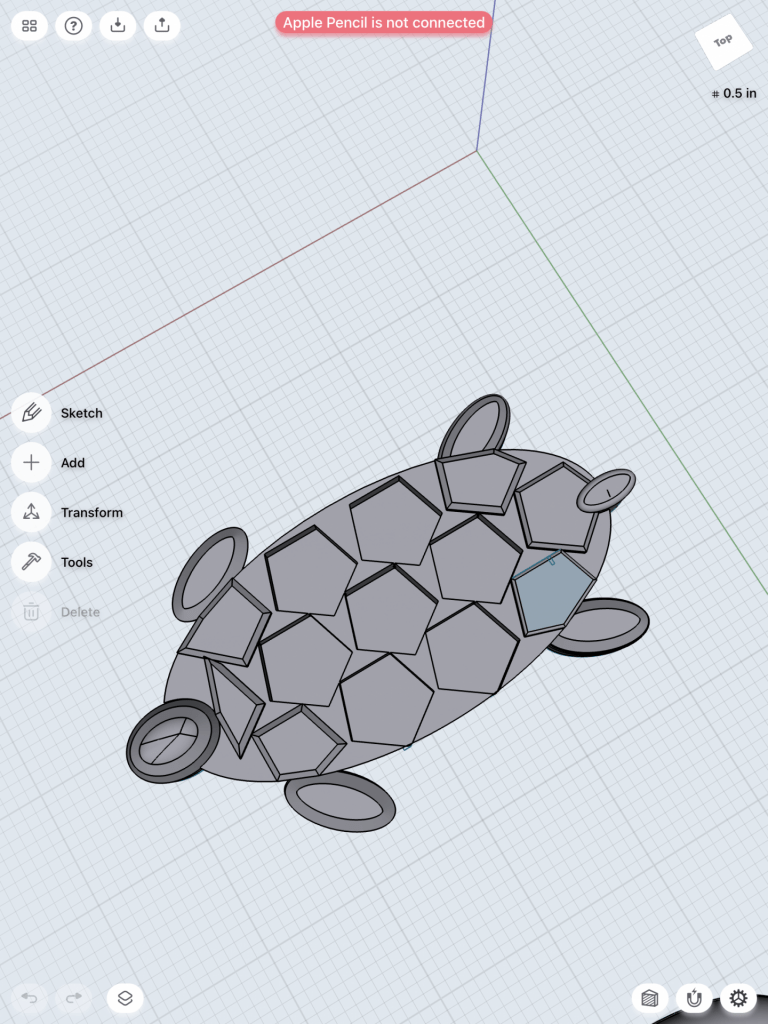
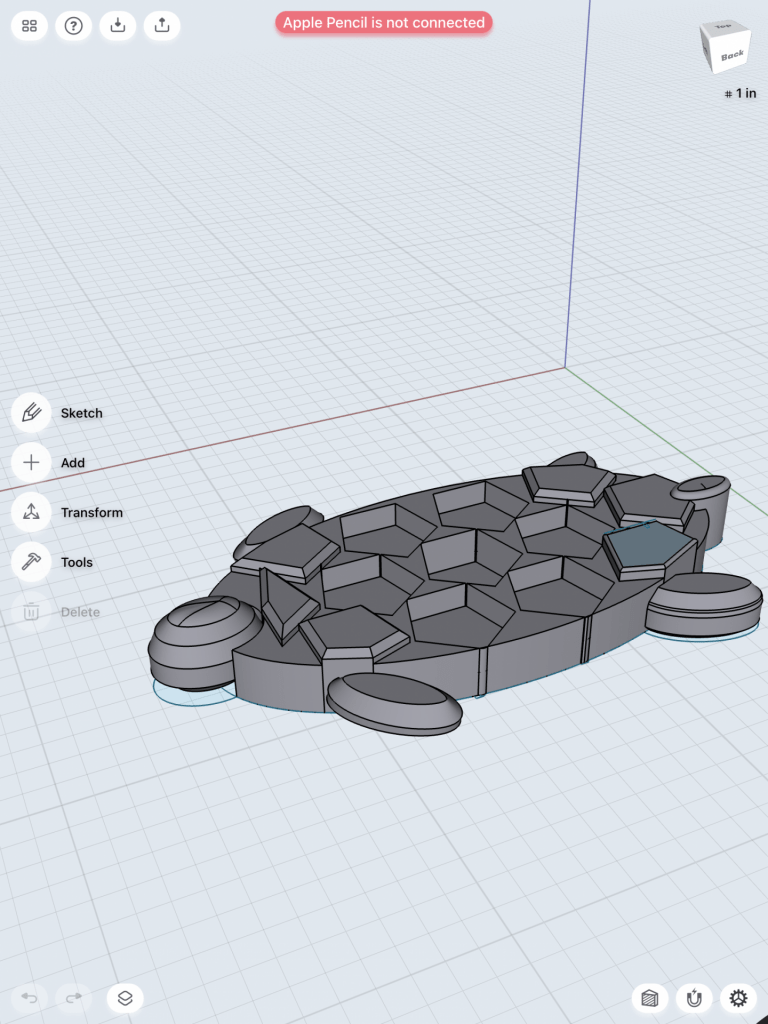
My first iterations did not go how I had originally planned; I spent hours on Shapr 3D attempting to create a turtle figure with its back having compartments for the pills to go, but the integrity of my design was lacking. I compromised the integrity in order to make the design more like how I pictured it in my head, which is obvious by looking at my first prints. Unfortunately, the hexagonal shapes on the turtle’s back, which were meant to be compartments, had holes in them throughout that were not visible on Shapr 3D. I am out of town this week so a fellow classmate graciously printed my design out for me, so I figured that the best way to share that with her would be on Tinkercad where she could look up my profile and find my design to print. When I exported my design from Shapr 3D to Tinkercad, the low-quality export hurt the quality on Tinkercad, and thus hurting the quality of the print. Since I am out of town, I could not print a second time to make any changes once I saw what was wrong with my first print, but I am eager to print this again and redesign a better foundation for this object.

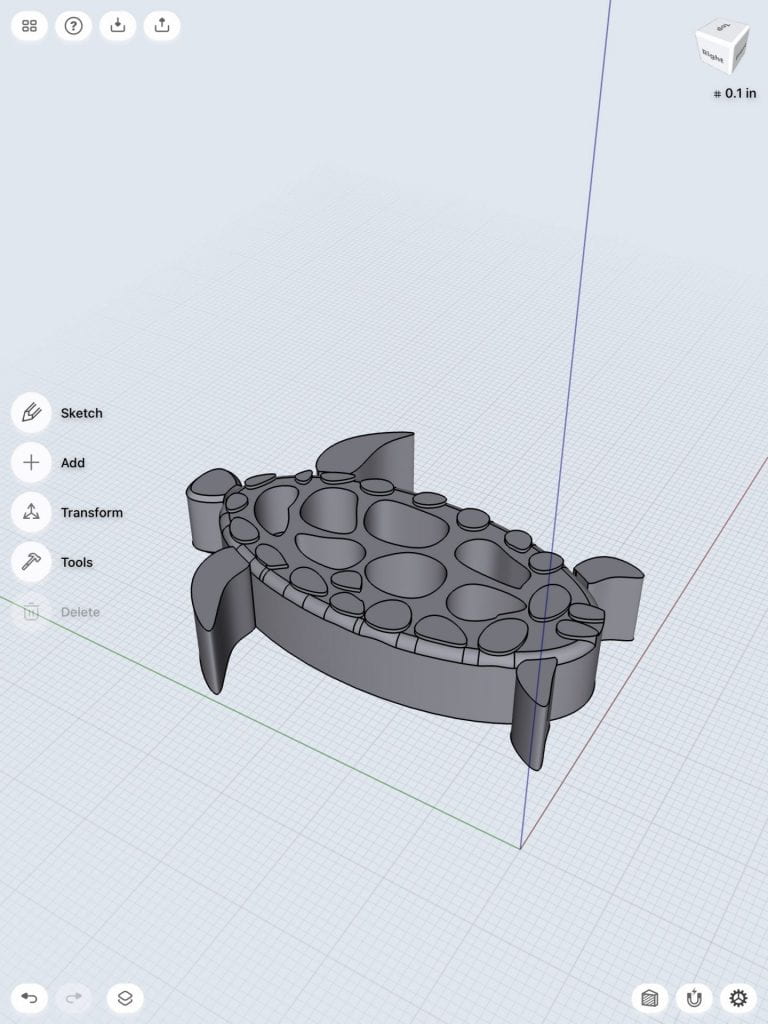
Below is the original design on Shapr 3D.

Second Iteration

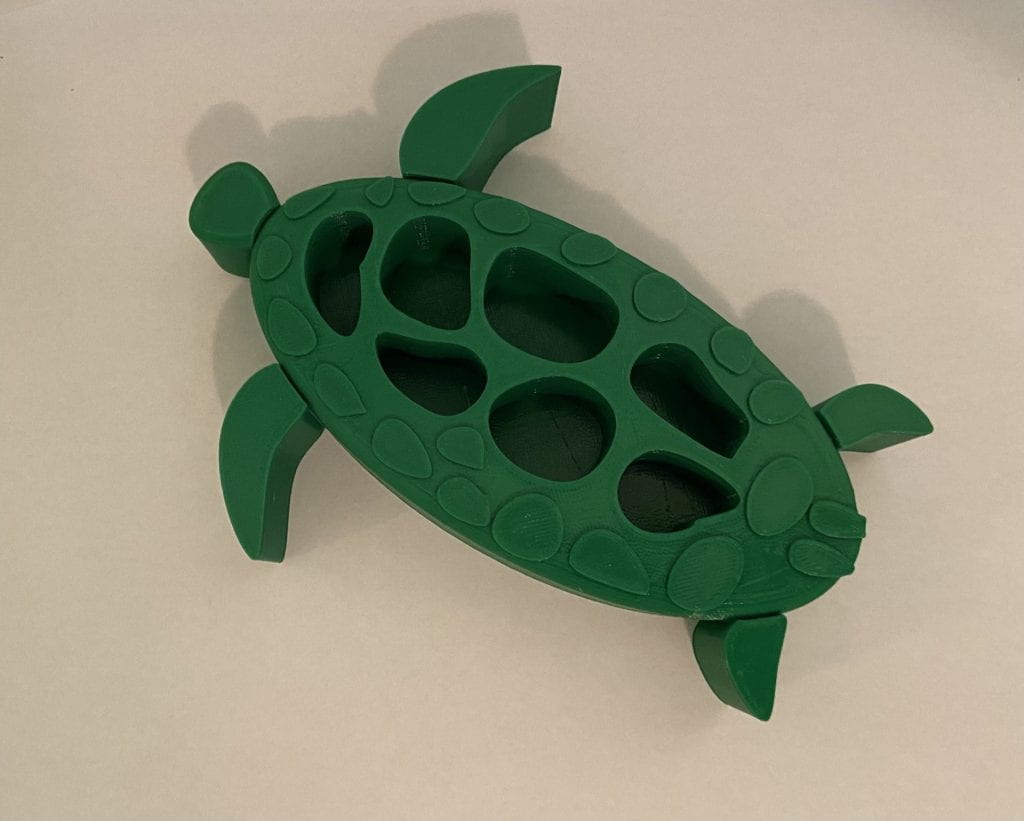
For my second iteration, I felt that I had nearly landed on my final product on the dot. I created a new design on Shapr 3D from scratch, in which I changed quite a few things. Firstly, I made an oval shape and pulled it up to create a one-inch high body. From there, I used the spline tool to make the scutes on the turtles back into more realistic shapes, rather than hexagons as I did with my first print. I made seven scutes larger than the others on the sides for those to be the holes for each day of the week in which pills can be stored. Once I lowered those seven scutes, I added the fins and the head and made the entire model a united body in order for them to be connected. I purposefully made the fins different shapes because when using a reference picture for the design, I saw that these were aspects of turtles that are fairly unique and I wanted to make the turtle more realistic. I rounded out the top and bottom edges of the head so that it looked more like a real rounded head that a turtle has, but would still be stable and not be susceptible to breaking off. Overall, I thought this design was great and I loved the way it printed, however what I found was that the size of the holes were fairly small which would make it difficult to stick your finger in and grab things out of, so I wanted to make that adjustment.

Below is the design for my second iteration on Shapr 3D.

Final Print and Reflection

For my final print, I decided that I wanted to take the same design as my second iteration, but put it at 120% scale. This larger print would allow for an easier experience when someone is trying to stick their finger in the holes and fetch out the pills that they put in. The higher scale worked perfectly and I love the way that the final print turned out. The integrity of the design was still perfectly intact, and now the functionality has been raised. As final touches, I spray painted the turtle a beautiful light green color and added glue dots to the bottom; the light green spray paint was used because I loved how my second iteration was printed with green filament, and I wanted my final product to be green as well to emulate the green color that turtles are well-known as having. The glue dots were added so that the print could hold sturdy on a surface, because without it, the slippery plastic filament texture would slide all over other hard surfaces it is placed on. Also, since the holes do not have caps to cover them, the glue dots take the place of ensuring that the pills placed inside of them do not fall out, as the design will remain stable on the surface it’s placed on. I am extremely happy with how this design turned out and I believe that it serves its intended purpose and does a great job of adding a bit of whimsicalness to the otherwise boring object of a pill organizer.

The process of making this final design was quite stress-inducing in the beginning stages. The idea of actually trying to make this design come to life made me wish I had chosen something easier to create, but I needed to stick with it. My first design was quite the eye-opener in the sense that I had found creating the original turtle design to be super challenging, and then when it didn’t print the way it was pictured on my Shapr 3D screen I felt even more defeated. After doing two of the tutorials to create other objects on Shapr 3D, I then learned other tools that made me want to start my design from scratch, so that is what I did. Going in with a bit more pessimism than I did when designing my first design, I started creating this brand new design with caution. To my surprise, my second design was created with much more ease than the first one (who knew that actually learning the tools of a program would help?!). Once this second iteration was printed, I was ecstatic that the only change I wished to make was for it to be bigger. I was so enthusiastic about this print that I wanted to go the extra mile and spray paint it and add glue dots to make it look how I imagined it in a perfect world, and it did exactly that. This is my final product because it turned out to be fully functional, whimsical, and overall simply a fun design. Now, after having been through all the ups and downs of emotions with Shapr 3D, I can actually say that I find the program to be quite fun to work with and I really enjoyed it, and I am really proud of my print.

My design for my print on Shapr 3D can be seen above under my second iteration, because the only thing I changed was the scale. Below is my final design on Tinkercad.

Cole’s Self Expression

Research & Concept

When choosing for an object to put my own playful spin on the first thing that came to my mind was a bottle opener. The function of a bottle opener is to pop the cap off of any glass bottle that doesn’t come as a twist off. The style of bottle opener that interested me the most was a hand held opener with a piece of metal stable enough to pop the cap off. These bottle openers also have a hole put into the design to attach a key chain. Having a key chain attached to the opener helps it become portable and easy to attach to bags to prevent misplacing it.

To make this design whimsical I plan on making it the shape of a lime. My dads favorite beverage is a Corona with a lime so I think this design would be a perfect gift for him. My main concern with creating this tool is figuring out how to shape it to crack open a bottle with ease. This will come with trial and error and I’m ready for the challenge.

Iterations

After completing my final model I was happy with how it turned out. The bottle opener clearly looks like a lime and the key chain loop fits perfectly in the bottom hole. The bottle opener is whimsical while also serving its purpose as a bottle opener to key chain to your cooler. One thing I’d like to change to the print is to find a way to get smoother edges at the bottom. I made many attempts at fixing this but I wasn’t able to create a base that would allow this.

When attempting to create the most efficient model possible I realized my first print on the right was too thick to be on a key chain and my hole was too high on the lime to fit on a key chain. When printing this key chain I printed it on its side which made the lime texture only appear on one which made me print the next one vertical. On my second print it was cosmetically correct and fit on a key chain but the bottle opening end was too short to pry open a bottle cap. This lead me to extending the mouth of the bottle opener on my last print fixing this functional error.

Final Print and Reflection

This is my final print of the lime bottle opener. Overall, I’m pretty happy with how it turned out but I wish I was able to get smoother edges from the printer. I’m happy with its functionality and will be attaching it to our family cooler over the summer. The process of making the opener function properly was very challenging but I enjoyed the process of making small tweaks to the design in order to get the results I was happy with. The aesthetic of the print was very easy to make so I spent most of my time on this project tweaking the mouth of the opener. My favorite part about the finished print was the size of it, the print fits perfectly in your hand and is pretty proportionate to most openers you’d attach to a cooler. I’m proud of my finished design and I know it’ll come in handy.

Daniel’s Self Expression

Research & Concept

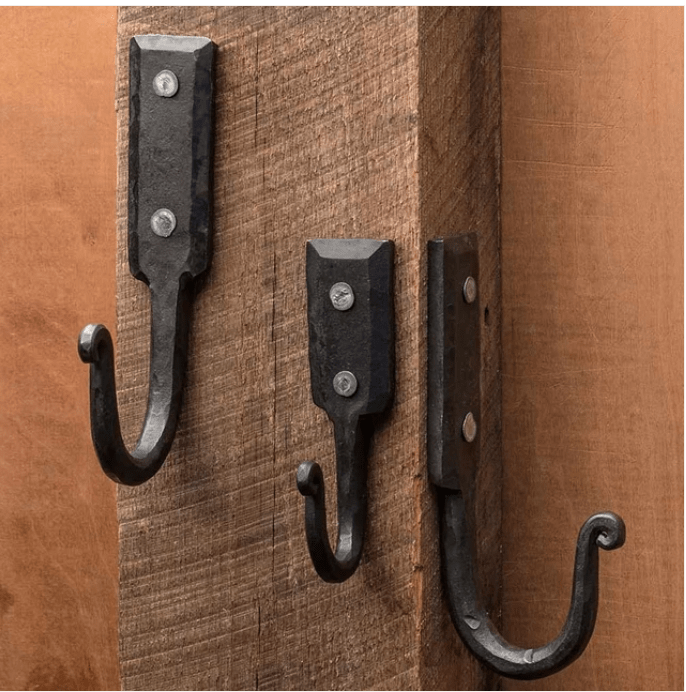
It was a bit difficult for me to think of simple items that could be incorporated with a sense of playfulness with its function. As I was thinking of what object to use, the two objects that I thought about was a door stop and a wall hook. I still haven’t made a final decision yet for which item to add playfulness to, but I am debating between these two. These two objects are very simple to use by looking at it and understanding its function. Wall hooks are made to use by hanging items against the wall, whether it be clothes, appliances, and so on. A door stop has a simple function of preventing a door closing by itself by inserting a door stop at the bottom of the door. These objects are used everyday at all locations. Although they might look simple and easy to use, I thought it would be a good chance to add a sense of playfulness to these two items.

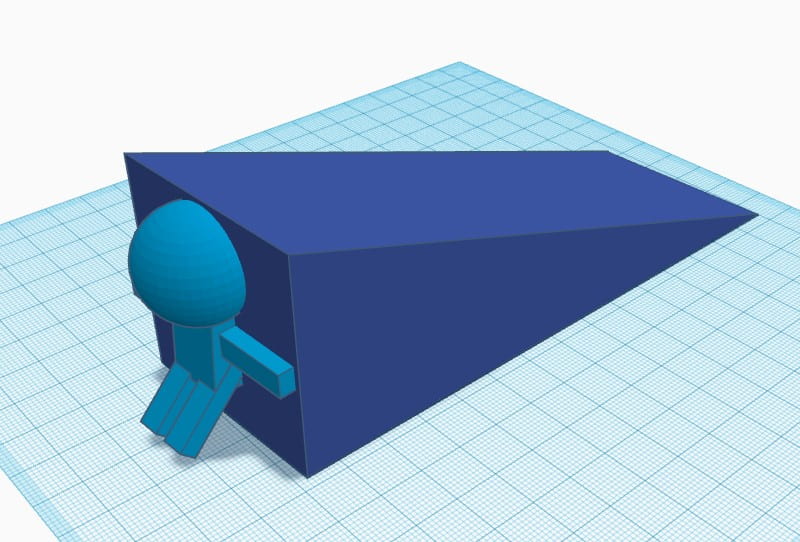
As you can see at the images below, for the door stop, I thought about three different ways to add playfulness to a door stop. The normal dimensions of a door stop is usually a height of 1.5 inches, length of 5 inches, and a width of 2 inches. I plan to keep those dimensions the same to keep the functionality of the door stop as it is, but add a sort of playfulness to it. The three ideas I have thought of was a person pushing against the doorstop, a person pushing backwards against the doorstop, and a person on top of the door stop holding a stop sign. These indicate that the person attached to the door stop is preventing the door from closing in some sort of way. I think adding these elements will add a sort of playfulness for a simple door stop. The image below the door stop is the wall hook. I thought about three different ways to add an element of playfulness to a wall hook. The first concept is a simple wall mount, but with a finger acting as the hook to hold the item. The next concept is a wall hook but shaped as a cat. The tail of the cat will act as the hook, holding onto the objects. The last concept I thought about was an elephant. The shape of the wall hook would be a figure of an elephant, and the trunk of the elephant would act as a hook to fulfill the function of the wall hook. I still have not decided what my dimensions for the wall hook will be, since the three concepts that I have thought about for the wall hook would be different than the others.

Iterations

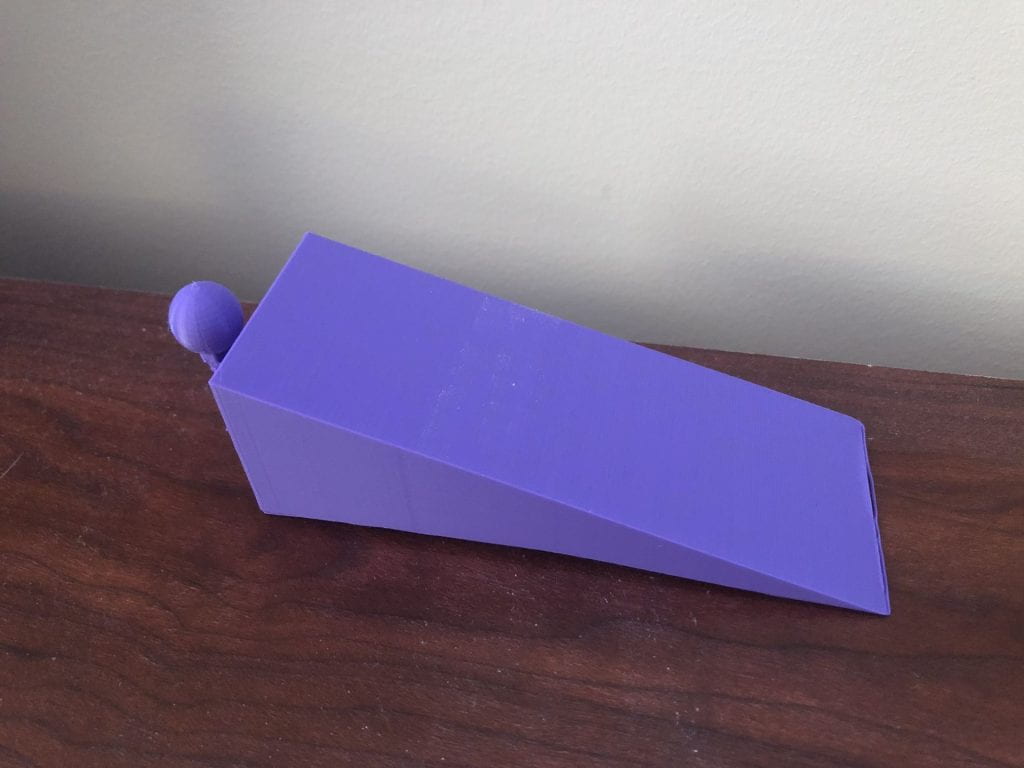
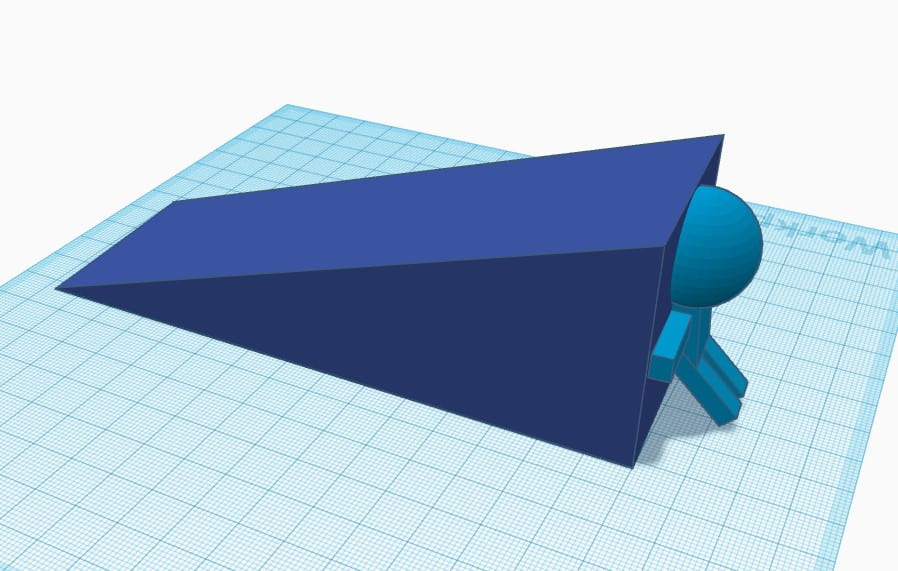
This past week I decided to choose to add playfulness to a doorstop instead of a wall hook. I believe that many people have added playfulness to a wall hook already, and I think that adding playfulness to a door stop would be creative. For my first print, I decided to go exactly as I planned on my sketches. As you can see the model below, this was my first draft of the model. I decided to make the length of the doorstop 127mm, width of 50mm, and a height of 38mm. I also incorporated a stick figure acting as it is pushing and stopping the doorstop, preventing the door from closing. The stick figure pushing and preventing the door to close is my playfulness to an everyday object. However after my first print, it didn’t print as I hoped. The door stop itself printed as it is, but the stick figure itself had a bit of an issue. It was able to print the head and the two arms. However, the bottom half of the stick figure did not print correctly. I believe this is because I may have made a mistake on my measurements and the structure of the stick figure itself. Due to an inconvenience, I was not able to make another print. I also learned that the wedge on Tinkercad is not evenly sized. As I printed the door stop, I could tell that the lip of the door stop wasn’t a straight line. It looked as if it was around 175 degrees instead of a straight 180.

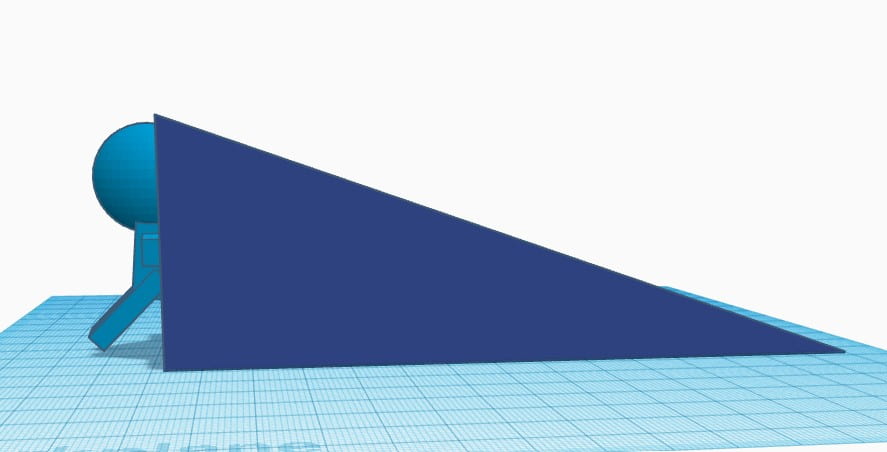
For my next prints, I plan to make the door stop itself a big larger. It does fulfill its purpose of preventing the door from closing, but the size is a bit too small. I also plan to make sure the doorstop dimensions are evenly measured and does not look slightly angled. I also plan to make some edits of the entire model on Shapr3D. I want to make my stick figure look more realistic, as well as more smooth than it was before. I want to emphasize the stick figures details, and make it easy to know that the stick figure is acting as like a door stop and preventing the door from closing. Below are some edits I have done to my model. I plan to make the height of my model to be 50mm, a length of 150mm, and a width of 50mm, so it would be more stable of stopping a door from closing. I also changed the model of my stick figure, putting its back against the door stop, another way to interact of how it is preventing the door from stopping.

Final Print

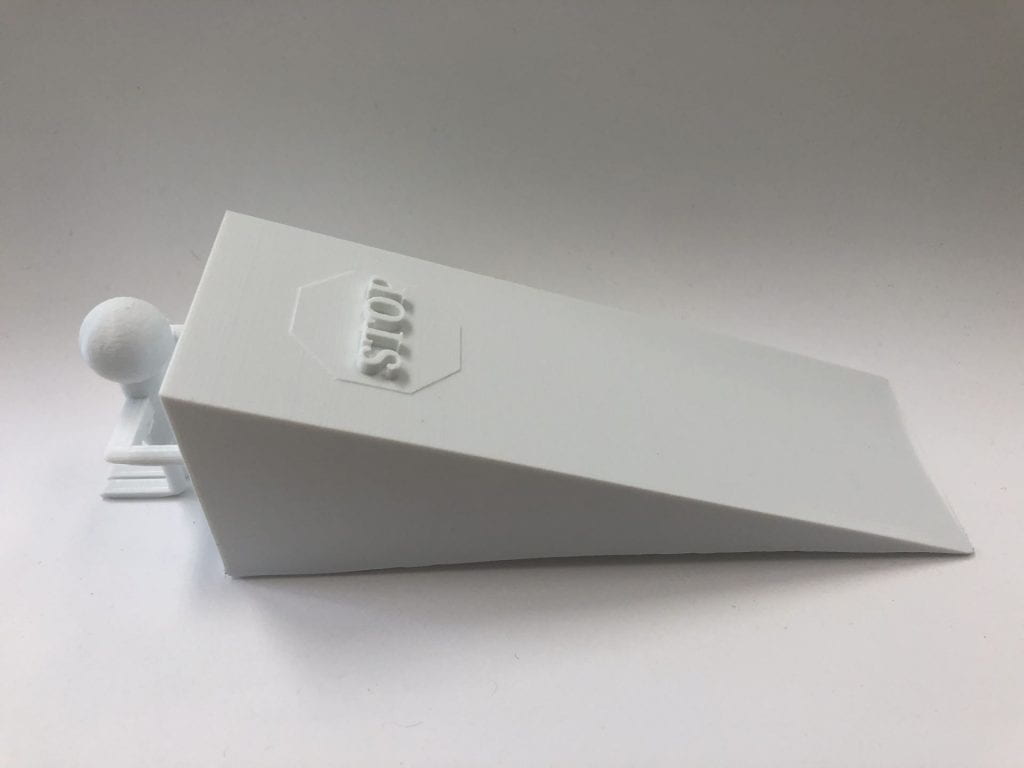
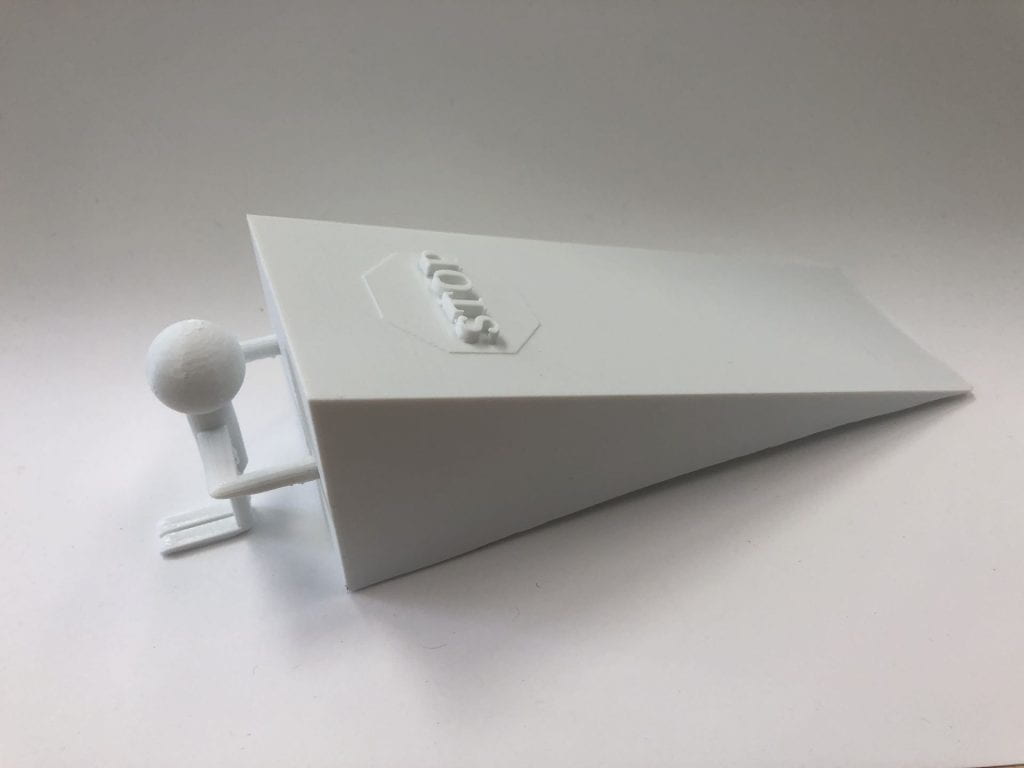
This was my final print for my everyday object with added playfulness. This process was very interesting. The very first doorstop I had printed was a bit smaller from before, so I decided to expand the dimensions of my doorstop. Before it was about 127mm in length, the new final model is now 181mm including the stick figure attached to it. The width from the first model was about 50mm and a height of 38mm. The new final model now has a width of 53mm and a height of 50mm. These changes have made the function of the doorstop much better than before. I had many trail and errors throughout printing this model. Most of my prints from before never really printed perfectly. There was always some sort of issue with the print. The images below are the results of my final print.

From before the prints weren’t printing correctly. Sometimes the bottom of the doorstop wouldn’t print to the bottom of the adhesion, making it look lopsided. The main problem was the stick figure attached to the doorstop. I had printed four different models from before, and the stick figure would always be an issue when printing. The stick figure wouldn’t be printed. Sometimes the bottom half of the body wouldn’t print and there would be filament around it, as you can see above from my first prints before a while ago. Throughout these four different prints, it is always the stick figure that wouldn’t print correctly. I have used Tinkercad with making these stick figures and I figured that was the problem. Whether it be the shapes not forming correctly, or grouping correctly. In the end I decided to use the Shapr3D app on the iPad. I figure that if I were to hand sketch my own 3D stick figure it would print much cleaner and easier. The image below is what I have made in Shapr3D.

The figure of this stick figure looked much better and well constructed as it was before in Tinkercad. I then uploaded this model onto Tinkercad and grouped it with my doorstop. I also added a small stop sign on top of the doorstop to give it the detail and definition of the purpose of the doorstop, preventing the door from closing. I then finally printed this model and it came out just the way it looks. I’m glad that in the end I have fixed my mistakes and issues and that the print worked out great. This was a fun project to do and throughout my experiences I am starting to get used to the methods of 3D printing when using both Tinkercad and Shapr3D. You can find and download my model here on Thingiverse.

Daniel Drecun’s Form|Function

The Thingiverse object that I chose was a cable organizer created by user @tjmck. It’s designed to hold larger cables such as ethernet or phone cords. I chose this design because it was something that I personally need, but I think I could improve upon the design. I’d want to make it more friendly for smaller wires.

To improve upon the original design, I’d want the object to be able to hold wires of any size without any external means. I created “clips” so that I could stick the wires in without them coming back out unless I lifted the clips.I didn’t like that it was just a circle and I’d want to be able to stick the organizer on a desk or something else so I can easily access the wires if I needed to so I created a base for it. I thought the waves would limit the amount of cables I could put in too much so I decided to keep the compartments in a line.


F|F Iterations

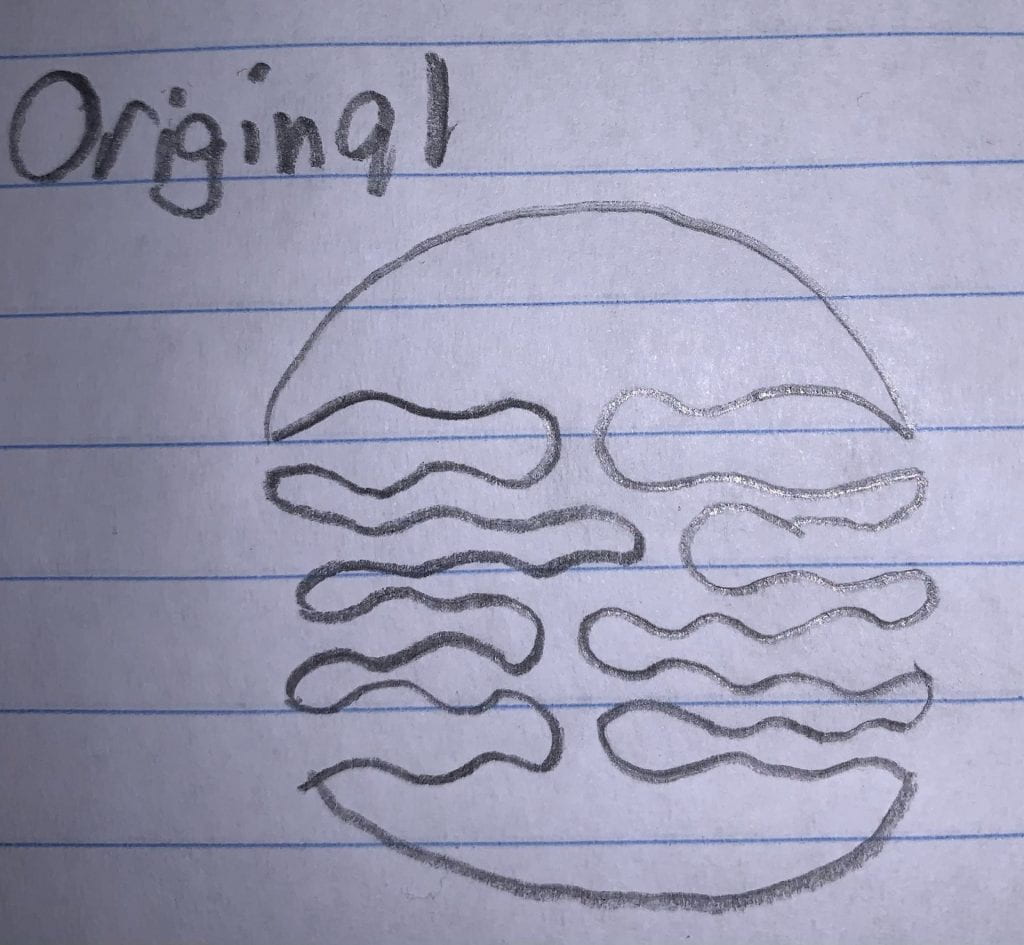
Original Object: This cable organizer, created by Thingiverse user @tjmck, is designed in a circle shape with wavy patterns on the inside with the intention on holding different size cables.

Below is a video of how the print is supposed to be used.


My First Iteration: I decided that since the original had trouble with keeping the wires in place and not having enough size variation for different cable thicknesses, I should try to address those issues. Below is what I came up with.

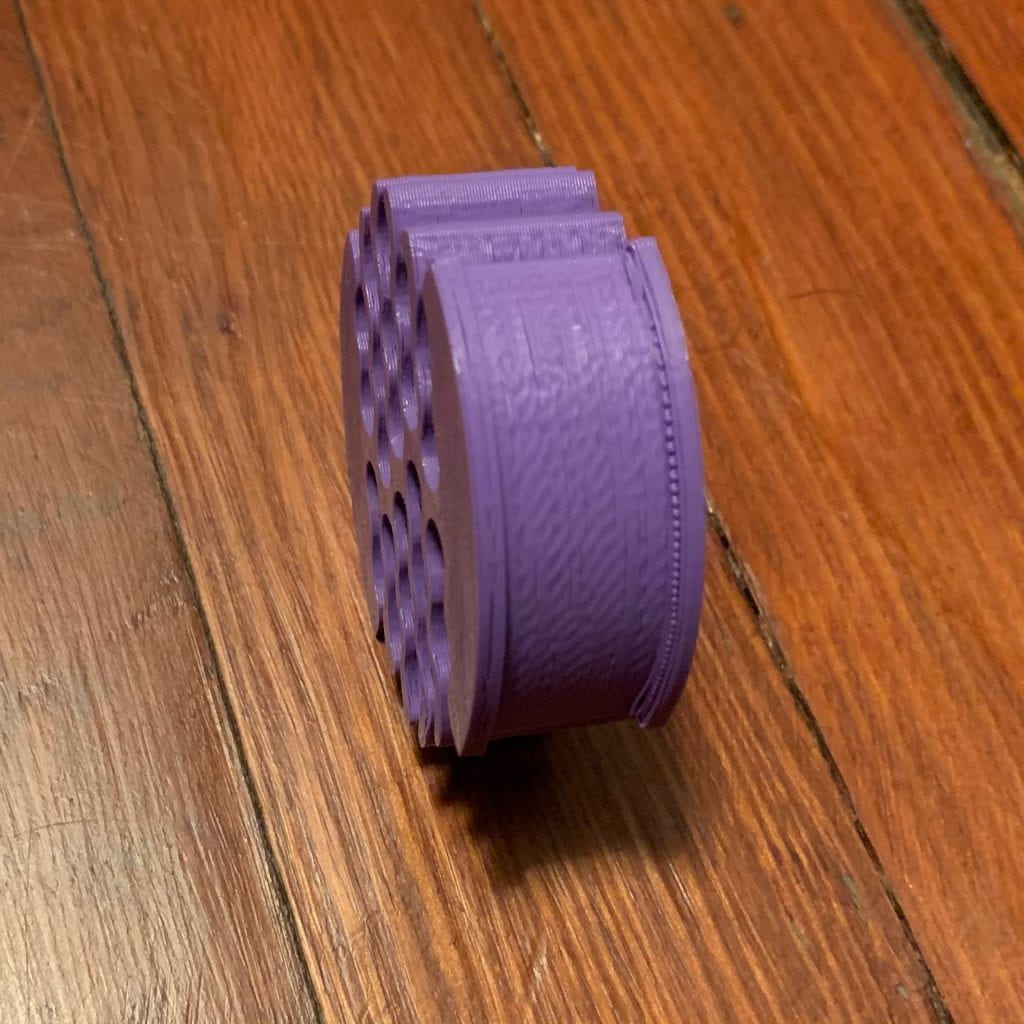
The intentions I had behind this design included slipping the wires underneath the wedges so that once the wire was in there, it wouldn’t move. I made the base flat so that way I could tape it down to a surface instead of leaving it hanging. I tried to give each of the spaces different sizes to allow for varied wire sizes. Below is what the print looked like in real life.

Printer Problem on Iteration One

Unfortunately something went wrong during the beginning of the print but it sorted itself out afterwards. I think if I had made a base it wouldn’t have came out so strange. I was surprised by the durability of the plastic when I was bending it to insert wires. I accomplished the goal of having the wires stay inside the organizer. I regret making so many compartments though, as it took away space that I could’ve used to make less of them but bigger. I didn’t accomplish my goal of being able to hold larger wires so I’ll try to improve that design again in the future.


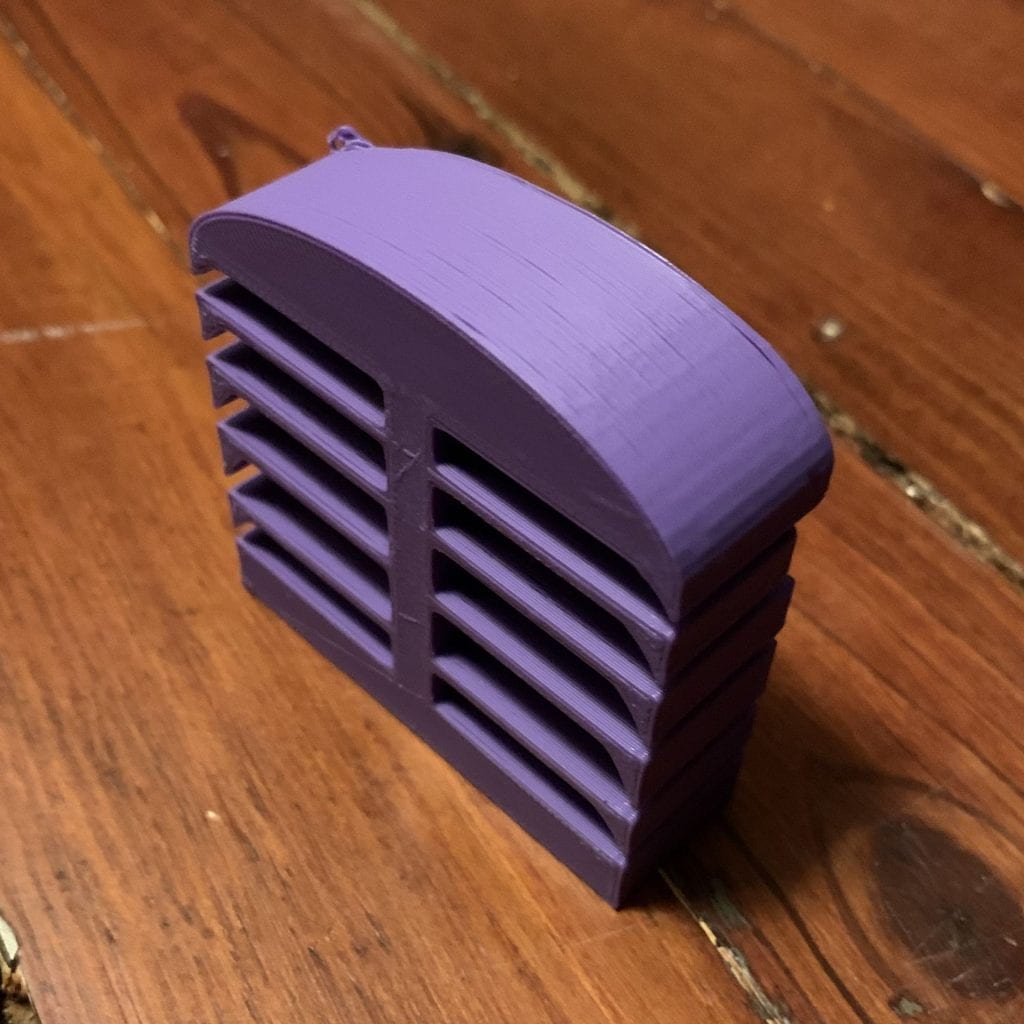
My Second and Final Iteration: Since the first iteration that I printed was affected by some printer issues, I used a different printer this time to avoid that happening again. I made some very slight changes to the first iteration. I deleted one of the wire compartments so that I could make space for compartments that would allow for thicker wires to be inserted. I also increased the infill density from 20% to 40% to make sure that it was stronger and wouldn’t snap if a wire was shoved in there.

This model did the job I wanted it to do perfectly. I unfortunately don’t have any wires thick enough to demonstrate the bottom portion, but the rest of the compartments work perfectly. The wires slip into the side with just a little effort and stay there unless they’re pulled out. Thanks to the wedge shapes, it’s easy to pull them out as well. My biggest concern with this entire build was that it would snap into pieces but after applying more force with my fingers than it would ever need to deal with, I’m confident that this is quite a strong bit of plastic, and I will definitely be using it next time I move my things around.

Jonathan Berrang’s Form|Function

F|F Research & Concept

Single Joy-Con Grip by 3DBotMaker on Thingiverse

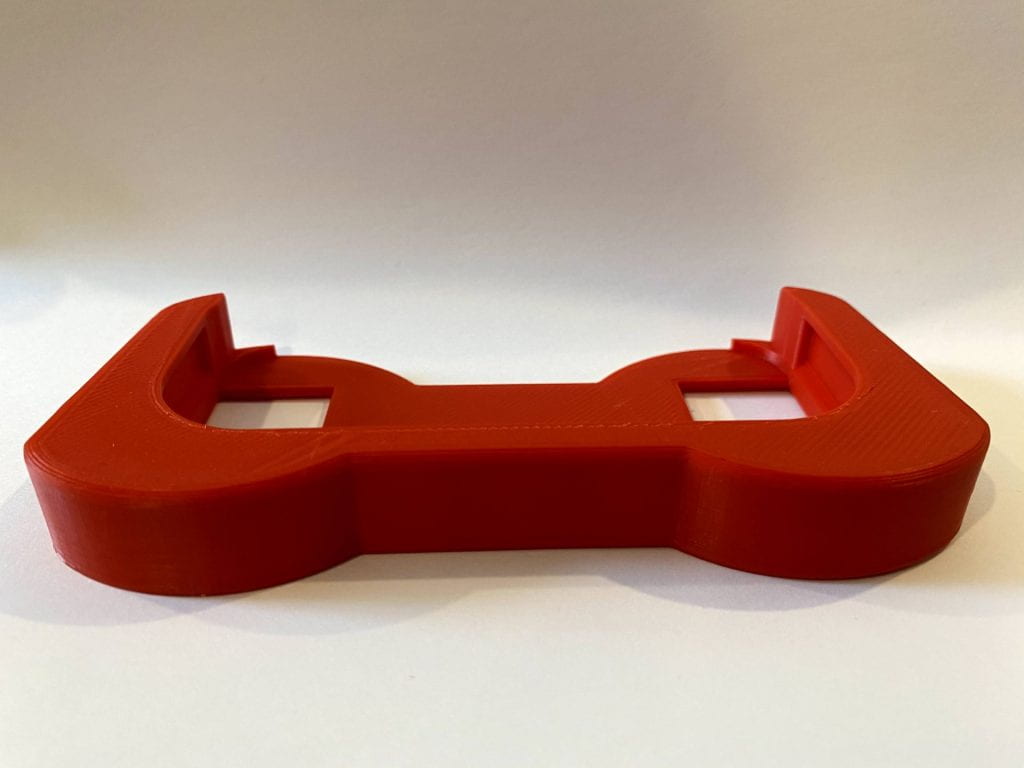
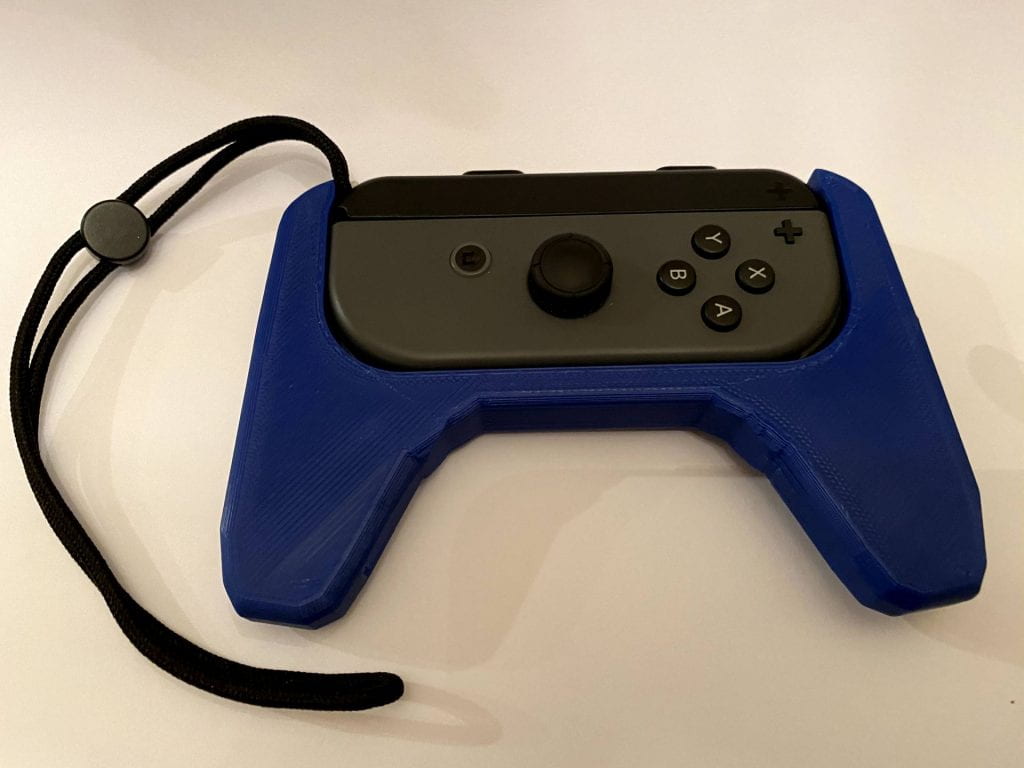
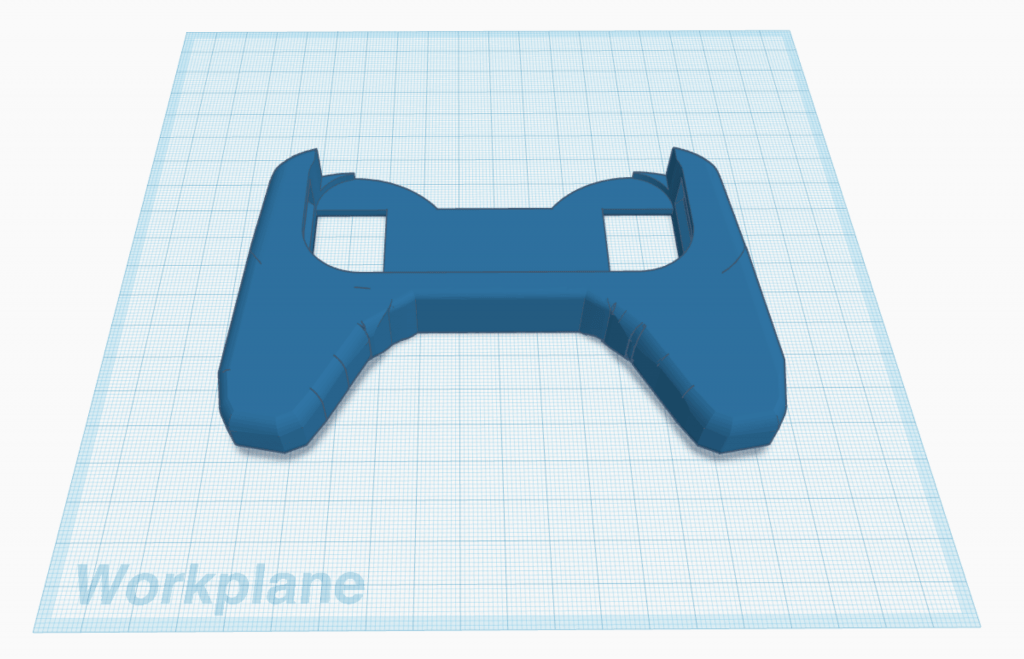
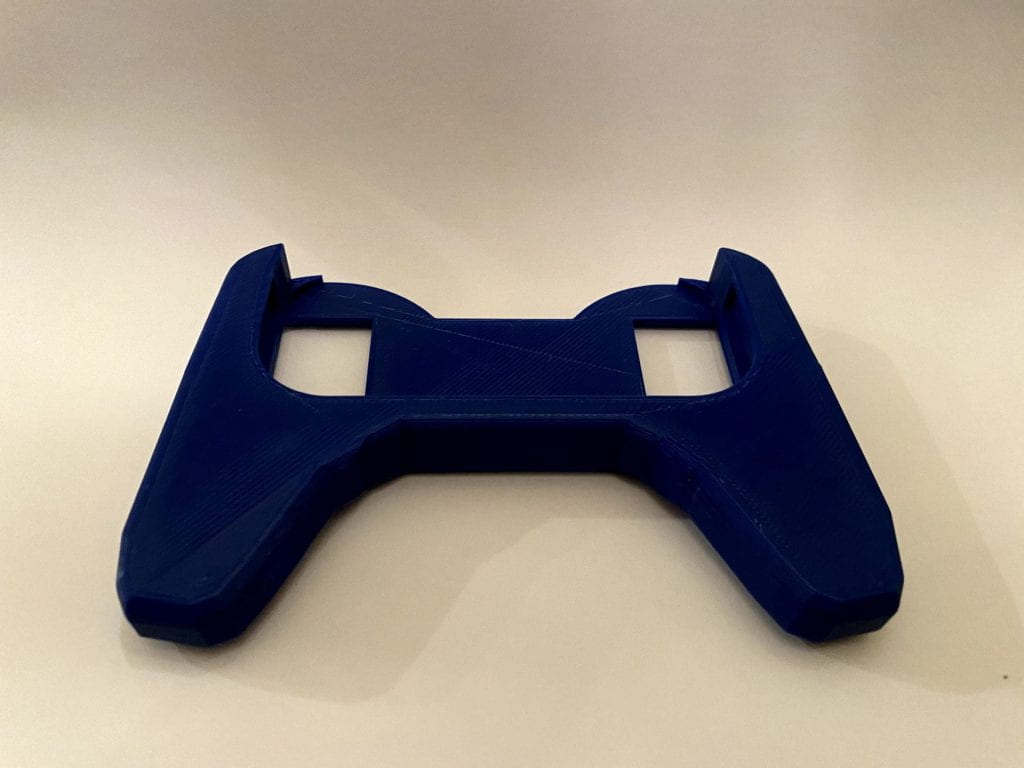
This Thingiverse object is a grip for a Nintendo Switch controller. These controllers are very small and somewhat uncomfortable to use on their own. The grip is designed to increase the size of the controller by giving your hands something bigger to hold onto. It is designed to make it easy to insert and remove the controller, while (hopefully) still holding it tightly in place. There are also holes in the back so that you can push the controller out when you’re done using it.

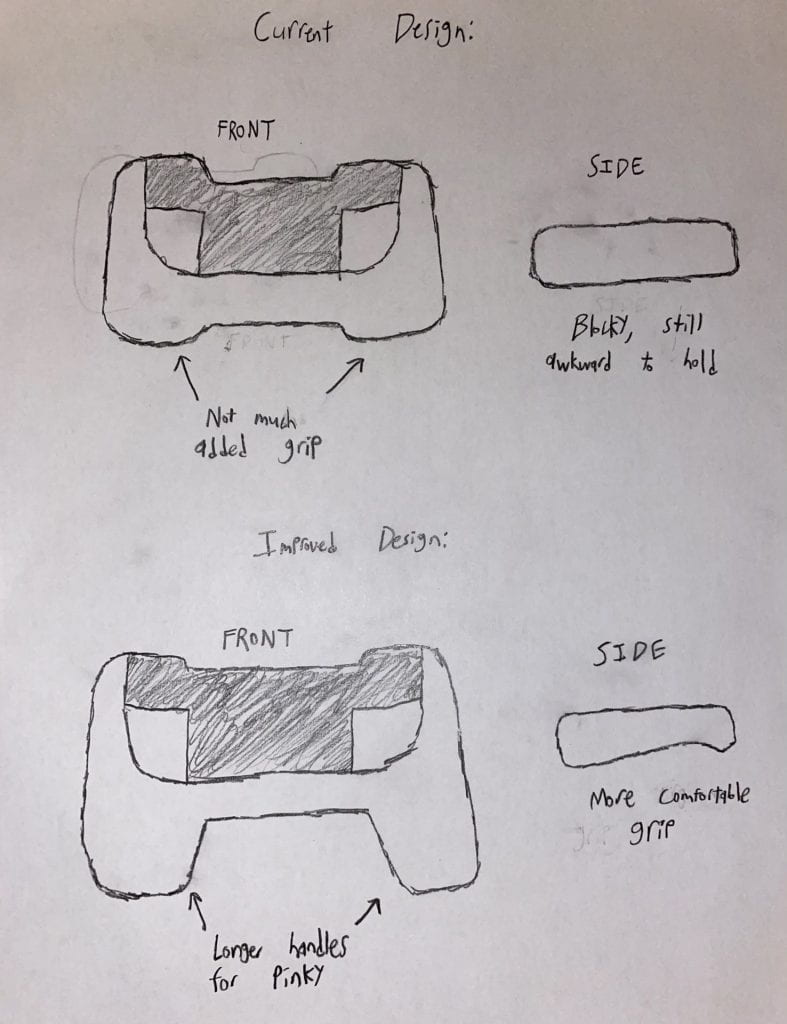
After some planning, I realized that I wanted to make some changes to the model. While I knew the grip would be helpful on its own, I wanted to take it a step further and make the handles longer, making it shaped more like a traditional controller. Another improvement I was originally planning to make was changing the back side so it would be easier to hold. On the original model, the grip is perfectly rectangular, so I considered making the back curved to give my fingers an easy place to grip.

F|F Iterations

Original Model

Single Joy-Con Grip by 3DBotMaker on Thingiverse

This is the printed base model from Thingiverse, with no modifications added.

Modifications

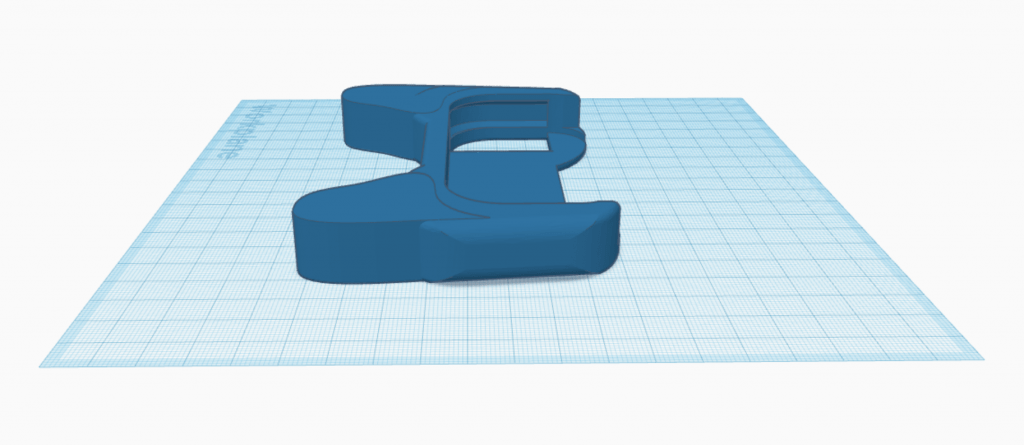
After seeing how the model looked in the physical world, I started to make some changes in Tinkercad. At first, I planned on extending the handles and making the back side curved. However, after testing the original print, I thought the straight back still felt pretty comfortable, so I just focused on making longer handles. For my first iteration, I simply added some rounded shapes in order to achieve this.

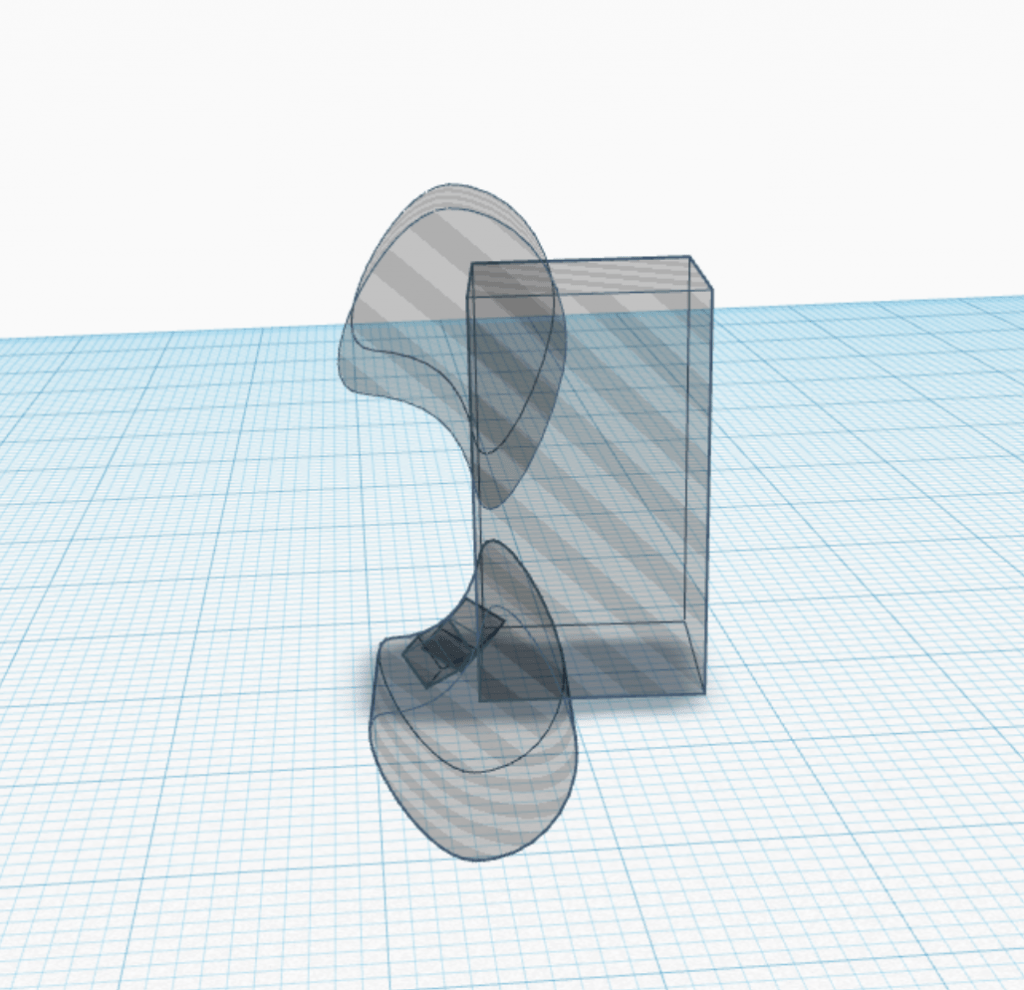
After working on it some more, I wanted to make sure that when printed, the handles would fit to my fingers more naturally, so I decided to replace these handles with custom extrusion shapes. It was a bit hard to integrate my additions smoothly because the original model includes rounded edges, but I tried my best to align it as well as possible.

The base model came with instructions to print with 10% infill and .25mm layer hight, so I used these settings to print both the original model and my remix. The second version ended up, structurally, as I expected, however the “layers” didn’t seem to be as smooth as the original print. The settings were exactly the same, so it may have been because I used a different printer model for the second version. After testing my remix, I found that the extended handles did make the controller more comfortable to hold as I intended, although they could have been even longer to fit my entire hand.

Final Iteration

I then went back into Tinkercad and tried to figure out a way to make the handles match the original model better. The process was very tedious, but ended up accomplishing this by adding hole shapes around the handles, which “carved” the straight edges to be rounded.

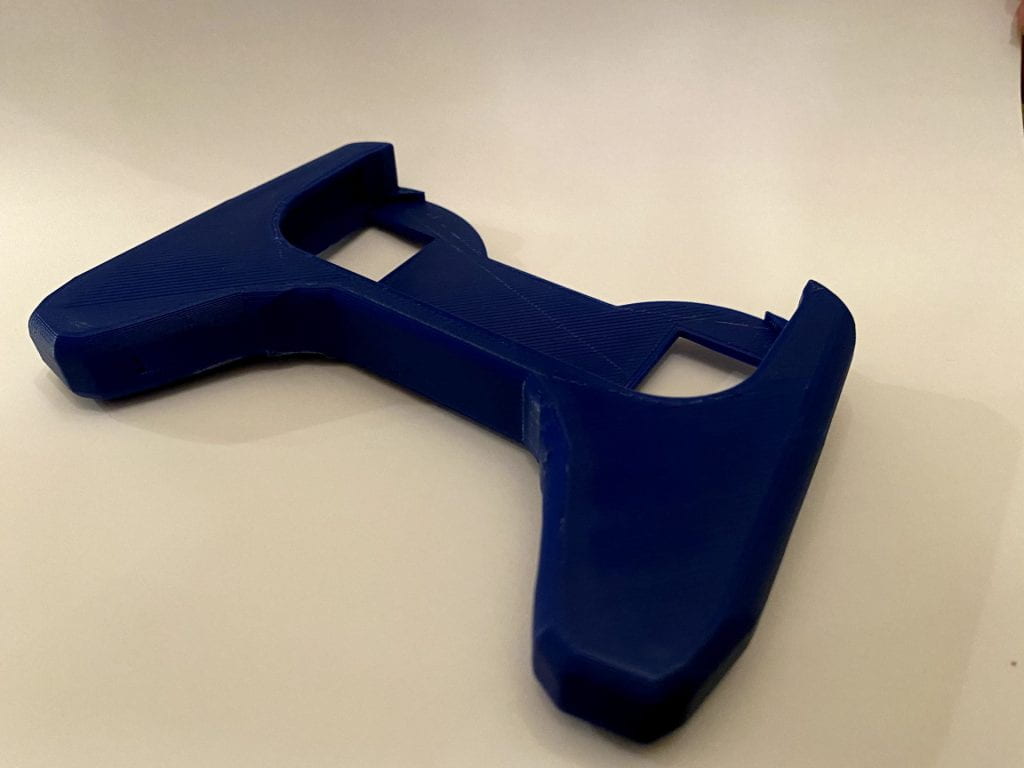
The final model and print ended up working out very well. As I was smoothing out the edges in Tinkercad, I was worried that it would come out blocky, but once I printed it it actually ended up being pretty smooth. Because I didn’t make any changes to the base model, the controller fits perfectly inside the grip. It is snug enough to stay in place while still being easy to insert and remove. The handles are now a good size, and the controller fits comfortably in my hands. Overall, this project was very challenging, but I am very happy with the way the final product turned out.

Michael Mensah Form|Function Concept

Credit to Erikjuh on Thingiverse

The object that I would like to recreate to show the principle of form and function is a hook . This hook can be used as hat hook or any clothing item can be hung on this item or even something like keys. I want this design to be a versatile tool that can be used at the convivence of any user.

https://www.thingiverse.com/thing:1081862

Some improvements I would like to make to this hook is to add more a curve to the hook so that the user will be able to hold more items on the hook. I feel like the length of the hook is minimizing the potential of the object. I may also look into the possibility of making the base of the hook a rectangle shape instead of a oval type shape in order to provide more stability and to look more aesthetically pleasing when in use.

https://www.youtube.com/watch?v=UI6VgLhRoBM&feature=youtu.be

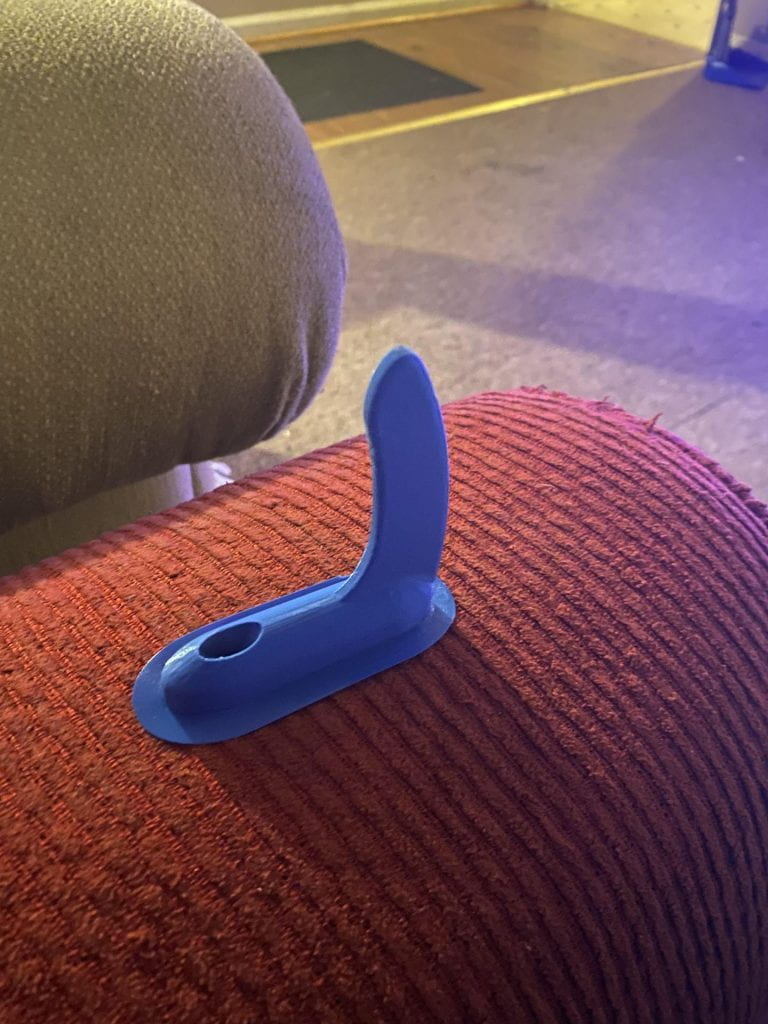
The original design came out entirely too small. The overall size of the hook would not allow for optimal use. The length of the hook and the curvature contribute to the fact that optimal use could not be made out of the hook. Below are images of the original design and above is a video explaining why this design is not optimal.

The modifications I made to the original design include extending the base of the hook and making the actual hook longer so that it is able to hold more items. Modifications to the hook curvature will allow for optimal use. Below is an example of the moderations I made to the original design in Tinkercad followed by the final product of the new design.

For this second iteration I decided to elongate the curvature of the hook to allow for more items to be placed on the object but I soon realized that this iteration still did was not at its full potential as far as versatility and usage

Below are examples of the second iteration :

Final Iteration

Because my second iteration was not up to par with what I believe the maximum usage of this item was I decided to add some modifications. The lanyard holding side widget is what this item needed to be taken to the next level. The side widget can be used to carry smaller items such as keys, lanyards, or any other miscellaneous items like that.

Below are drafts of my final iteration in Tinkercad:

Below are images of how my final iteration turned out:

Below is an image of my final iteration in use:

Final Conclusion

As you can see, this final iteration was a huge improvement over the first two. I am very satisfied with the model that I ended up with because I was able to figure out what needed to be added in order to make this item as useful as possible. This final iteration of the model incorporates all of the design elements that I envisioned while having many versatile uses. I decided to As you can see it can be used for many items such as clothing, hats, keys, lanyards, masks, etc. This items purpose is to make any users life a lot more easier.

Megan Barton’s Form|Function Concept


F|F Research & Concept

The original Thingiverse object I choose, which is linked below the picture of the 3D print, is a remote control holder that was created by the user Niverson. The 3D model is designed to simply hold a Roku TV remote control and be attached to the wall using a screw or nail. I decided on this object from Thingiverse because I often find myself losing small objects like my tv remote and AirPods when I’m in my room and saw this as the perfect opportunity to adjust it to my own needs.

Improvements:

To improve this design I started by adding an extra pocket to hold other devices, such as AirPods. I also adjusted the hole for the nail to make it easier to hang up. Lastly, I decided to also scale the model up just a tad to make it more versatile and allow for it to hold other electronics or remotes that may be bigger.


3D View of my First Iterations:


F|F Iterations

Original Thingiverse created by Niverson:
This is the original design that the user Niverson on Thingiverse created with no modifications or adjustments.

Remixed Thingiverse:
This is my remixed version of Niversons design, I simply adjusted it so that the back wasn’t rounded that way it would fit better to the wall. I also adjusted the original design by adding a ledge so that it could hold more things, such as Airpods. Additionally, I set the infill to 25% instead of the original 10%, which seemed to help make it more sturdy and reliable than the initial print. Despite making my version more sturdy and better fixed to the wall, I didn’t scale it correctly which caused the ledge to be virtually useless since only very tiny things can fit in it. Overall, I learned a lot from this print including that I need to scale my designs and pay more attention to dimensions before printing.


3D View of Final Iterations:


Final Print:

After my first print with my original iterations, I realized that I was going to have to make some adjustments to the scale of the model. In order to do this, I found the dimensions of a Roku remote and Airpod Pro case online and then drew a few models to better visualize what adjustments I was going to have to make in Tinkercad. In the end, I also decided to add two extra millimeters throughout the whole design for some extra space in case you wanted to use it to hold more things. All in all, this project was a big challenge for me in that it pushed me to learn more about 3D printing and that you don’t always get it right on the first try.


Julianna Barnaba’s Form|Function

F|F Research & Concept

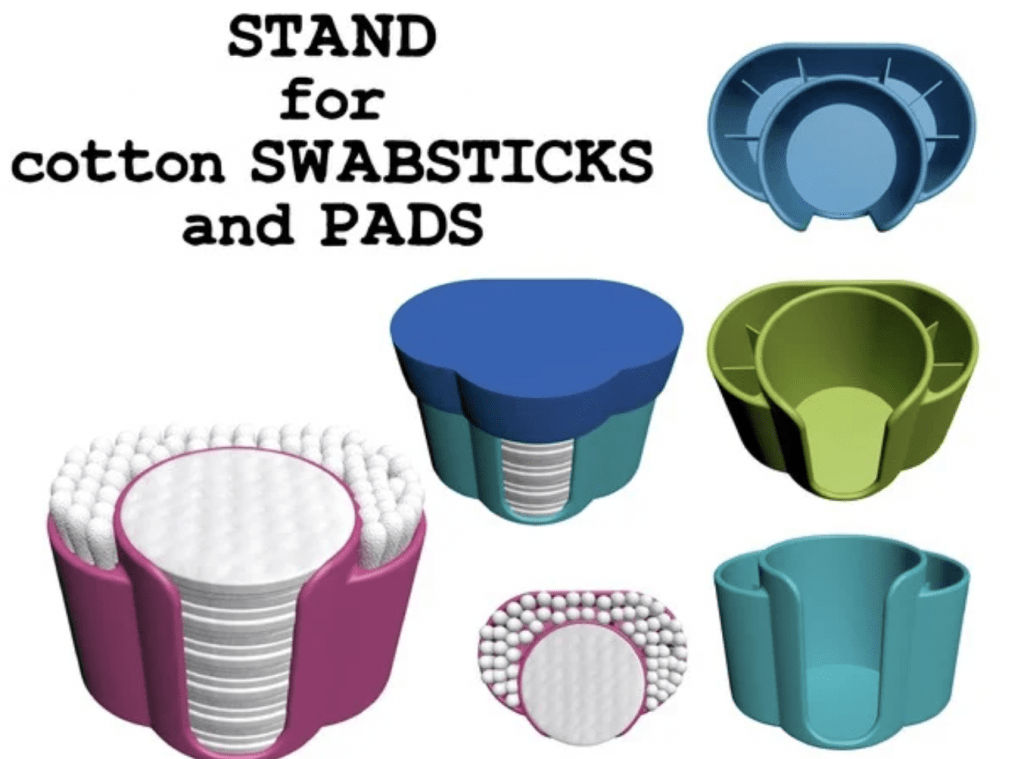
The object I would like to make to demonstrate form and function is this cotton swab and cotton pad container. The purpose of this is to effectively organize those items and either leave the out on your counter or be able to store them away or travel with them using the lid. It is perfectly fitted for the round pads and contains small compartments to fit in a bunch of swabs.

https://www.thingiverse.com/thing:4723700

Some personalizations I would like to make in order to make it more usable for me would be to lessen the amount of compartments. By making only 3 compartments it would give me more space to fit something other than just cotton swabs that may be bigger like makeup brushes. Another personalization I could make would be to make the base of it wider. The original design is just under 119 cm wide. If I made it 123cm I think that would be enough to give more space to fit other things, all while keeping the spot for the cotton pads the same size.

F|F Iterations

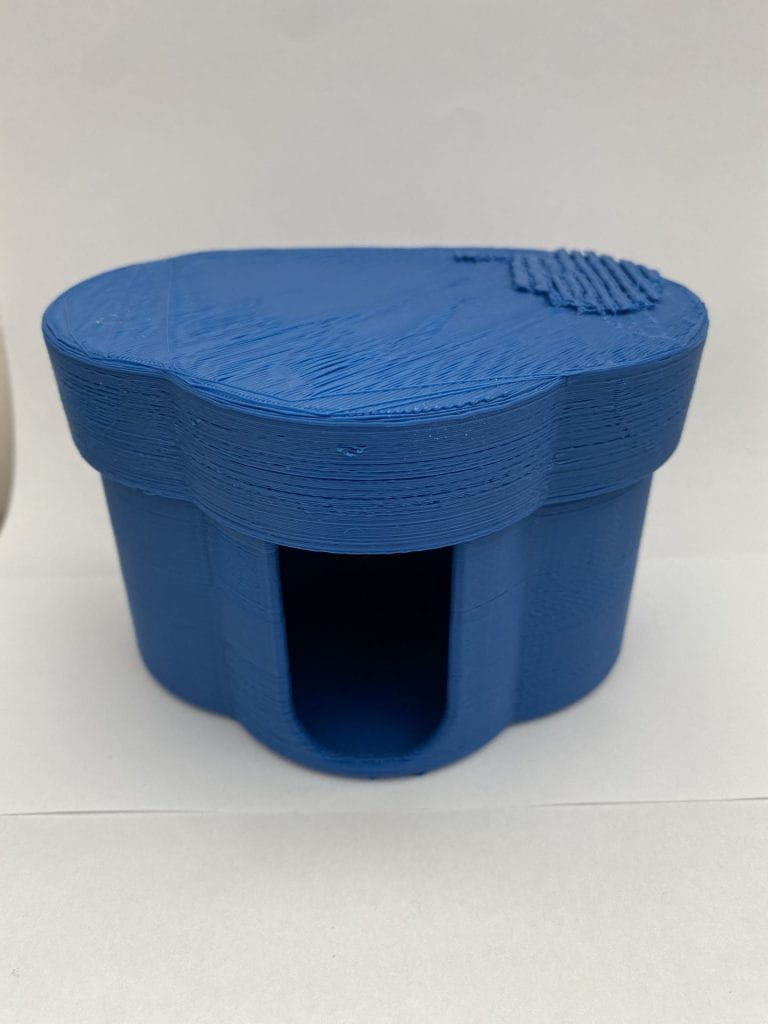
This is my original print of the un-altered cotton swab and q-tip holder by Syzguru11 on Thingiverse. This print took about 7 hours and came out great. In my sketches I mentioned wanting to get rid of some of the walls that section it off but after seeing this first print I decided to focus on just removing the lid and the lip at the bottom of the front opening.

After seeing the original print I decided I wanted to remove the small lip from the bottom of opening in the front. I thought this would be a good idea since having that there may make it more difficult when trying to get out the last cotton pad. Finally, I decided to remove the lid seeing as it was not very useful and for myself it did not seem to serve a purpose.

Here is my Tinkercad design with the removed lip using a box hole and the removed lid with a box hole over it as well.

If I had more time to test out more versions of this print I would try to take out some of the walls that make the compartments but when I tried to do that originally, I could not figure out how to properly cover the wall with a hole without messing up anything else in the process.

Here is where I finally was able to semi cover the walls the way I wanted to without creating a hole at the bottom or being destructive to any other part of the design except for the two walls. Unfortunately when I printed this the printer ran out of PLA and was not able to complete the Thing. From what I could tell I was able to remove most of the wall successfully.

As you can see the lip was removed but not in the best way. It was hard for me to tell how it would turn out on Tinkercad but obviously this still works and I think was a beneficial change.

Overall, the process of remixing and reworking this print was really fun and I learned a lot about Tinkercad. I wish that I had more time to reprint my last version without the walls but either way I think my final print was good enough and it has already been extremely useful!

Daniel Cymes’s Form|Function Research & Concept


Original Thingiverse object:

https://www.thingiverse.com/thing:3586659/files

The image above is a model of an engineering stencil ruler designed by @JojodaHobo. It allows individuals to plot straight lines on paper and trace other precise geometric shapes. It is an essential tool for engineers, architects, and individuals who simply want to add precision to their sketches. There is a multitude of shapes cut out of the filament, allowing creators to make a perfect circle or right triangle, among other designs. It is a simple and common object that is extremely useful to designers of all different backgrounds.

Personalizations and Improvements:

The image above represents how I envision modifying the existing object. Although I want the height and the length to stay the same, I would like to increase the ruler’s width from 1mm to 2mm. This would make the object much more sturdy and durable. I also would like to remove some of the original geometric stencil shapes, and replace them with shapes that are more tailored to my design tendencies. Overall, I was pleased with the majority of the original design elements, but my desired modifications will make this an even more practical tool.


Form|Function Iterations

Original Thingiverse Object:

Pictured below is a 3D print of the original Thingiverse object, attributed to @JojodaHobo. This print contains no personal alterations or modifications. Because the ruler only has a thickness of 1mm, it is very flimsy.

Iteration Process:

At first, I was quite intimidated by the thought of adding my own modifications to this ruler. I was uncertain on how I would go about filling the stencil shapes that exist in the original design, in order to implement my personalized stencil shapes. Below is a time-lapse video that demonstrates how I designed my Tinkercad remix. The entirety of the process took roughly 45 minutes.

Posted below is a 3D view of my completed Tinkercad remix.

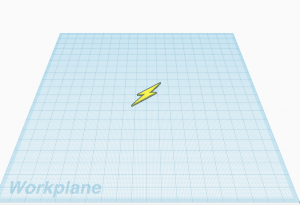
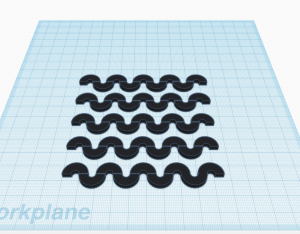
The pictures below are of Tinkercad designs that I incorporated into my iteration. The lightning bolt was designed by @blaise-miranda and the high contrast squiggles were designed by @Annie-Sullivan. I transferred both of the shapes into my workplace and then transformed them into holes, in order to create two separate stencils on the ruler.

Functionality:

In the video below, I demonstrate the functionality of the object that I remixed.

Overall I was very pleased with how my iteration turned out. By increasing the original ruler’s thickness from 1mm to 2mm, the durability was clearly improved. I also increased its personal functionality by adding personalized stencils that will provide me with greater design benefits.

I only ran into a few slight problems. When removing the base filament from the ruler, it made the primary straight edge a little jagged. Normally this would not be a problem, but because one of the sole benefits of using a ruler is having a smooth straight edge, it created a slight drawback. In order to overcome this inconvenience, I merely had to sand it down. The only other issue that I had was that the numbers and marks on the ruler showed up very faintly.

Iteration #2:

After spending a few days using the first iteration I created, I realized that the problems that I initially identified upon the completion of the print were going to require me to complete a second iteration. The two primary problems I had were these: it was a little too thick, which prevented me from using some of the stencils with a pen, and the straight edge was jagged because of the raft that was printed with it.

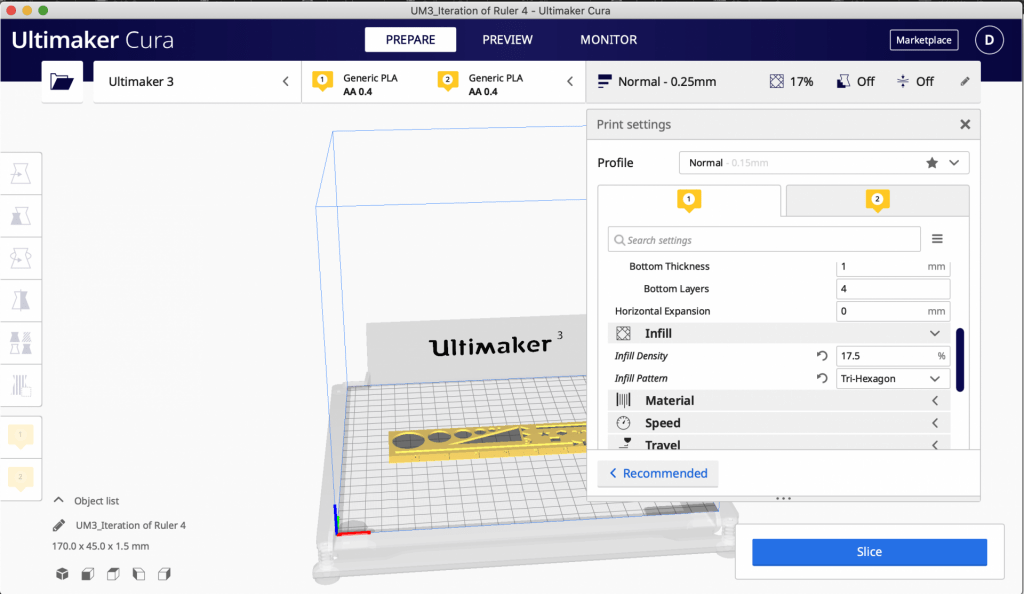
To solve these problems, I decided to decrease the height of the ruler from 2mm to 1.5mm and remove the raft from the print settings in Ultimaker Cura.

I also wanted to address the comments and critiques that I received from my classmates, which mainly emphasized the lack of numerical markers and measurement lines.

In the slideshow above, I demonstrate the modifications I made to my initial iteration. As stated above, the most significant changes I made include the addition of number shapes provided in Tinkercad, measurement lines made from rectangle blocks, and a decrease in height.

Although the height change made all of the stencils usable, while simultaneously maintaining its durability, I created a completely new problem in this iteration. Upon closer look, one can see that the rectangle boxes that I converted to holes, in order to create measurement lines, ended up creating divots in the ruler’s straight edge.

Final Iteration

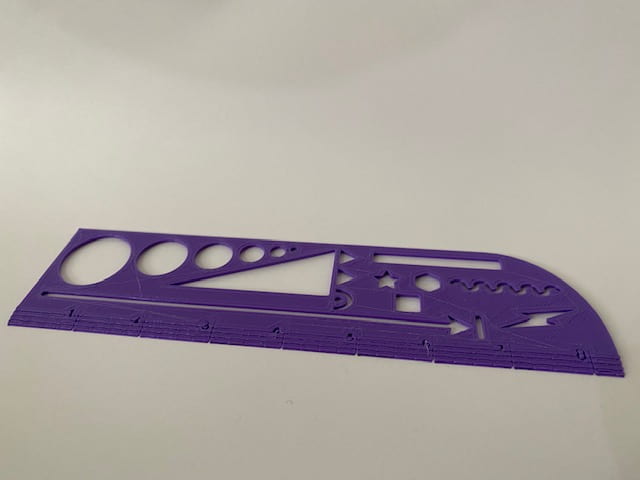
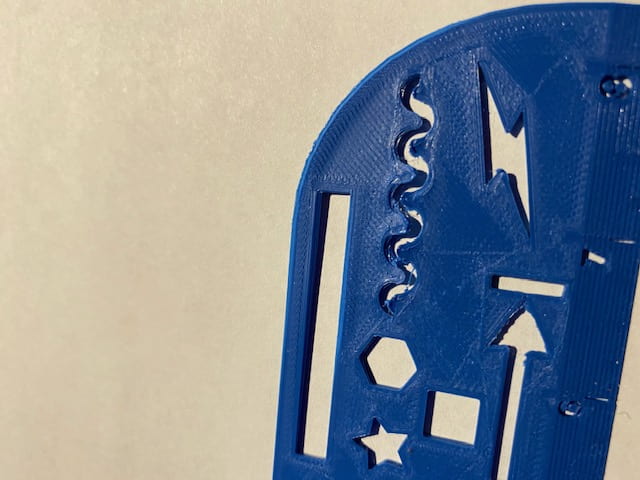
These pictures are of my final ruler iteration. Although I was able to eliminate the divots that were previously present, I ran into a new problem. As pictured below, the squiggle stencil did not print properly due to a printer malfunction.

Conclusion

After completing 3 different iterations of the ruler, I was still not able to make the perfect print. This was in part due to time constraints out of my control and printer inadequacies.

Overall I am not disappointed, as I was able to sand down the rugged edges of the first ruler that I printed to optimize its functionality. Although I cannot easily use all of its stencils and it has very faint measurement markings, it serves its main goal perfectly–allowing me to draw a straight line!

If my final iteration had not been messed up by the printer malfunction, it definitely would have been the best of all three iterations. Not only was the straight edge smooth, but it also had clear numerical markings and measurement lines. Below is a picture of the printer settings I used to print the ruler. Hopefully I can find time to fully ‘straighten’ any remains problems out.