Research & Concept
Recently I have found myself with a growing need for a bag clip as my addiction to jalapeño potato chips has only gotten stronger. Whenever I am at the store purchasing a bag clip never crosses my mind because really it is a boring item. This is why I chose this item for my self expression print. The more I looked at different images of bag clips, I quickly realized how easy it would be to inject playfulness into this typically overlooked household item.

In order to make the prospect of a bag clip more fun I decided I would make it look like an alligator’s head. I would do this by adding an sphere at the top as an eyeball and a few ridges along the top tab. I would also make the top tab slightly longer to help with opening it. The ridges that are already on the inside in the above example are very important to making the clip able to stay on the bag tighter but also add to the vision of an alligator and sort of look like teeth.

Iterations
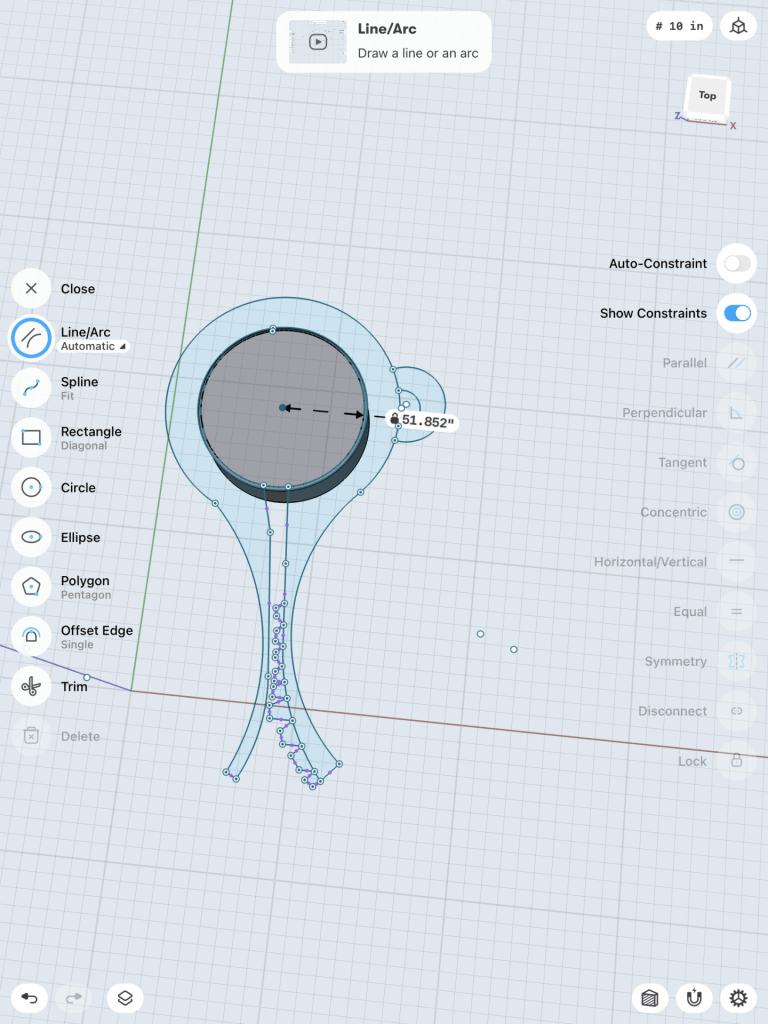
For my iterations I used Shapr3d in order to make the shape of the bag clip. I thought this would be easier because of the curved shape and it turned out being perfect because of the very specific shapes I needed to sketch for alligator’s mouth.
These are screenshots of my design in Shapr3d. It was very simple to sketch and extrude my object and it was exactly the shape I wanted. I then transferred it into Tinkercad, because I did not realize you could print straight from Shapr3d.

I then needed to resize my object because it was very small. I did not have a good concept of what size I really wanted it so this was just a guess. Now that my first prints came out I have a better idea of what size is most practical.

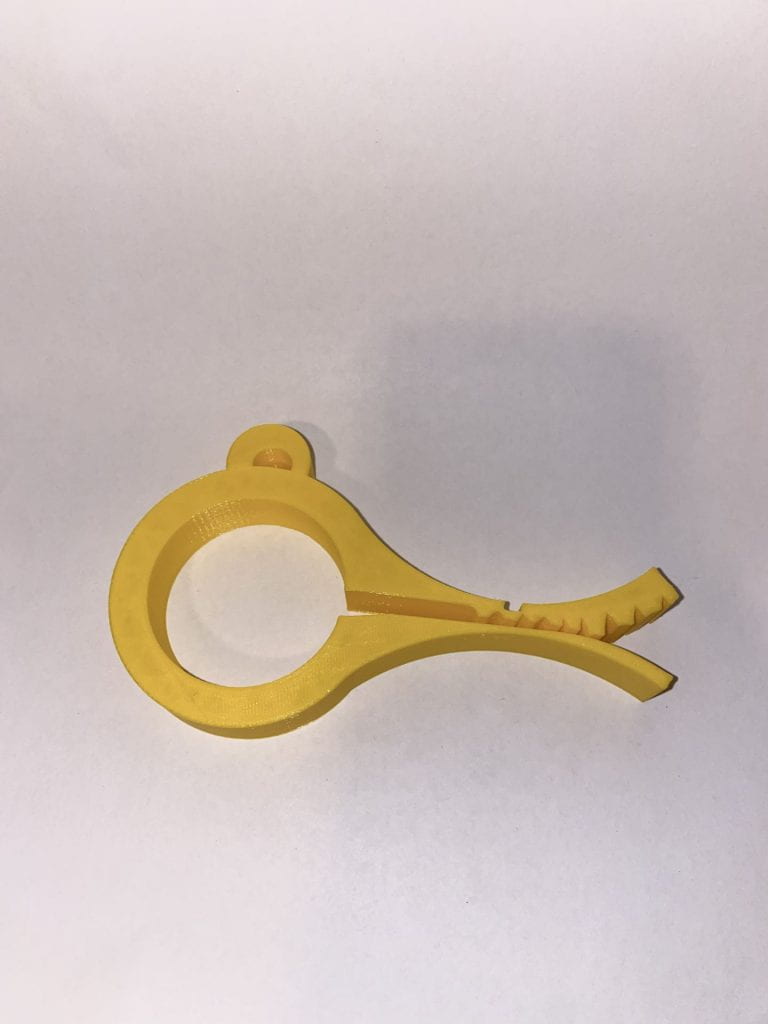
Unfortunately, when I moved my object into Cura Ultimaker to slice and print it, for some reason it kept appearing with a hole in it when there was no hole in Shapr3d or in Tinkercad. I decided to go ahead and print it anyway in the hopes that it would print with the hole filled but it did not.

Other than having a hole in it I thought the print came out great so I decided to keep everything the same but to figure out how to fill in the hole and reprint. To do this I went in to Tinkercad and put a box where the hole was appearing in the hopes that it would cover it.

By doing this I was able to fill the hole that was appearing on the slicer and continued to print another iteration.
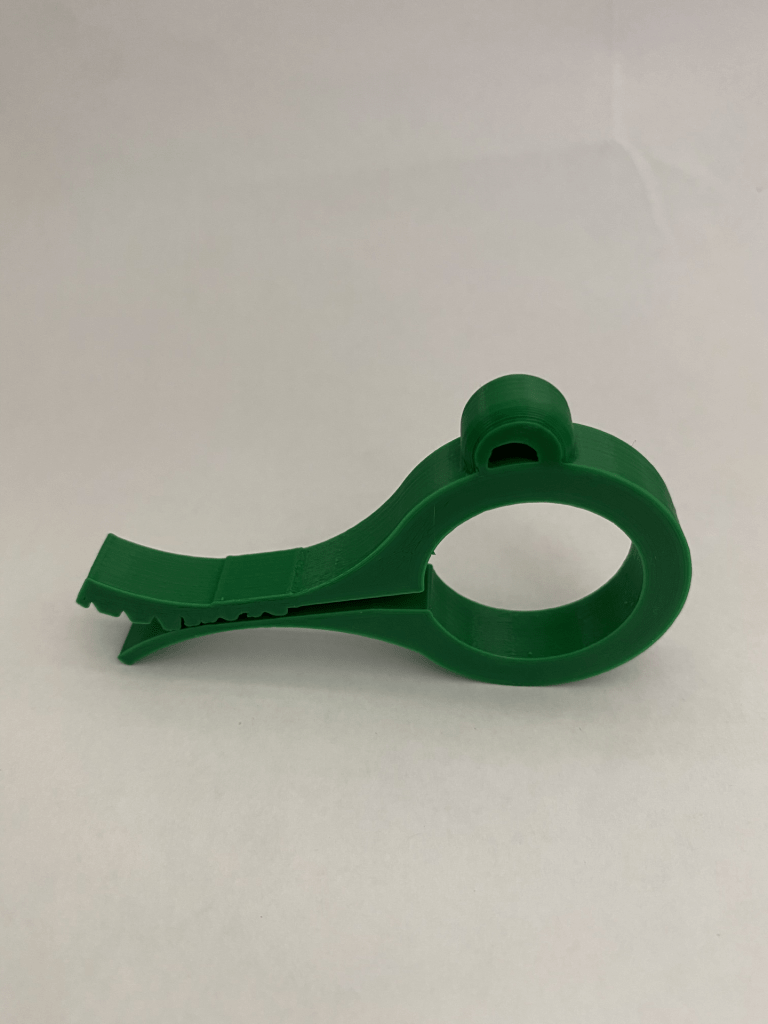
This is my final iteration of my alligator bag clip. I am very pleased with the way it turned out but I think I am going to try downsizing it a bit. I also decided to put teeth on the inside of the two clamps instead of on the top like I drew in my sketch. I did this in order to make it more useful, I felt like the ridges of the teeth may make the clip grip better on a chip bag rather than having a smooth edge trying to hold together a smooth thin bag. Other than sizing it down a bit I do not think there are any other changes I would make to this design.
Final
As I said I would do before, for my final print I downsized the clip a ton. Additionally, I rounded the eye on the alligator to make it look more realistic. I am extremely happy with how this turned out and I hope people make it or remix it!


