Research & Concept
Each letterform has its own distinct characteristics of dimensionality and texture that allows it to be able to be recognized standing alone. Although letterforms are distinct there are still multiple methods used to customize the letterform’s structure in a way that still keeps its essence but alters the appearance of the letter character. No matter what alteration, typography allows us to recognize a letterform and its shape unconsciously.
First Letter: “Z”
The first glyph I chose was the letter “Z” because I felt that it was a very unique yet simple letter. I like how angular the letter is and that it contains sharp edges. This letter form has two even horizontal line connected to the each end of an angular, vertical strip. When written it is similar to the shape of a zig zag. Depending on the font or style, the letter “Z” will sometimes contain the personalization of a serif or a san serif. Below are some examples of my own alterations of the letter “Z” along with sketches.
Second Letter: “U”
The second glyph I chose was the letter “U” because it is the first letter of my name and because it is completely opposite to the letter “Z”. I thought it would be interesting to go from a completely angular letter to a softer, more curved letter. The letter “U” contains a simple upwardly curved line. When it is in lowercase it additional has a tail attached to it. The “U” also can be alter differently depending on if it is serif styled or san serif styled. Below are some examples of my own alterations of the letter “U” along with sketches.
Iterations
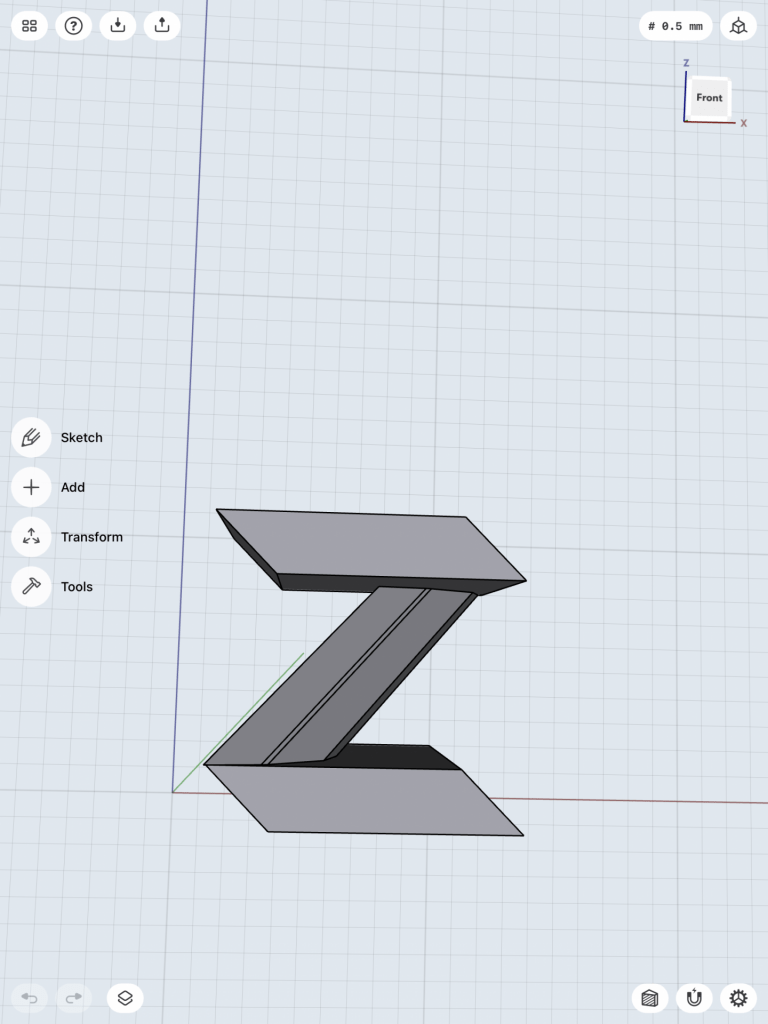
My first iteration for the letter “U” was pretty straight forward because I was able to draw out the shape that I wanted on Illustrator and then transferred that file into Tinkercad. My “Z” letter took more of a process because I originally started with a design of a Z shape that is hollow on the inside but as I was playing around with the outline more I came up with a more 4D type of design that I really liked.
After looking at 4D letters and taking inspiration from letter sculptures, I thought that the “Z” was simplistic enough to be able to play around with its shape and angles as well as morph its form. I also really wanted to take advantage of how clean cut the letter is so I wanted to create a more challenging design for this letter. Because of that, I thought that it would be the perfect opportunity to create the “Z” in a way that could be read at all angles when it is turned in a circle.
This is the first “Z” letter design I came up with.
This is my second “Z” letter design. If you move it around you can see that it takes the shape of a “Z” no matter what angle it is in.
I like both designs but I prefer how the second design turned out because I enjoy its unique 4D quality. The 2nd design to me also has a lot more potential as well to be altered in a creative way.
For the letter “U”, because it is the complete opposite of the letter “Z”, I wanted to take a different approach to it. My main concern when I chose the letter was how it was going to stand up on its own because the base of the letter is curved. After doing the research I came across many designs where the curve of the “U” is slightly more angular but still holds the true essence of the letter. I really love the style of old english and thought it would be clever to create a 3D print of a letter that looks like it came straight from a written pen or off a page of an old book. Below is the design I came up with. You can see that the bottom of the “U” is also sharp enough to stand on its own as well if needed.
Final Print & Reflection
Before printing out my final letter form I had to make some slight changes. For the letter “U” I tidied the corners up so that the letter form as a whole had a smoother edge. Below is the final design of the letter “U”. For the letter “Z” I decided to keep that the same because the test print came out really well.
Below you can see the two final forms of my two letters “Z” and “U”. On the top is the final design for the letter “Z” and on the bottom is the final design for the letter “U”.
Overall I’m super happy with the final prints for this last project. As shown above, you can see that both letters both stand upright on their own. I’m most happy with the outcome with my letter “Z” because it can be viewed as a “Z” in all directions. I’m also content with my letter “U” because I love how it is able to stand up on its own due to the old english font it is in. Both letters were fun to make and a nice challenge to play with their letter form.
The process to obtain these prints were mostly easy but I did come across some obstacles. The test prints for these objects came out super well even though I accidentally broke the “Z” taking it home. When I went to print out my finalized letters the 3D printer glitched and melted the back of the letter prints. The supports also didn’t print with the “Z” and so it spaghettied everywhere.
After this I reprinted the letter and they came out very nicely. The supports actually printed and the overall form of both letters looked clean. Below are my final letters together. They two prints came out the cleanest and are the sturdiest!


