At first, I had some troubles using the tutorial on how to get the proper ring shape and size, but eventually Fusion 360 decided to cooperate with me!  This is the very original design of my ring straight out of the tutorial. I did not print this just yet because I wanted to adjust a few things and see if I could make a better, more sleek design.
  This is my final design from Fusion 360. I used the Fillet tool to create a smoother edge and inside. I did print this design and the results came out very nice! It fits comfortably as well as feels comfortable to wear. There are no sharp edges or rough spots on the print! The size is about an 8.5.
When I started using Meshmixer, I didn’t have any problems really besides figuring out how to undo a mistake I made. Unfortunately I do not have the original meshmixer photo of my design because I used the computers in the lab to create my ring design and did not realize they wipe the computers every so often.
 This is the ring design directly from meshmixer imported into Shapeways. As you can see, my design has simple hand-made hearts because I was having trouble with the stencil tool and converting a picture into a jpg file so that it would work in Meshmixer. I also included small dots around the ring as well for a bit of a fun flair to it. The file was successfully exported onto Shapeways and will be made in a professional black plastic and should ship around October 16! This project tested my patience a little bit at times, but overall was a fun project to work on!
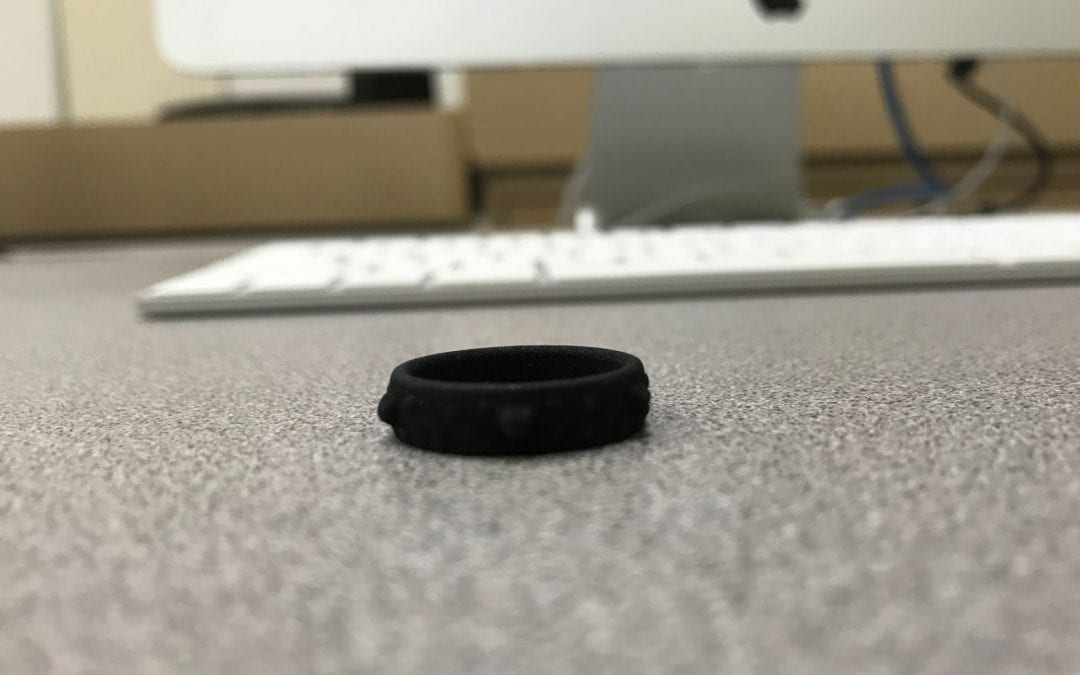
My ring arrived about a week later and I am really impressed with how it turned out and the feel of the material!
 Here is the final ring that came from Shapeways!
Recent Comments