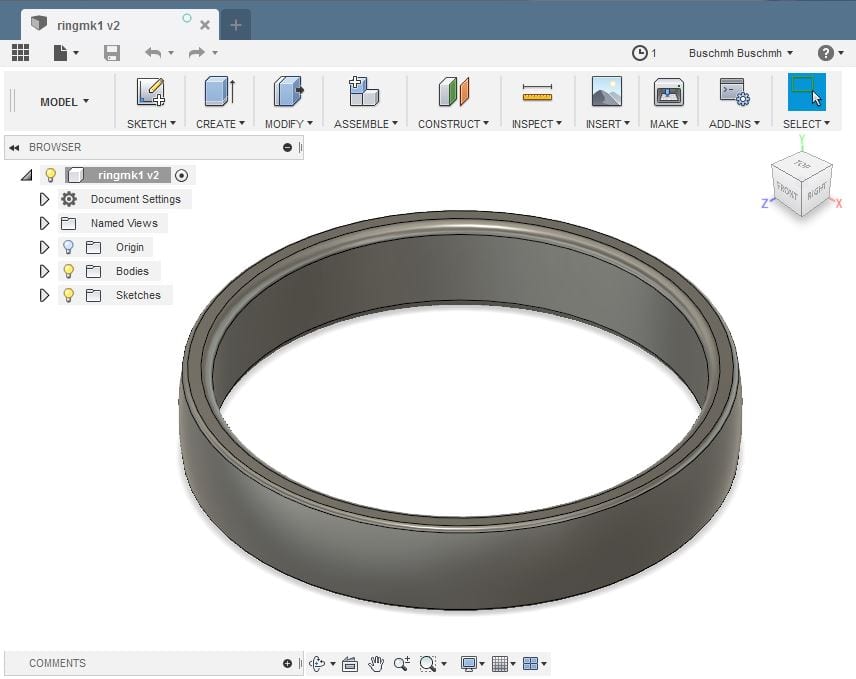
Fusion 360 was a very difficult program for me to use at first. However, after a couple of practice attempts of making a ring with the online tutorial, I became pretty adept at designing the ring.
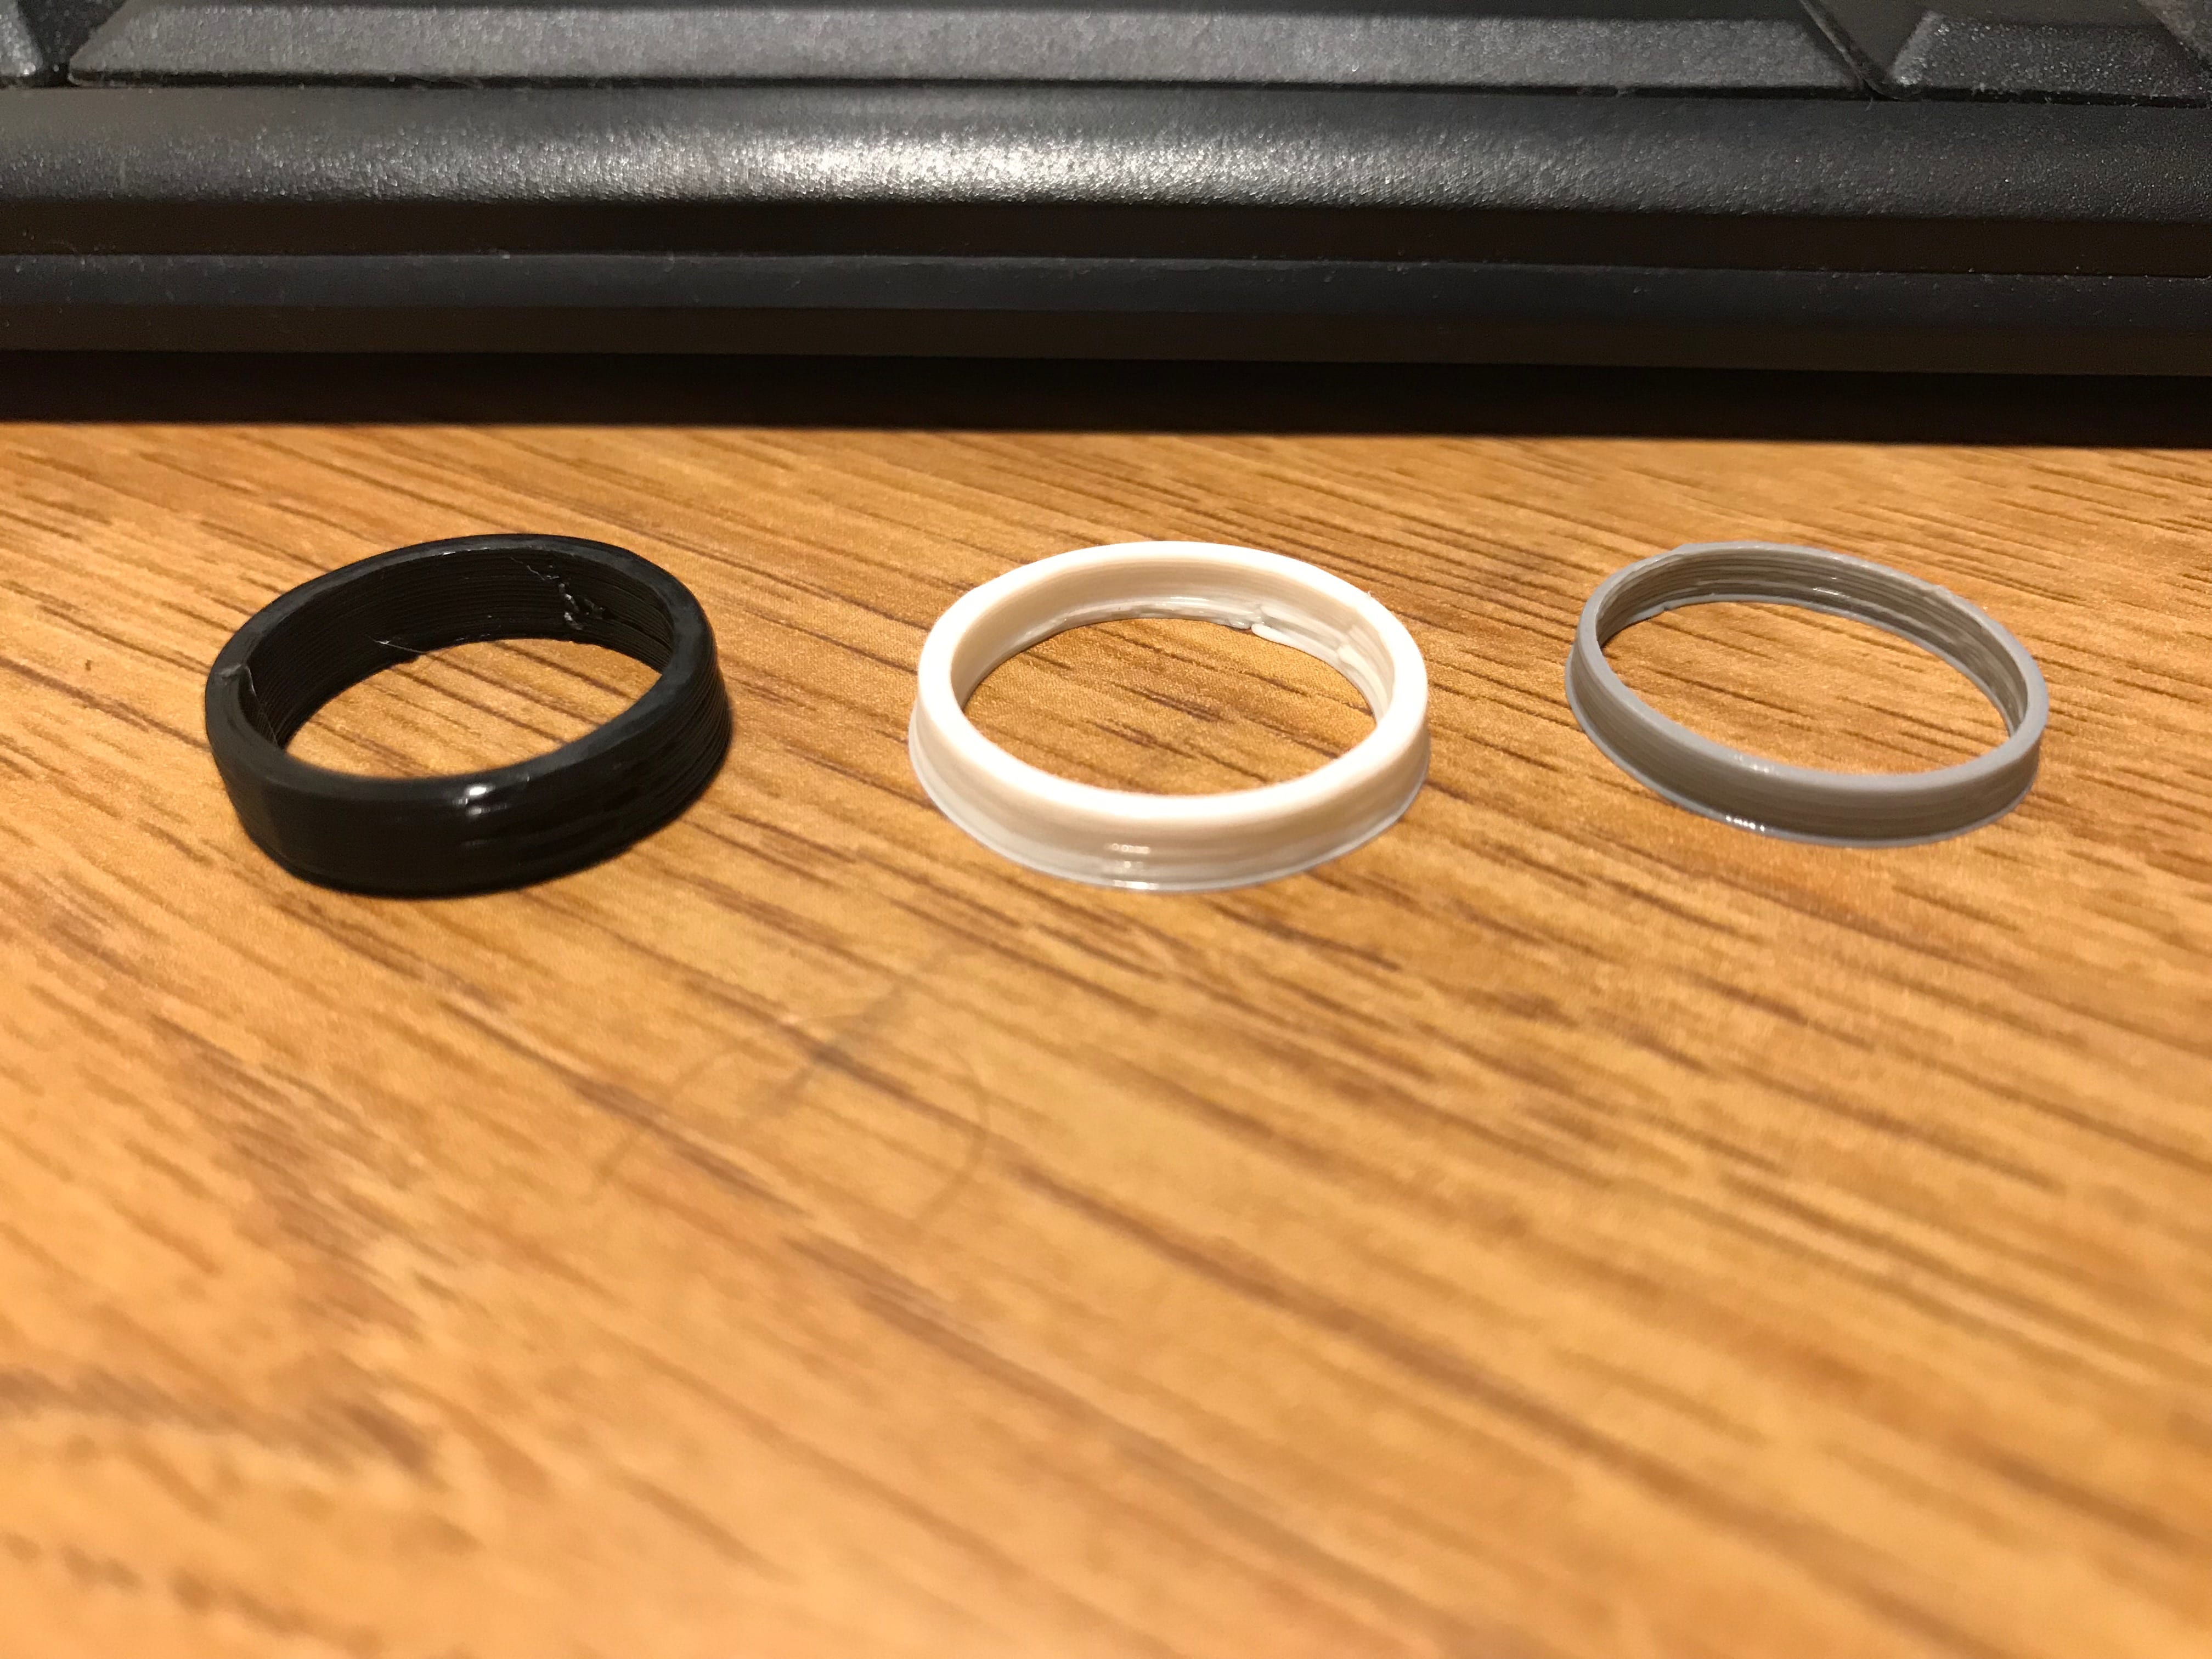
For sizing purposes, I printed 3 different kinds and sizes of rings. I am making this ring for my girlfriend so I could not easily try on the rings myself and I wanted her to see which size, height, and thickness she liked best. I ended up going with a size of 17.2mm, an offset of 1.2mm, and a ring height of 3.6mm, after she had tried the three rings on and decided.
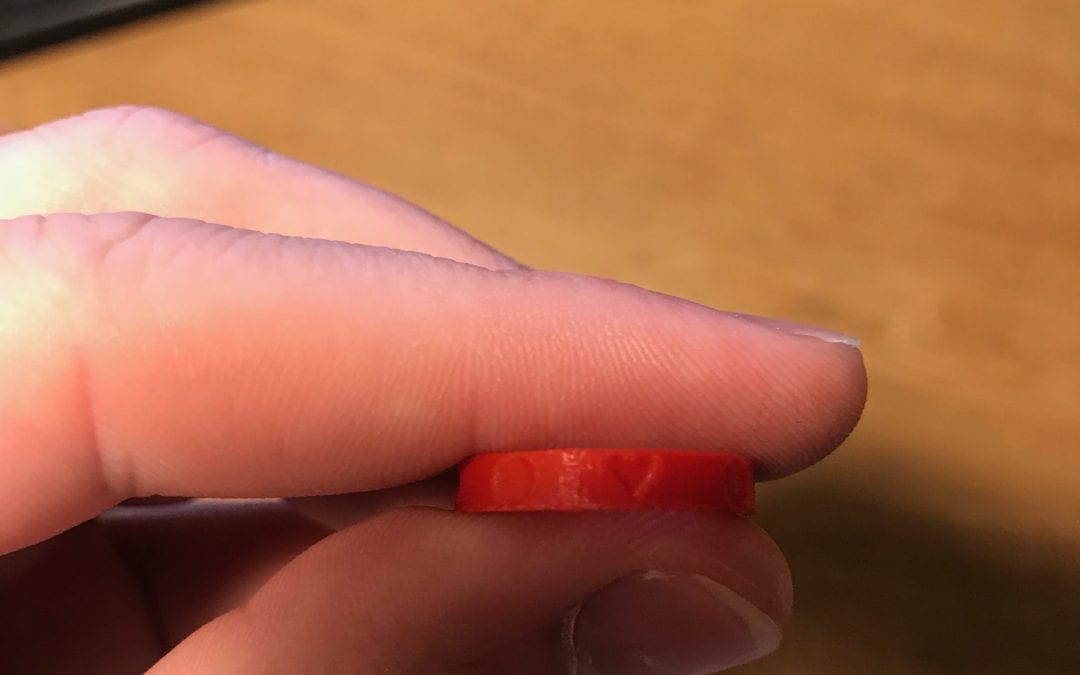
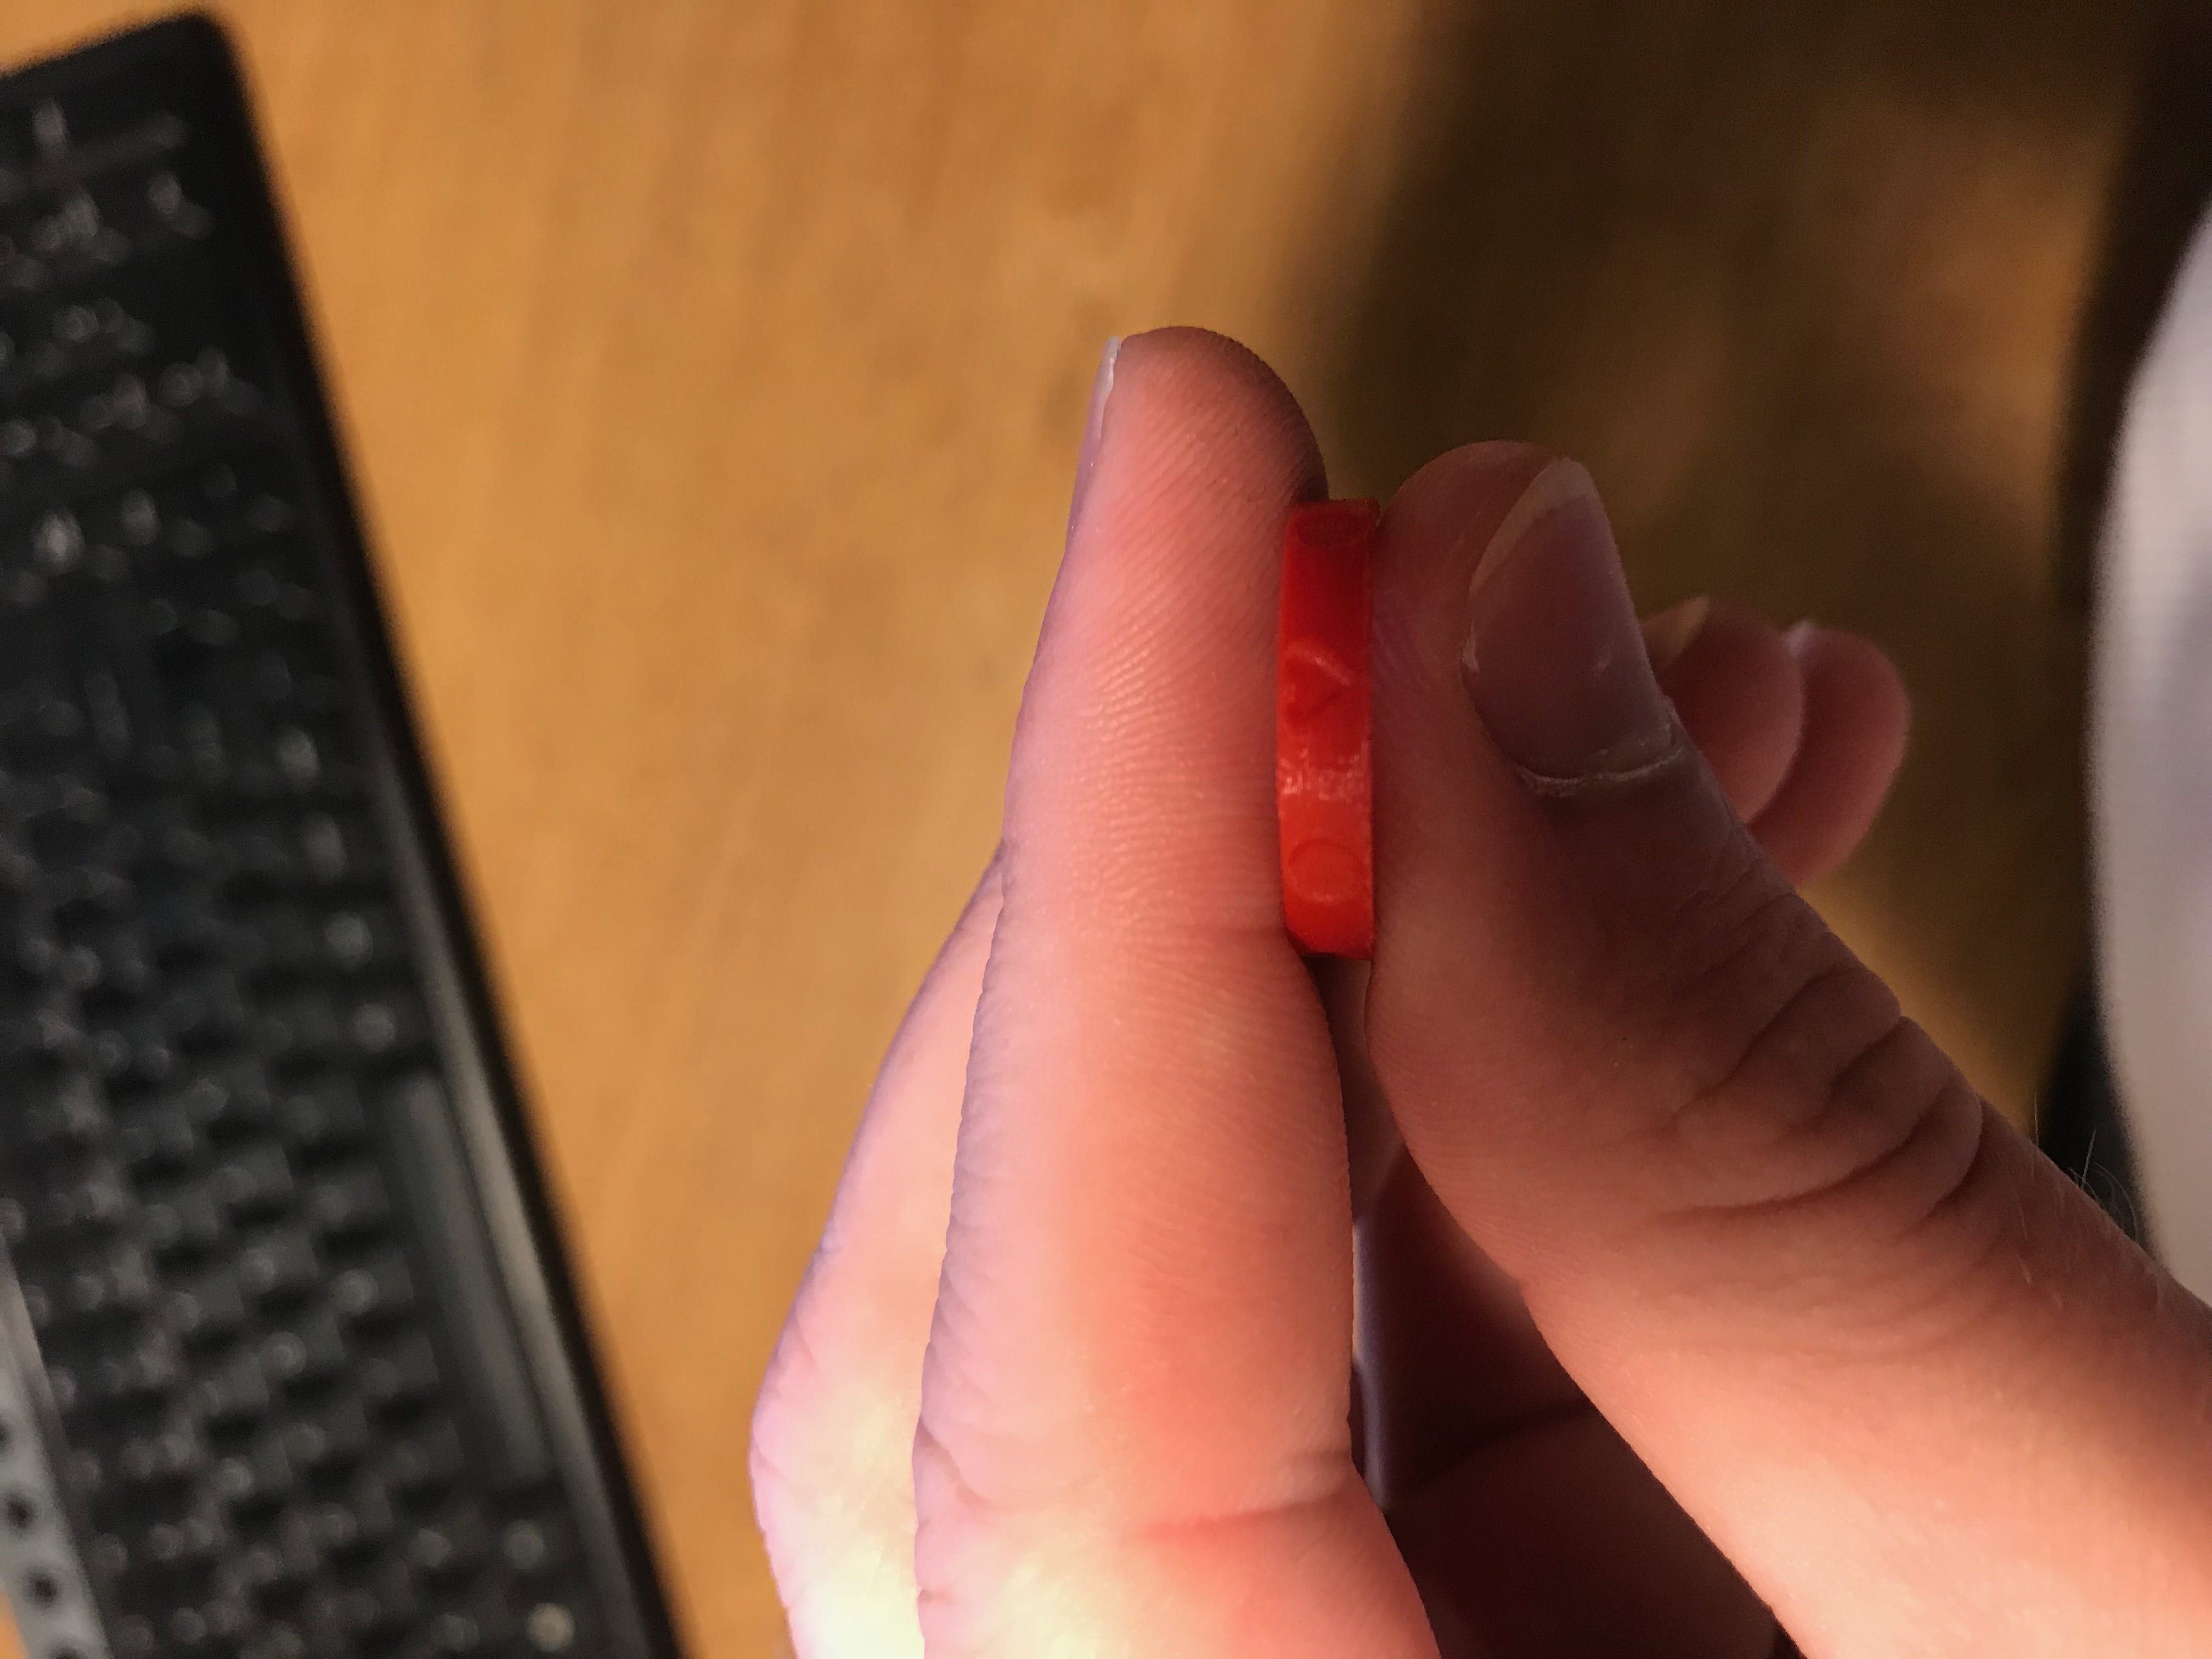
In Mesh Mixer, I had many difficulties with finding the right strength and size for stamping. No matter the stencil that I uploaded, it would just be a strange blob that formed. After many attempts and playing around with the sizing and strength, I was able to add circles and one single heart stamp around the circumference of the ring. To do all of this, I used the symmetry tool. I was very pleased with the result in the end!
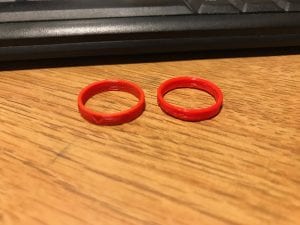
Once satisfied with the design, I printed the ring on both the Ultimaker and the Lulzbot printers just to get a somewhat reasonable model of the end result. Something I found really beneficial and useful by doing this was seeing the large difference in detail between the printers. The Ultimaker printed the circle and heart design very well, while on the Lulzbot ring, you can barley see the circle and hear designs.
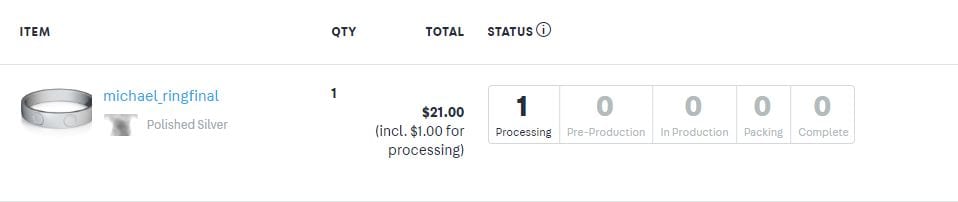
I had no issues uploading my final design to Shapeways! When I initially tested uploading an in-progress design to Shapeways to see how much it would cost in different materials, I was getting an error and it was because my file was too big. On my final design, I did not re-mesh my model in Mesh Mixer as much and this helped my file size significantly. My final cost for the ring in polished silver is roughly $21.00.
Recent Comments